VAC (Varnish Administration Console) Templater is a simple server and web UI designed to allow non-technical users to graphically modify and deploy Varnish Cache configurations. VAC Templater depends on the VAC API to discover VCL files and to execute deployments. A Varnish Plus subscription is required to get access to the VAC.
VAC Templater is a web UI that extends the current functionality of the VAC. In particular, VAC Templater defines a syntax to include annotations in VCL files using standard VCL comments. Using these annotations you can define placeholders in VCL files that will be editable using the web UI.
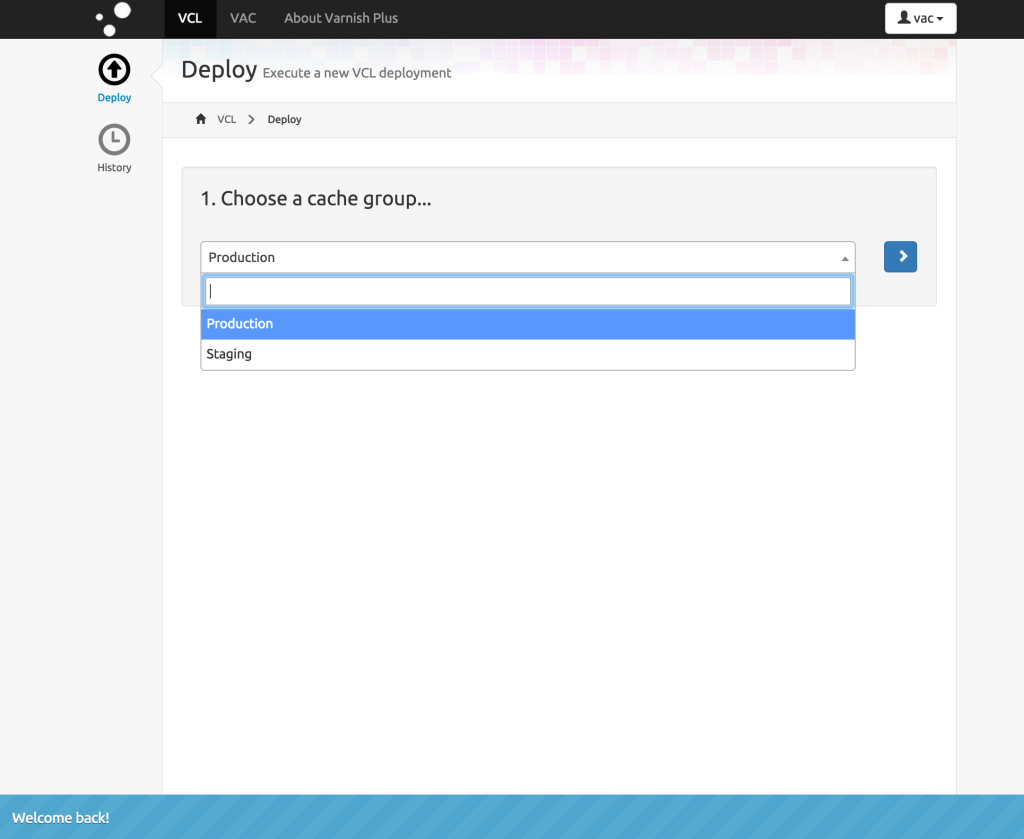
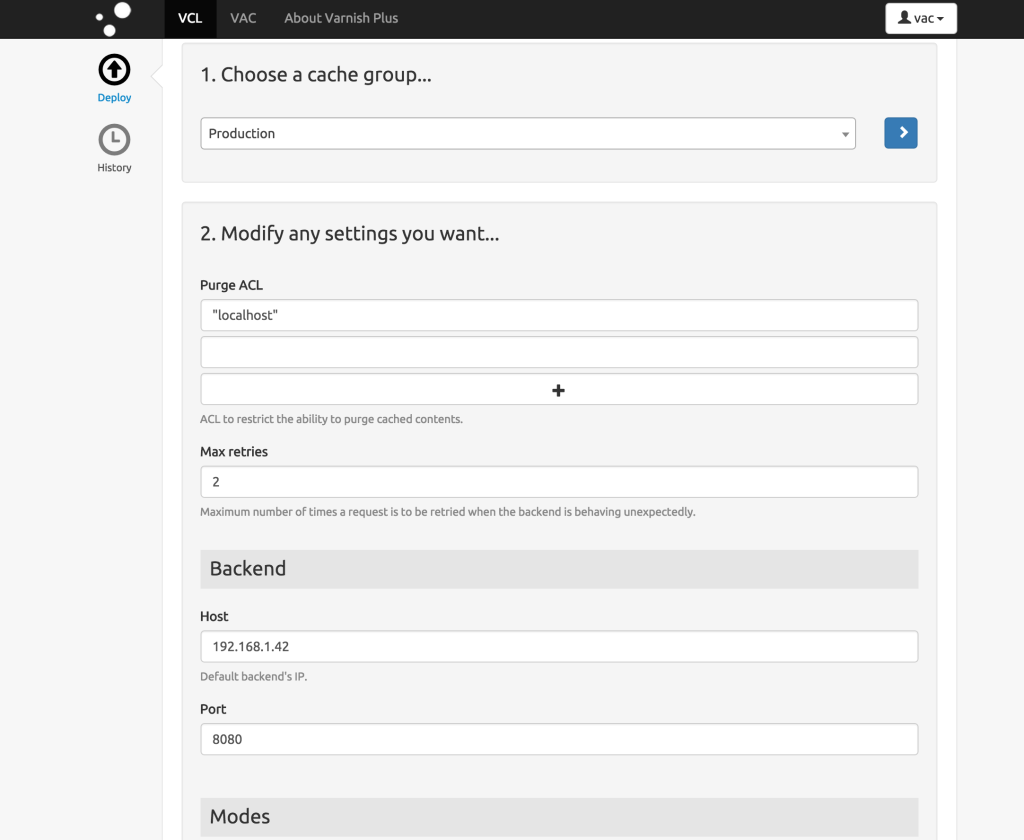
Each placeholder in rendered in the web UI as an input field(s) inside a HTML form. The look and behavior of each input field is defined by the VCL annotations: name, description, type (e.g. integer, duration, ACL, timestamp, etc.), validations (e.g. min, max, regexp, etc.) and user role (i.e. not all users are allowed to edit contents of all placeholders).
 |
 |
 |
|---|---|---|
| ========= | ==== ========= | ==== ========= |
| |deployme | nt3| |deployme | nt4|  |
Check out the example VCL file in extras/envs/dev/default.vcl for a better understanding of how to annotate a VCL file to be used with VAC Templater.
You probably already have this, but if not, install the Python virtual environment creator:
bob:~$ sudo pip install virtualenvChoose an user (e.g.
www-data) to run the VAC Templater's server. Also select a location for the VAC Templater environment (e.g./var/lib/virtualenvs/vac-templater), create and activate it:bob:~$ sudo mkdir -p /var/lib/virtualenvs bob:~$ sudo virtualenv /var/lib/virtualenvs/vac-templater
Follow next steps running all commands in a terminal with the newly created virtualenv active (i.e. source /var/lib/virtualenvs/vac-templater/bin/activate).
Install VAC Templater and all its dependencies:
(vac-templater)bob:~$ sudo sh -c '. /var/lib/virtualenvs/vac-templater/bin/activate; pip install vac-templater'- Once everything is installed in your virtual environment, you should be able to execute the VAC Templater CLI (i.e.
vac-templatercommand) and get some output. Adjust the VAC Templater configuration. You can initialize your configuration from a template running the following command:
(vac-templater)bob:~$ vac-templater settings | sudo tee /etc/vac-templater.confBeware the default configuration assumes some folders (
/var/run/vac-templater/,/var/log/vac-templater/and/var/lib/vac-templater/) exists and are writable by the user (e.g.www-data) running the VAC Templater's server:(vac-templater)bob:~$ sudo mkdir -p -m0755 /var/run/vac-templater/ /var/log/vac-templater/ /var/lib/vac-templater/ (vac-templater)bob:~$ sudo chown www-data:www-data /var/run/vac-templater/ /var/log/vac-templater/ /var/lib/vac-templater/VAC Templater provides a built-in webserver (note configuration is assumed to be located in
/etc/vac-templater.conf. If not, use theVAC_TEMPLATER_CONFenvironment variable to set its location). Lauch it using the following command:(vac-templater)bob:~$ sudo -u www-data sh -c '. /var/lib/virtualenvs/vac-templater/bin/activate; vac-templater start'- If not changed in the configuration, the VAC Templater's server runs on port 8001. If locally installed, you should now be able to test the service by visiting
http://localhost:8001. You should also be able lo log in using the user name and password of any valid VAC user. Add the following line to the crontab of the user (e.g.
www-data) running the VAC Templater's server:(vac-templater)bob:~$ (sudo crontab -u www-data -l ; echo '1 * * * * sh -c ". /var/lib/virtualenvs/vac-templater/bin/activate; vac-templater cron" > /dev/null 2>&1') | sudo crontab -u www-data -- If you want to bind VAC Templater's HTTP frontend to port 80, simply set up a reverse proxy using your preferred web server. Always avoid running VAC Templater as a privileged user for this! Check out the sample configuration files for extra information.
- In a production environment you should run the VAC Templater HTTP frontend as an OS services. Use whatever software you are most familiar with, such as upstart, supervisord or a simple init.d script. Check out the sample init.d scripts if you need some inspiration.
Simply execute in a terminal with the proper active virtualenv:
$ sudo sh -c '. /var/lib/virtualenvs/vac-templater/bin/activate; pip install --upgrade vac-templater'VAC Templater transparently supports migrations by using Django's own migration mechanism so you don't need to do anything special to keep the database up to date.