A cloudlet is a new architectural element that arises from the convergence of mobile computing and cloud computing. It represents the middle tier of a 3-tier hierarchy: mobile device - cloudlet - cloud. A cloudlet can be viewed as a "data center in a box" whose goal is to "bring the cloud closer".
Copyright (C) 2012-2017 Carnegie Mellon University This is a developing project and some features might not be stable yet. Please visit our website at Elijah page.
All source code, documentation, and related artifacts associated with the cloudlet open source project are licensed under the Apache License, Version 2.0.
We have tested OpenStack++ on Ubuntu 14.04 LTS 64-bit using the OpenStack Kilo release.
Installation (Using Ansible)
$ sudo -iPrepare Ubuntu 14.04 64-bit:
$ apt-get update
$ apt-get upgrade
Step 3. Install Ansible
$ apt-get install software-properties-common
$ apt-add-repository -y ppa:ansible/ansible
$ apt-get update
$ apt-get install -y ansible git$ cd ~
$ git clone https://github.com/zetelight/elijah-openstack.git
$ cd ~/elijah-openstack/ansibleStep 5. Configure the Ansible scripts
Ensure the variables defined in roles/openstack-controller/vars/main.yml and roles/openstack-compute/vars/main.yml are satisfactory.
- Specifically you should ensure that the interfaces defined by
pub_ifaceandflat_ifaceare valid.pub_ifaceis used by the physical machine to reach the internet.flat_ifaceis used by OpenStack in order to communicate with the virtual machines running on the host.- If you only have a single network interface, make sure that
flat_ifaceis something unique as a virtual interface with that name will be created when theone_nicvariable in openstack-kilo.yaml isTrue. Please note that this virtual interface is not persistent and will be lost after reboot. To remedy this, you can run the entire Ansible playbook after rebooting which will recreate the dummy interface and restart the necessary nova services.- By default, the script is setup to install all OpenStack components on a single node that has a single NIC card. If you have two network interface cards, set
one_nictoFalseinopenstack-kilo.yaml. If you are setting up a multi-node cluster where the compute node will reside on a separate host(s) from the controller, you must configure additional hosts in thehosts/inventory, changeopenstack-kilo.yamlto reflect which hosts should be compute nodes, and ensure that thesingle_nodevariable is set toFalse. You will also need to change the controller IP and hostname in thevar/main.ymlto reflect those of the controller.
Installation of the cloudlet library from https://github.com/cmusatyalab/elijah-provisioning requires a local user/password. Ensure that these are properly reflected in roles/cloudlet/vars/main.yml. You should also ensure that password login is enable in your ssh configuration in /etc/ssh/sshd_config (#PasswordAuthentication yes)
Step 6. Launch ansible playbook to install OpenStack, the clouldet library, and the OpenStack++ extensions
$ cd ~/elijah-openstack/ansible
$ ansible-playbook -i ./hosts openstackpp.yaml$ source ~/admin-openrc.sh
$ nova network-create <name> --fixed-range-v4 <cidr> --fixed-cidr <cidr> --bridge <bridge> --bridge-interface <flat_interface>NOTE: The bridge name you specify here will be created by nova, so this can be any name. The bridge-interface however, must correspond to the name of the actual interface that was specified as the flat_iface in the Ansible variables.
For example, to create a private 10.11.12.x network for VMs, with a bridge named br100, on the dummy flat interface called veth1:
$ nova network-create vmprivate --fixed-range-v4 10.11.12.0/24 --fixed-cidr 10.11.12.0/24 --bridge br100 --bridge-interface veth1These can be assigned to VMs to allow public access to them.
$ nova floating-ip-bulk-create <cidr>In order to be able to access VM instances, you first need to edit the rules corresponding to the default security group or create a new security group and set of rules. From the 'Project' drop down menu at the left, select the 'Access & Security' panel. Under the 'Security Group' tab, you can then create a new security group or click the 'Manage Rules' button of the default security group. Once under the rules section, you can create rules for various types of traffic based on port/protocol and a CIDR range.
NOTE: If you create a new security group, you must be sure to assign the VM that security group after launching it.
You may optionally wish to install the Cloudlet Gateway which is a web server that launches cloudlet applications within VMs and/or containers and sits behind an OpenVPN firewall to provide public access to VMs/containers running on OpenStack++. To install the Cloudlet Gateway, please see the README
If the installation is successful, you will see a new panel on the project tab
as seen in the figure below. You can also check for the cloudlet extension by listing
the available OpenStack extensions using the standard OpenStack
API.
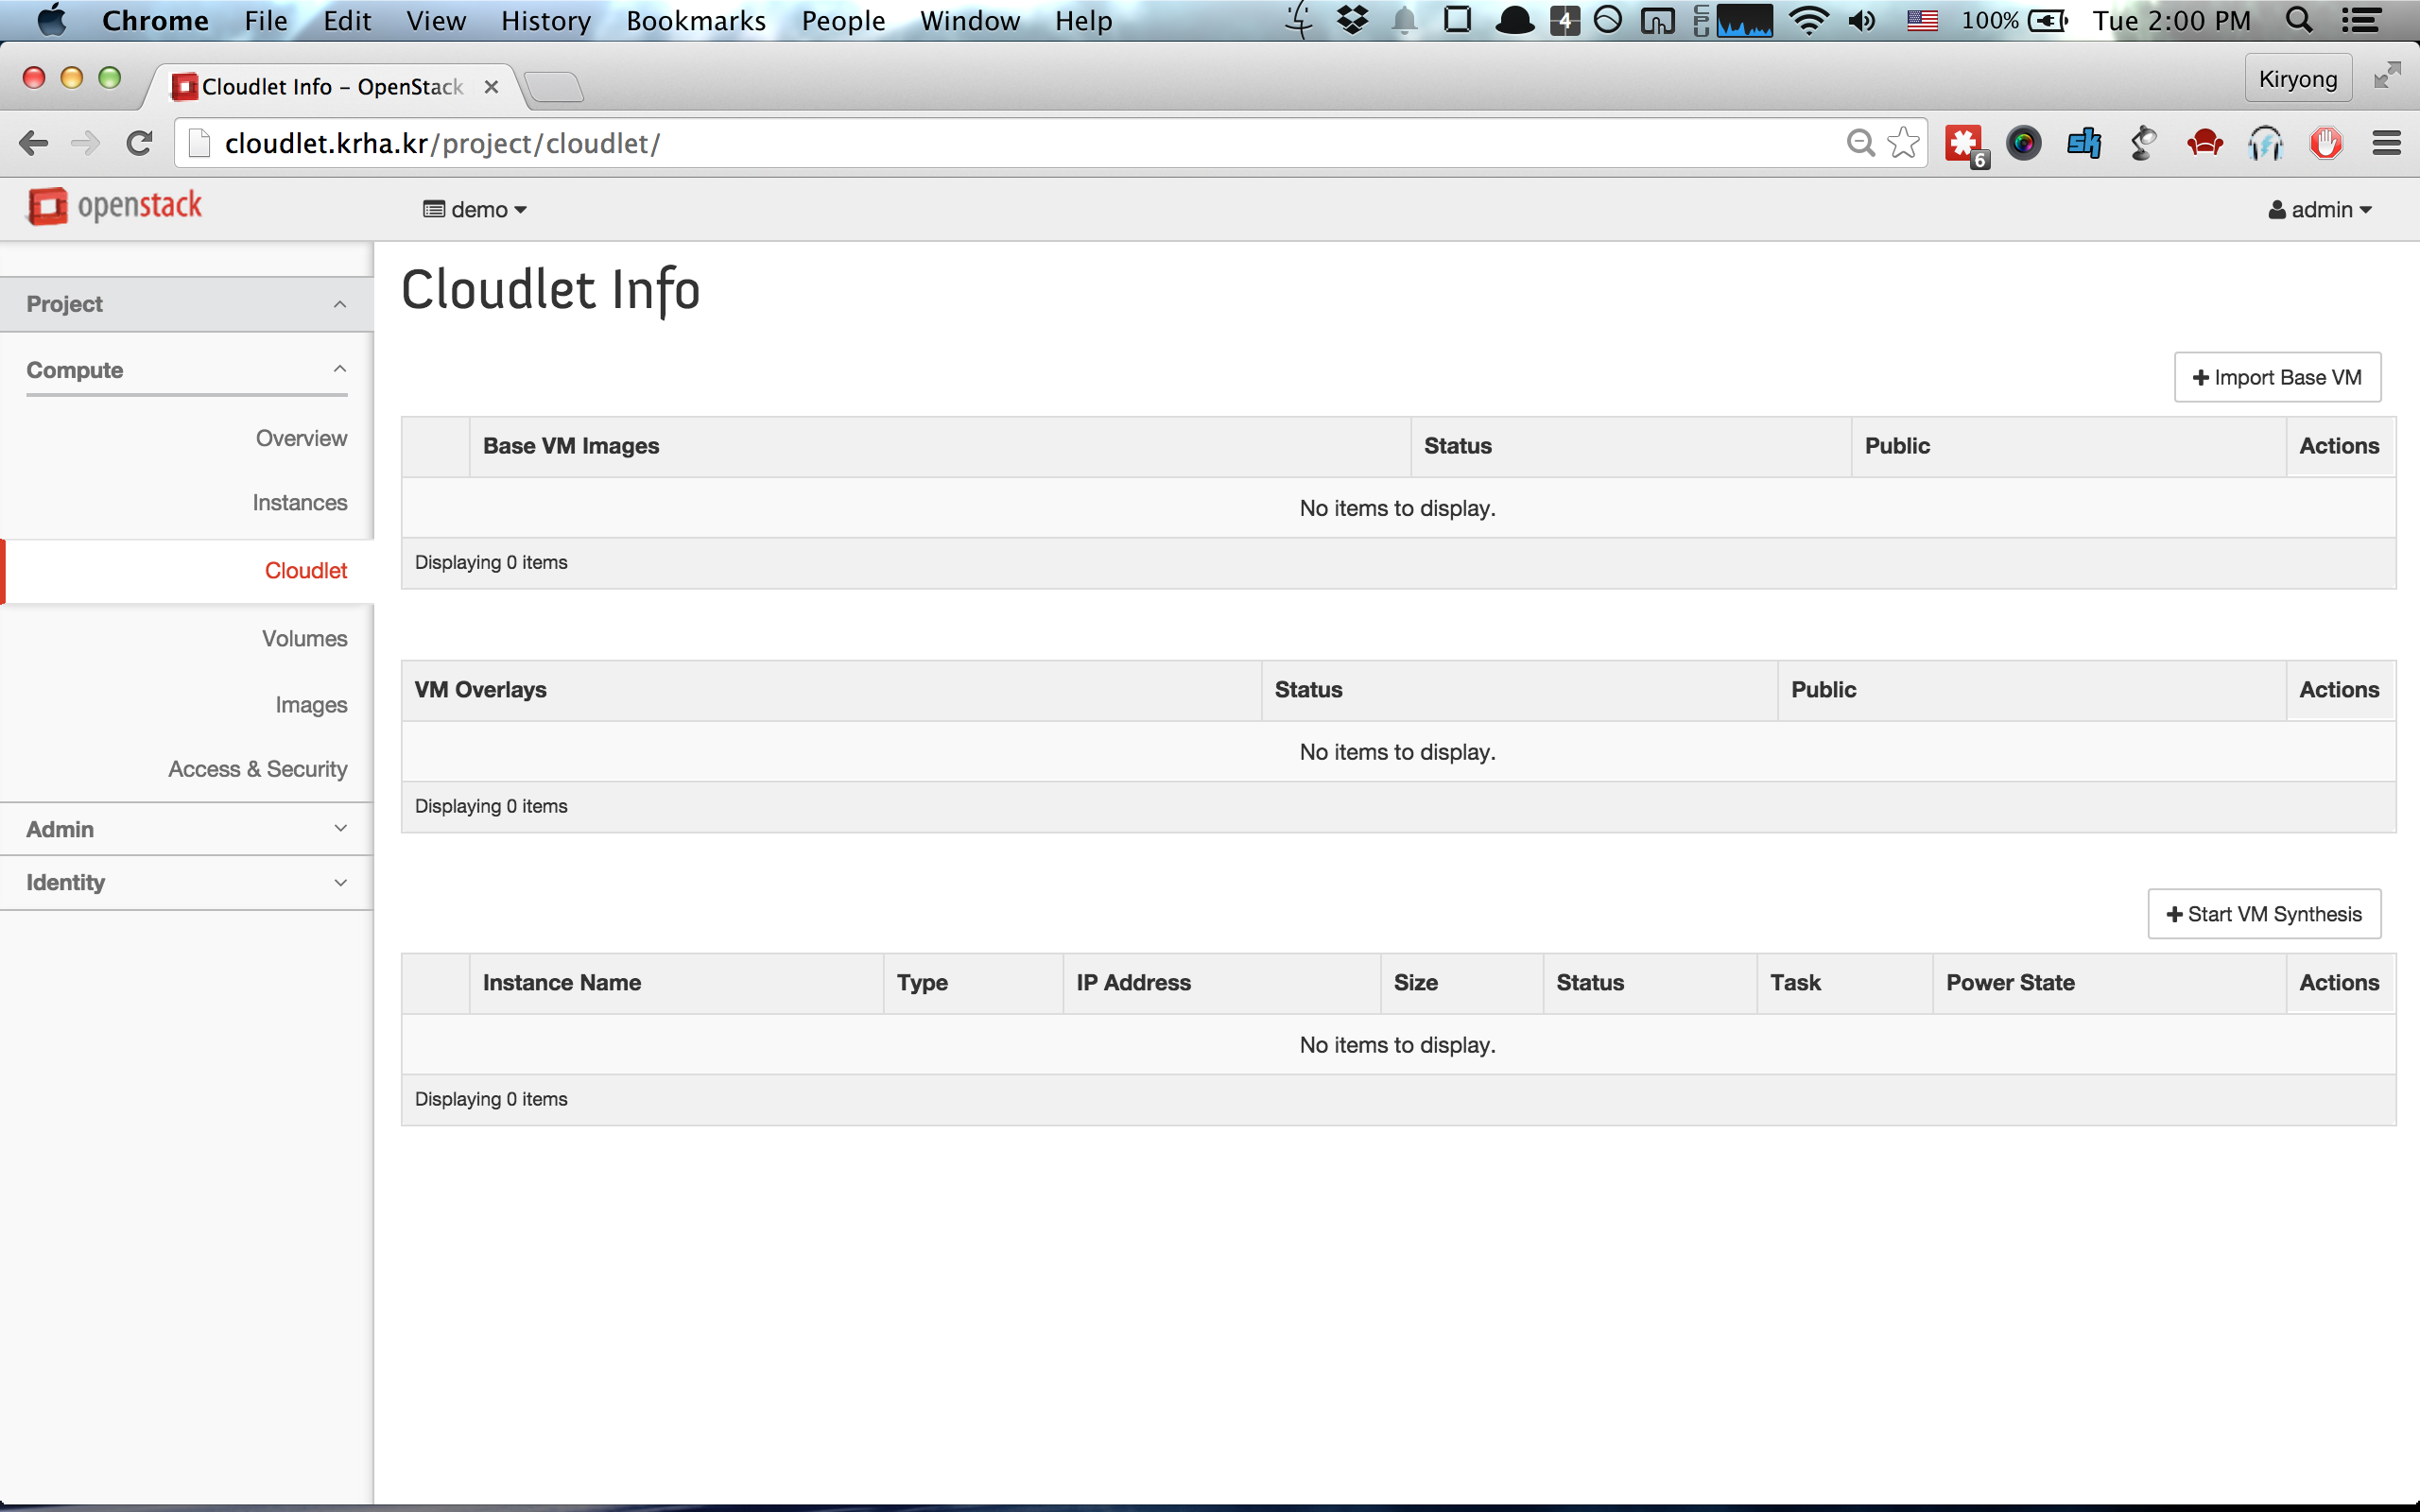
Import a Sample Base
VM using the
[Import Base VM] button (This process may take a while). The zip file in the link above contains both disk
and memory snapshots of the vanilla Ubuntu distribution (VM's account:cloudlet, password: cloudlet). 
To resume a base VM, please use [Resume Base VM] button atop the Base VM image
table. Initially, resuming Base VM can take a long time because the Base VM needs to be cached to
the compute node. 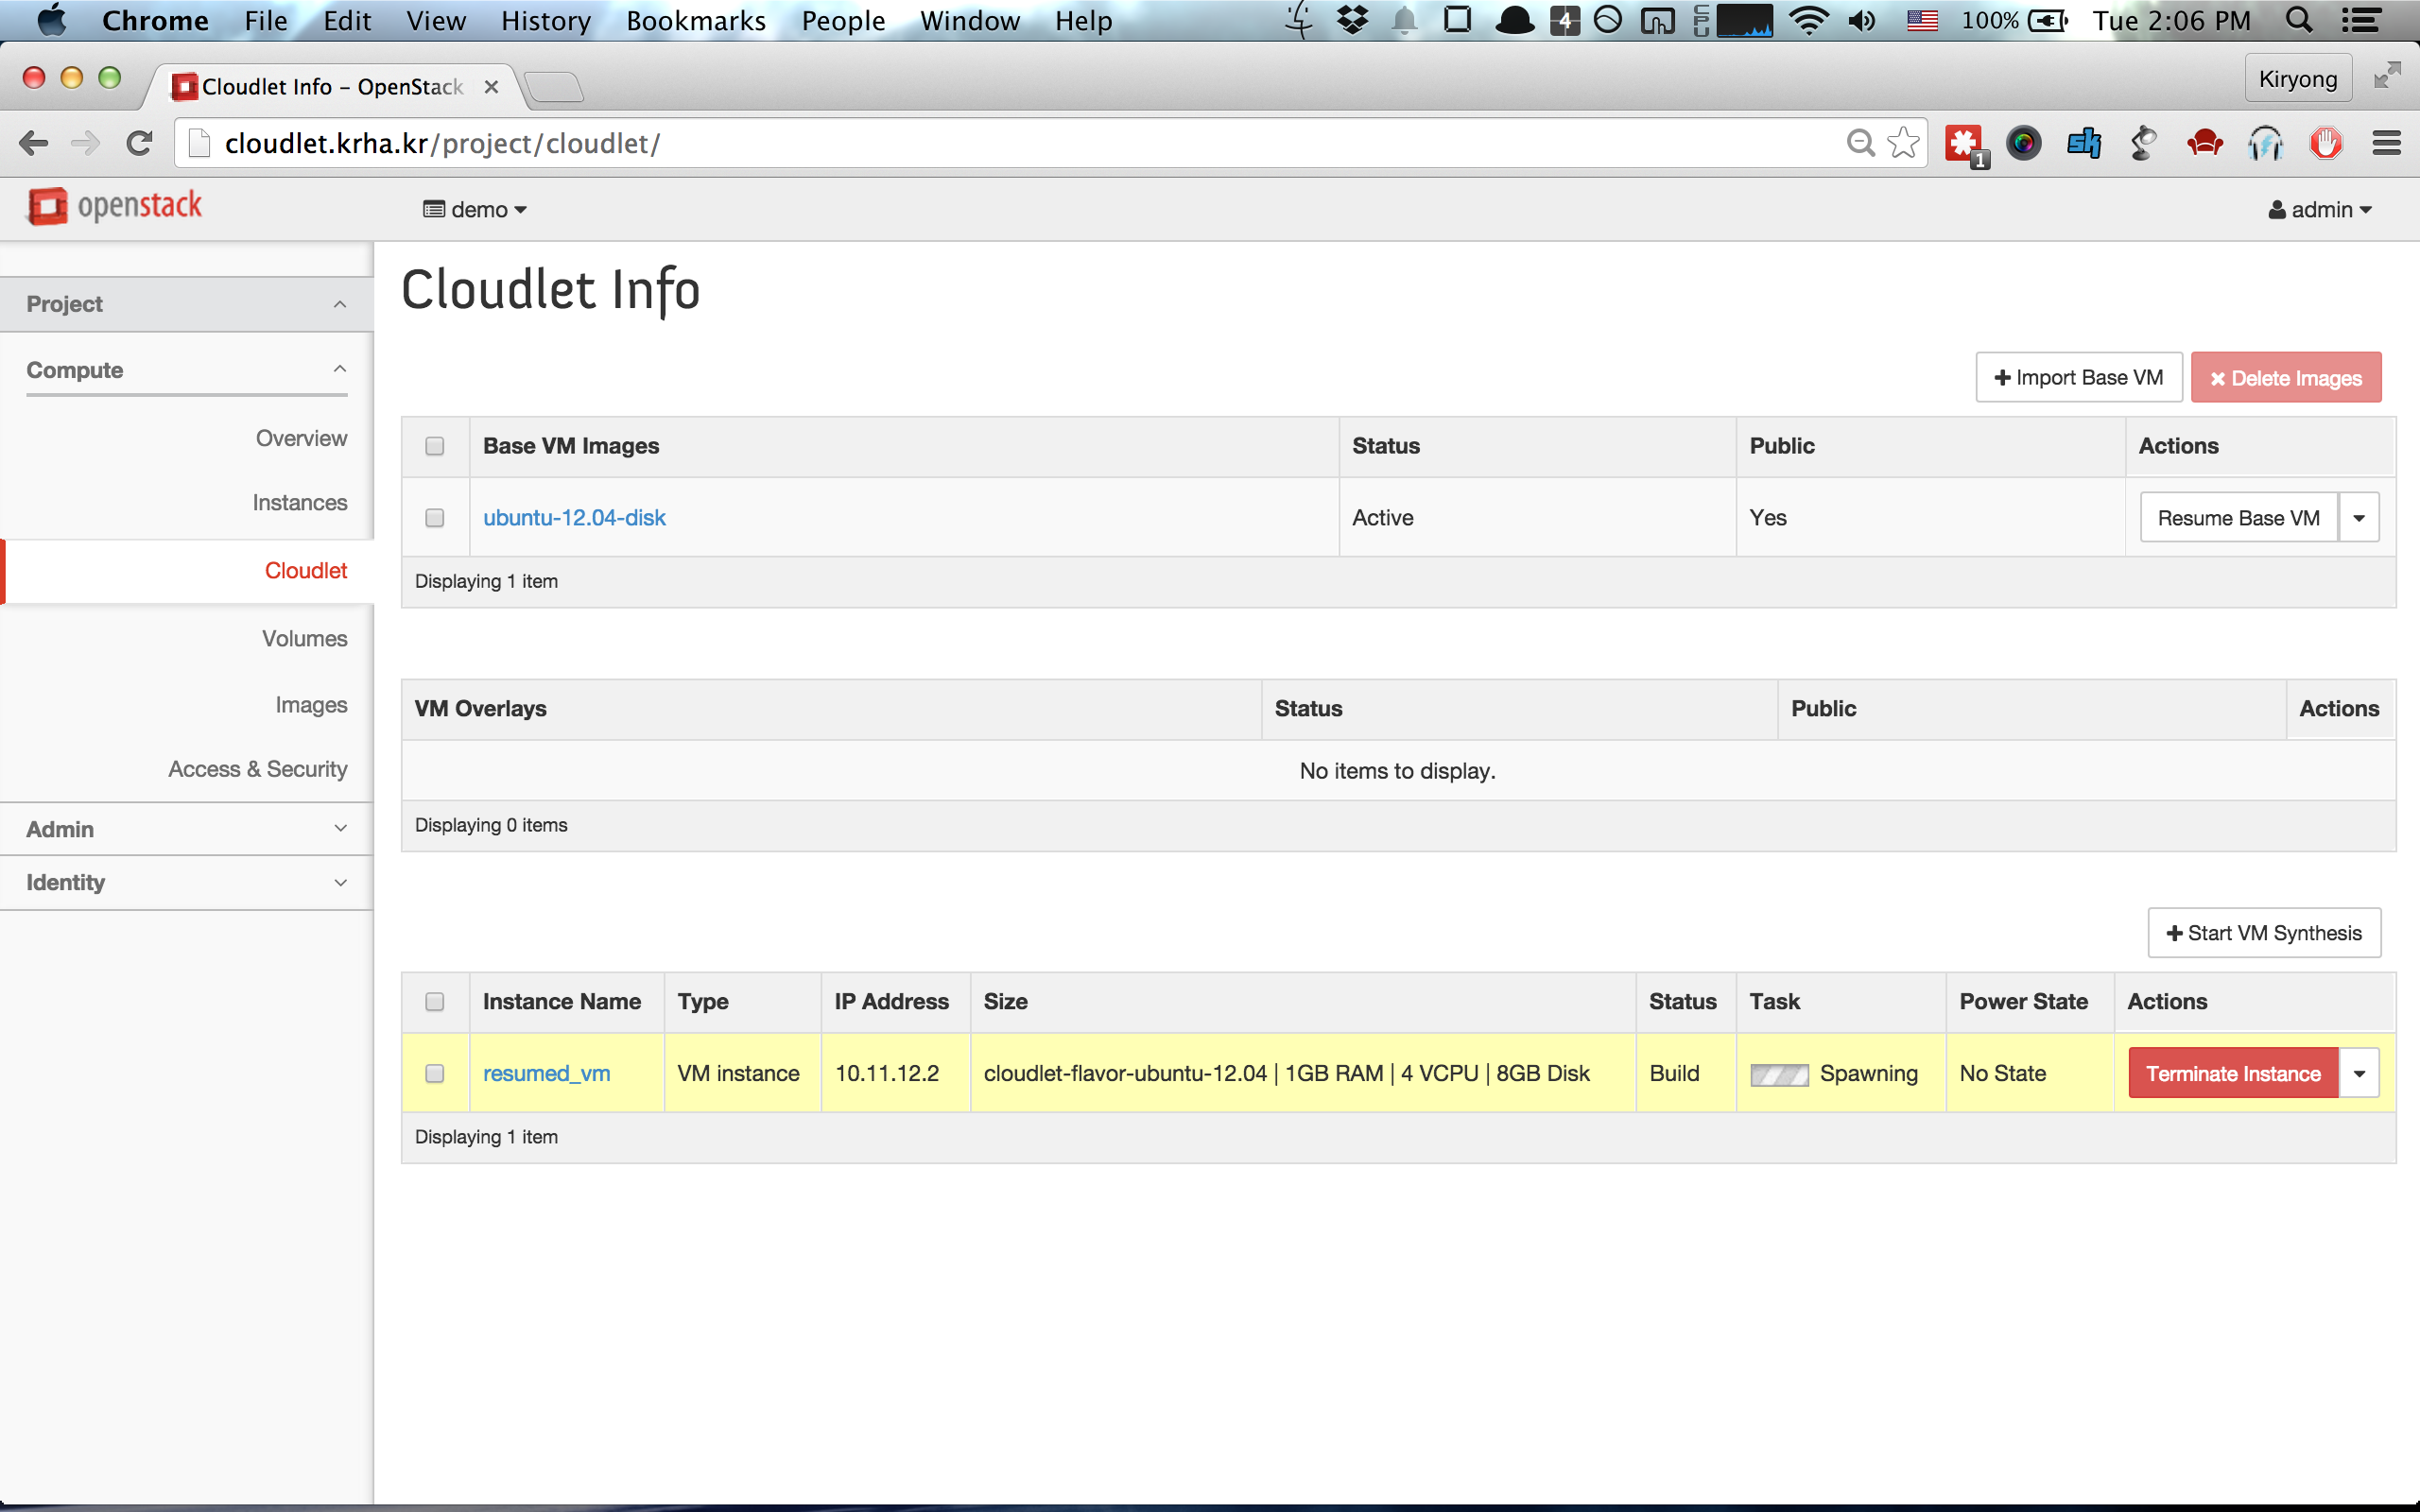
Install application specific libraries and binaries on the resumed VM to customize the image. Then use [Create VM overlay] button when you ready to create a VM overlay from the base VM.
This will create a VM overlay which includes the compressed differences of the disk and memory snapshots with the base VM.
 After the VM overlay is generated (this process may take a while), you
can download VM overlay using [Download VM overlay] button.
After the VM overlay is generated (this process may take a while), you
can download VM overlay using [Download VM overlay] button.
VM Synthesis is the instantiation of a VM instance by applying a VM overlay to an existing base VM image.
To perform VM synthesis, please use the [Start VM Synthesis] button atop the Instance
table. You need to input a URL for your VM overlay. If you have created and
downloaded the VM overlay from the previous step, you can put that VM overlay on a separate Web
server and point at that URL for the VM overlay. Initially, VM synthesis can
be slow if the Base VM is not cached at the compute node. 
To migrate a running VM instance to another OpenStack, please use [VM Handoff]
button atop the Action column of synthesized VM instance. This will ask for
credentials of the destination OpenStack as shown below. Although it
does not save any credential information, please use a cloudlet command line
client
that accepts an auth-token instead of account/password if you don't want to transfer
account information. 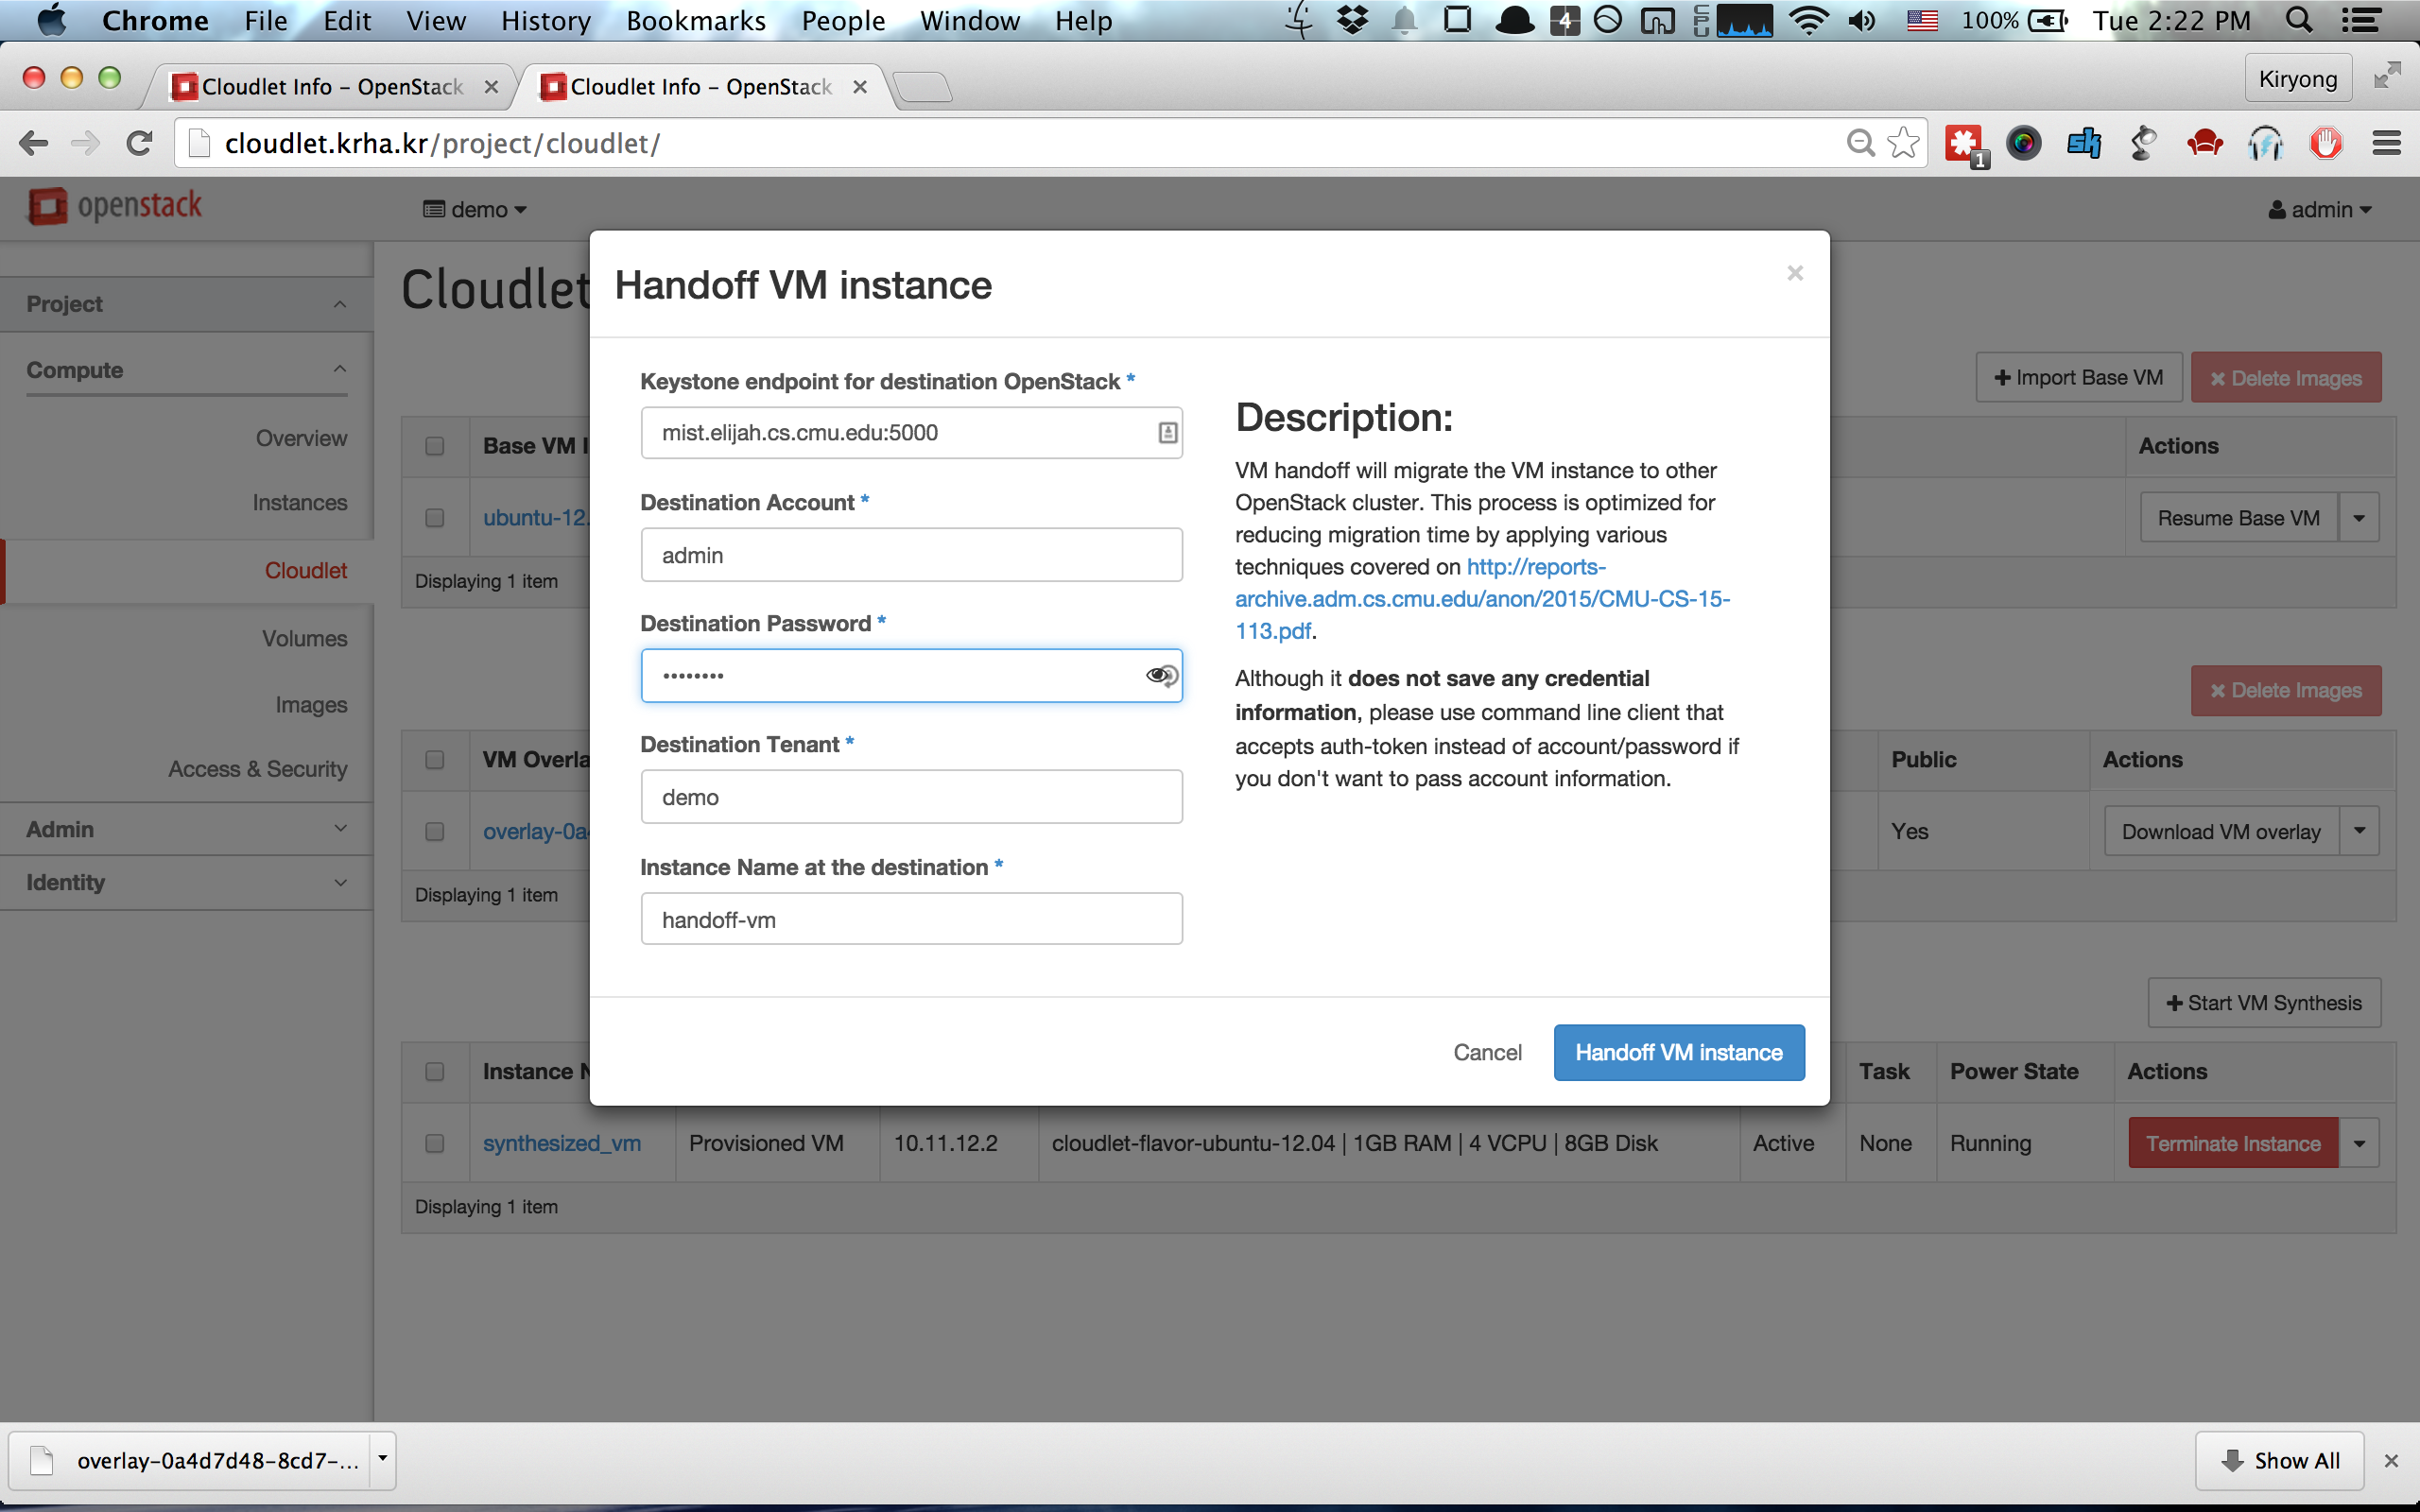
All the above steps can be done using the command line program at ./client/cloudlet_client.py
If you have any problems after installing OpenStack++ cloudlet extension, please follow below steps to narrow the problem.
When you resume a base VM you did not create (for example, the Ubuntu Precise image found here Sample Base VM ) the network configuration may have been entirely different when the image was created. This can cause difficulty connecting to the VM. Soft rebooting the instance from the 'Project->Instances' panel should result in the proper IP addressed being assigned from the pool that was created when the nova create-network command was issued.