A cloudlet is a new architectural element that arises from the convergence of mobile computing and cloud computing. It represents the middle tier of a 3-tier hierarchy: mobile device - cloudlet - cloud. A cloudlet can be viewed as a "data center in a box" whose goal is to "bring the cloud closer". Please visit our website at Elijah page.
Copyright (C) 2011-2014 Carnegie Mellon University
All source code and documentation except modified-QEMU listed below are under the Apache License, Version 2.0.
- To enable on-demand fetching of the virtual machine, we use modified-QEMU, which is distributed under GPLv2.
- The binary of this modified-QEMU will be automatically downloaded at installation script upon your agreement.
A copy of this license is reproduced in the LICENSE file.
This code is about rapid provisioning of a custom VM(Virtual Machine) to cloudlet using VM synthesis. This does not include any code for mobile applications, rather it provides functions to create VM overlay and perform VM Synthesis that will rapidly reconstruct your custom VM at an arbitrary computer.
Please read Just-in-Time Provisioning for Cyber Foraging to understand what we do here and find the detail techniques.
The key to rapid provisioning is the recognition that a large part of a VM
image is devoted to the guest OS, software libraries, and supporting software
packages. The customizations of a base system needed for a particular
application are usually relatively small. Therefore, if the base VM
already exists on the cloudlet, only its difference relative to the desired
custom VM, called a VM overlay, needs to be transferred. Our approach of
using VM overlays to provision cloudlets is called VM synthesis. A good
analogy is a QCOW2 file with a backing file. You can consider VM overlay as
a QCOW2 file and Base VM as a backing file. The main difference is that
VM synthesis includes both disk and memory state and it is much more
efficient in generating diff and reconstructing suspended state.
You will need:
- qemu-kvm
- libvirt-bin
- gvncviewer
- python-libvirt
- python-xdelta3
- python-dev (to pip install msgpack)
- liblzma-dev (for pyliblzma)
- apparmor-utils (for disable apparmor for libvirt)
- libc6-i386 (for extracting free memory of 32 bit vm)
- libxml2-dev libxslt1-dev (for overlay packaging)
- python libraries at requirements.txt
To install, you either
-
run a installation script
$ sudo apt-get install fabric openssh-server
$ fab localhost install (Type your account password when it is asked) -
install manually
-
install required package (Ubuntu 12.04)
> $ sudo apt-get install qemu-kvm libvirt-bin gvncviewer python-libvirt python-xdelta3 python-lzma python-dev liblzma-dev apparmor-utils libc6-i386 python-pip libxml2-dev libxslt1-dev python-xdelta3At Ubuntu 14.04 python-xdelta3 package is no longer supported. But, old version of 13.10 still works without issue. Therefore, at Ubuntu 14.04
> $ wget http://mirrors.kernel.org/ubuntu/pool/universe/x/xdelta3/python-xdelta3_3.0.0.dfsg-1build1_amd64.deb > $ sudo dpkg -i python-xdelta3_3.0.0.dfsg-1build1_amd64.deb -
install python libraries
> $ sudo pip install -r requirements.txt -
Disable security module. This is for allowing custom KVM. Example at Ubuntu 12
> $ sudo aa-complain /usr/sbin/libvirtd -
Add current user to kvm, libvirtd group.
> $ sudo adduser [your_account_name] kvm > $ sudo adduser [your_account_name] libvirtd -
Make sure the current user to have fuse permission. The qemu-kvm library changes fuse access permission while it's being installed, and the permission is recovered if you reboot the host. This is a known bug in qemu-kvm installation script (https://bugs.launchpad.net/ubuntu/+source/udev/+bug/1152718), so you can either reboot the machine to have valid fuse permission of just revert the permission manually as bellow.
> $ sudo chmod 644 /etc/fuse.conf > $ sod sed -i 's/#user_allow_other/user_allow_other/g' /etc/fuse.conf -
Finally, install cloudlet package using python setup tool
> $ sudo python setup.py install
-
We have tested at Ubuntu 12.04 LTS 64-bit and Ubuntu 14.04 LTS 64-bit (as well as their derivatives such as Kubuntu).
This version of Cloudlet has several dependencies on other projects for further optimization, and currently we include this dependency as a binary. Therefore, we recommend you to use Ubuntu 12.04 LTS 64-bit.
- Import
Base VM
First thing you need is a Base VM. Base VM is a pre-loaded element
and you can think it as a golden image similar to Amazon
AMI. We provide sample
base VM of Ubuntu 12.04 32-bit server for easy bootstrapping. Download
sample base VM at:
For Ubuntu 12.04:
Base VM for Ubuntu-12.04.01-i386-Server
(Ubuntu account: cloudlet, password: cloudlet)
For Ubuntu 14.04:
Base VM for Ubuntu-12.04.01-i386-Server
(Ubuntu account: cloudlet, password: cloudlet)
    Note: We have been carefully updated code to maintain compatibility of
    Base VM across different physical machine as well as different version
    of hypervisor. However, there were significant changes at QEMU between
    1.x (Ubuntu 12.04) and 2.x (Ubuntu 14.04). In short, QEMU has updated
    firmware of some of emulated HW, which causes inconsistency in memory
    snapshot. To handle that we can ship out custom QEMU with firmwares,
    but we haven't implemented yet.
Then, you can import this base VM using command line tool, cloudlet.
> $ cloudlet import-base ./ubuntu-12.04-32bit.zip
> INFO     create directory for base VM
> INFO     Decompressing Base VM to temp directory at /tmp/cloudlet-base-k7ANqB
> INFO     Place base VM to the right directory
> INFO     Register New Base to DB
> INFO     ID for the new Base VM:   406ed612a6a8b8a03fbbc5f45cceb0408a1c1d947f09d3b8a5352973d77d01f5
> INFO     Success
You can check the imported base VM by
> $ cloudlet list-base
> hash value<code> </code>path
> \------------------------------------------------------------------------------------------
> 406ed6<code> </code>/home/krha/.cloudlet/406ed6/precise.raw
> \------------------------------------------------------------------------------------------
- Perform VM synthesis using a sample
VM overlay.
First, launch the VM synthesis server at Cloudlet.
> $ synthesis_server
> INFO     --------------------------------------------------
> INFO     * Base VM Configuration
> INFO      0 : /home/krha/cloudlet/image/ubuntu-12.04.1-server-i386/precise.raw (Disk 8192 MB, Memory 1040 MB)
> INFO      1 : /home/krha/.cloudlet/406ed612a6a8b8a03fbbc5f45cceb0408a1c1d947f09d3b8a5352973d77d01f5/precise.raw (Disk 8192 MB, Memory 1040 MB)
> INFO     --------------------------------------------------
> INFO     * Server configuration
> INFO      - Open TCP Server at ('0.0.0.0', 8021)
> INFO      - Disable Nagle(No TCP delay)  : 1
> INFO     --------------------------------------------------
> INFO     [INFO] Start UPnP Server
Then, you can test VM synthesis using a sample VM overlay URL for Fluid
simulation's back-end server. The demo video of this application is at
YouTube.
The URL for the Fluid VM overlay is
https://storage.cmusatyalab.org/cloudlet-vm/overlay-fluid-portable.zip
Sample VM overlay of Fluid application is temporarily unavailable. Instead,
you can create your own VM overlay following How To Create VM
Overlay.
You can perform VM synthesis like
> $ synthesis_client -s localhost -o [path to your VM overlay file]
> OR
> $ synthesis_client -s localhost -u [URL to your VM overlay]
If VM synthesis is successful, you will see a screen-shot like

The custom VM of Fluid simulation back-end server is running and ready to receive client connection. Note that it is a TCP client, so you can execute synthesis_client program at a different machine.
If the VM synthesis is failed showing a screen-shot like below, it is due to
the memory snapshot compatibility of the base VM.
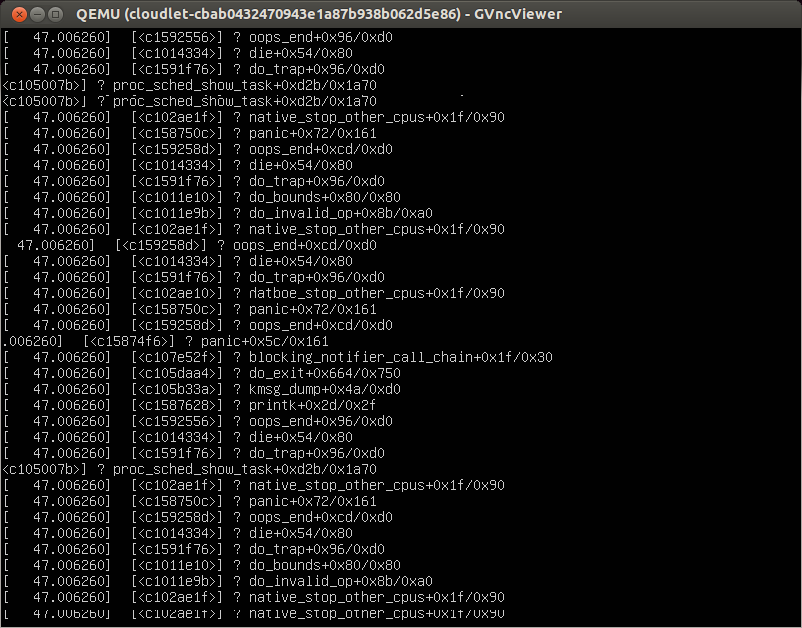
This kernel panic is causes by CPU flag incompatibility coming from QEMU
side. We do our best to make a VM memory snapshot work across heterogeneous
host machine, but it can failed in an old machine. In this case, you need to
create your own base VM (See more at How to create your own Base
VM)
- VM synthesis in different ways
In addition to using a synthesis server and a client, you can perform VM synthesis 1) using command line tool and 2) using an Android client.
1) Command line tool

    > $ cloudlet synthesis /path/to/base_disk.img /path/to/overlay.zip

2) Android client

We have sample Android client at $HOME/android/android and you can import
it to ``Eclipse`` as an Android project. This client program will
automatically find nearby Cloudlet using UPnP if both client and Cloudlet
are located in same broadcasting domain (e.g. sharing WiFi access point).
Otherwise, you can manually specify IP address of the Cloudlet by clicking
cancel in discovery pop-up.

Once installing application at your phone, you have to copy your VM overlay
to Android phone. For example with Fluid overlay example, download VM
overlay from <a
href=https://storage.cmusatyalab.org/cloudlet-vm/overlay-fluid-portable.zip
target="_blank">https://storage.cmusatyalab.org/cloudlet-vm/overlay-fluid-portable.zip</a>
and **unzip it**, then copy both overlay-meta and overlay-blob_1.xz file to
/sdcard/Cloudlet/overlay/fluid/ directory. This directory name, _fluid_,
will be appeared to your Android application when you're asked to select
``Overlay VM``. Right directory name is important since the directory name
will be	saved as appName in internal data structure and being used to
launch associated mobile application after finishing ``VM synthesis``.
Please recall that this VM synthesis client is for provisioning custom back-end server VM at arbitrary computer and you need to launch your mobile application after finishing VM synthesis. This client application will communicate with the back-end server you just provisioned. To launch mobile application after VM synthesis, we use Android Activity launcher and the directory name is used as an index for associated mobile application. See more details at handleSucessSynthesis() method at CloudletConnector.java file.
-
Backend-server is temporarily unavailable
-
Fluid Simulation is an interactive fluid dynamics simulation, that renders a liquid sloshing in a container on the screen of a phone based on accelerometer inputs. The application back-end runs on Linux and performs a smoothed particle hydrodynamics physics simulation using 2218 particles, generating up to 50 frames per second. The structure of this application is representative of real-time (i.e., not turn-based) games.
-
Doyub Kim is a primary contributor of this application.
-
Video demo
- <a href=https://www.youtube.com/watch?v=f9MN-kvG_ko target="_blank">Using Cloudlet
- <a href=https://www.youtube.com/watch?v=hWc2fpejfiw target="_blank">Using Amazon EC2 West
- <a href=https://www.youtube.com/watch?v=aSjQnfkUoU8 target="_blank">Using Amazon EC2 Asia
-
Code-
Binary back-end server: $ HOME/test/app-server/fluid-bin32/ -
Android client source code: $HOME/android/android_fluid/
-
Python client source code: $HOME/test/app-client/scripts/graphics_client.py
$ ./graphics_client.py -s localhost -p 9093 -i acc_input_50sec
-
VM overlay for the back-end server: https://storage.cmusatyalab.org/cloudlet-vm/overlay-fluid-portable.zip
-
You can also create your own base VM from a regular VM disk image. Here the
regular VM disk image means a raw format virtual disk image you normally use
for KVM/QEMU or Xen.
> $ cloudlet base /path/to/base_disk.img
> % Use raw file format virtual disk
This command will launch GUI (VNC) connecting to your guest OS and the code
will start creating base VM right after you close VNC window. So, please
close the VNC window when you think it's right point to snapshot the VM as a
base VM (typically you close it after booting up). Then, it will generate
snapshot of the current states for both memory and disk and save that
information to DB. You can check list of base VM by
> $ cloudlet list-base
Now you can create your customized VM based on top of base VM
> $ cloudlet overlay /path/to/base\_disk.img
> % Path to base_disk is the path for virtual disk you used earlier
> % You can check the path by "cloudlet list-base"
This will launch VNC again with resumed base VM. Now you can start making
any customizations on top of this base VM. For example, if you're a
developer of face recognition back-end server, we will install required
libraries, binaries and finally start your face recognition server. After
closing the GUI windows, cloudlet will capture only the change portion between
your customization and base VM to generate VM overlay that is a minimal
binary for reconstructing your customized VM.
VM overlay is using zip container and inside of the zip file there are 2
types of files; 1) overlay-meta file ends with .overlay-meta, 2) compressed
overlay blob files ends with .xz
If your application need specific TCP/UDP port to communicate with a client, then you can make a port forwarding using -redir parameter as below.
> $ cloudlet overlay /path/to/base_disk.img -- -redir tcp:2222::22 -redir tcp:8080::80
This will forward client connection at host port 2222 to VM's 22 and 8080 to 80, respectively.
Note: If you have experience kernel panic error like this, You should follow a workaround at this link. It happens at a machine that does not have enough memory with EPT support, and you can avoid this problem by disabling EPT support. We're current suspicious about kernel bug, and we'll report this soon.
HOME
  ├── bin: executable binaries such as command line tool, VM synthesis server and client
  │
  ├── elijah: Cloudlet provisioning code using VM synthesis
  │
  ├── cloudletfs: FUSE file system for creating VM overlay and performing early start
  │               optimization at VM Synthesis
  │
  ├── android: Android client
  │     ├─ android: main android client for VM synthesis
  │     ├─ android_fluid: fluid simulation client used in demo videos
  │     │	├─ YouTube: Using Amazon EC2 West
  │     │	└─ YouTube: Using Cloudlet
  │     └─ android_ESVMRecogn, android_ESVMTrainer: under development
  │
  ├── test: Test applications' code
  │     ├─ app-client
  │     │	├─ scripts: client codes for each test application
  │     │	└─ batch_files: batch scripts to test application using VM synthesis on x86 (not Android)
  │     └─ app-server: server binary for each test application
  │
  └── fabric.py: installation script using Fabric
-
KVM permission error at the first run
failed to initialize KVM: Permission denied No accelerator found!
Error, make sure previous VM is closed and check QEMU_ARGUMENT
Failed to create overlay
Please logout your session and re-login.