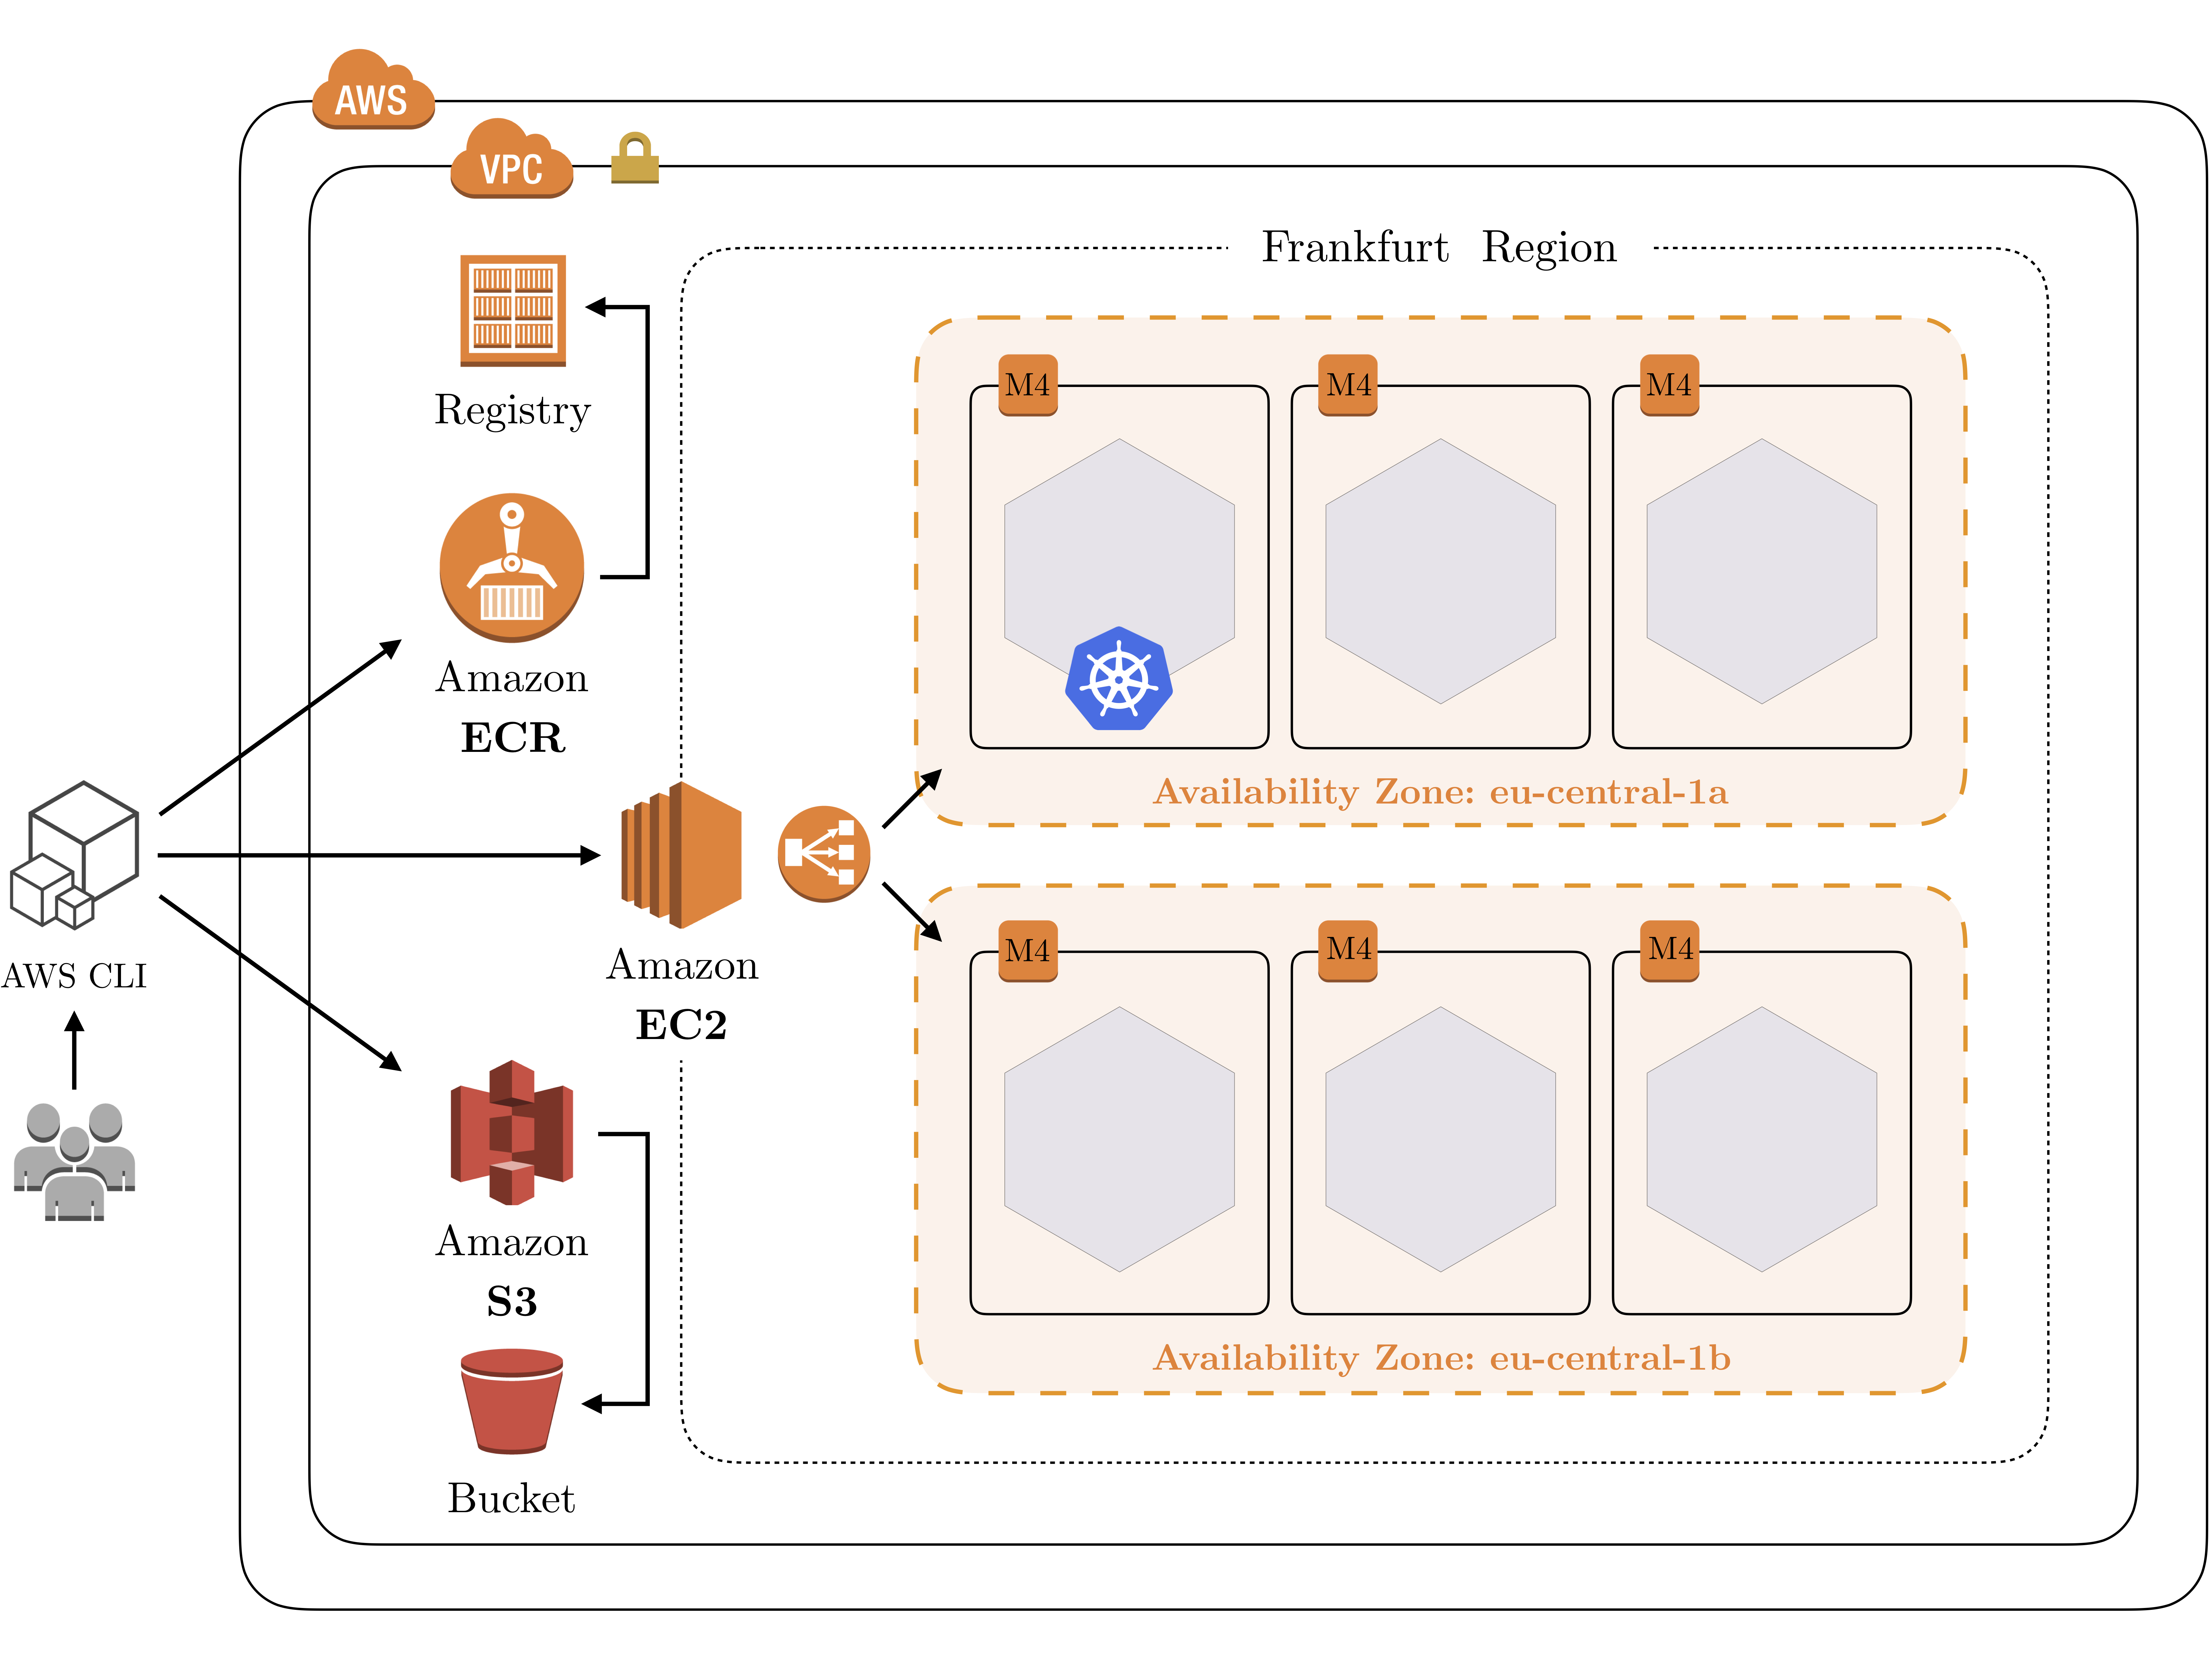
A real distributed system managed by Kubernetes and composed of Docker containers which run EpTO developed in Python.

Please, make sure your system has the following installed.
- Python (v3.6)
- Docker
- Kubernetes (v1.9) (for local setup download Minikube v0.25.0)
One common problem with installing packages directly to your current site-packages area is that, if you have more than one project or use Python on your machine for things other than Django, you may run into dependency issues between your applications and the installed packages. For this reason, we'll be using virtualenv to manage our Django installation. This is common, and recommended, practice among Python and Django users. Please continue reading here.
Once you have created a new virtual environment, you need to activate it running something like:
$ source ~/.virtualenvs/myenv3/bin/activate
Once you have done, you need to install all the packages listed in requirements.txt. To do so, you simply need to run the following commands.
$ git clone https://github.com/robzenn92/EpTODocker.git
$ cd EpTODocker
$ ./shell.sh setup
Minikube is a tool that makes it easy to run Kubernetes locally. Minikube runs a single-node Kubernetes cluster inside a VM on your laptop for users looking to try out Kubernetes or develop with it day-to-day. The latest released version of minikube is v0.25.0.
Please, be sure that docker is running. In order to start up a single-node cluster run:
$ minikube start
In case you need more memory (e.g. for some Kubernetes addons) you can specify its value as follows:
$ minikube start --memory 4096
Keep in mind that the default value is 2048 and if you already have a Minikube VM running, the memory won't be changed as this is done on creation of the VM. Hence, you need to run minikube delete before increasing the memory.
In case you set up a local Docker Registry, you need to run the following.
$ minikube start --insecure-registry localhost:5000
The output should look like the following:
Starting local Kubernetes v1.8.0 cluster...
Starting VM...
Getting VM IP address...
Moving files into cluster...
Setting up certs...
Connecting to cluster...
Setting up kubeconfig...
Starting cluster components...
Kubectl is now configured to use the cluster.
To check whether there is a single-node cluster up and running, we expect the following:
$ minikube status
minikube: Running
cluster: Running
kubectl: Correctly Configured: pointing to minikube-vm at 192.168.99.100
Once the cluster is running you can interact with it using the Kubernetes's CLI. In order to stop Minikube, just run:
$ minikube stop
Minikube's configurations are stored in ~/.kube/config. These will be used by the Kubernetes's client in order to deploy Docker containers and run the experiments.
The address and port of the Kubernetes master can be found as follows.
$ kubectl cluster-info | grep 'Kubernetes master'
However, if you want to access it via REST Api you can start a proxy to the Kubernetes API server as follows.
$ kubectl proxy --port=8080
Starting to serve on 127.0.0.1:8080
Then you can send requests to http://localhost:8080/api/ as defined in the API docs.
Kubernetes comes with a variety of addons. You can have a clue about the available addons in your cluster running the following:
$ minikube addons list
A couple of them which are really useful in order to supervise the cluster are Grafana and EFK(a combination of Elasticsearch, Fluentd and Kibana). In particular, Elasticsearch is a search engine that is responsible for storing our logs and allowing for them to be queried. Fluentd sends log messages from Kubernetes to Elasticsearch, whereas Kibana is a graphical interface for viewing and querying the logs stored in Elasticsearch. You can enable them following the steps defined here below or on the Addons's page.
$ minikube addons enable efk
$ minikube addons open efk
Keep into consideration that EFK requires at least 4GB of memory. Hence, you need to use the --memory 4096 option when starting your Minikube cluster.
To execute tests no matter in which packages they are, please run the following.
$ ./shell.sh run_tests
The project EpTODocker is basically composed of two Docker containers (cyclon and epto). To build both of them is as simple as run the following script.
$ ./shell.sh build all
This will run the tests, and in case the tests pass will build the docker images and deploy them into the minikube single-node cluster using the definition stored in deployment.yml.
Sometimes you may find helpful to remove <none> images. You can do that with the following command.
docker rmi $(docker images --filter "dangling=true" -q --no-trunc)
To deploy EpTO into minikube, you just need to run a kubectl command specifying the deployment.yml file as follows.
$ kubectl create -f deployment.yml
In order to make the replica set accessible from the outside world, you need to create a service which exposes the NodePort of the pods as follows.
$ kubectl expose deployment epto-deployment --type=NodePort
service "epto-deployment" exposed
At this point, you can get the services with the following command:
$ kubectl get svc
This will print you the services table, similar to the following one:
NAME              TYPE        CLUSTER-IP       EXTERNAL-IP   PORT(S)                         AGE
epto-deployment   NodePort    10.106.205.106   <none>        5000:30292/TCP,5001:30141/TCP   4s
kubernetes        ClusterIP   10.96.0.1        <none>        443/TCP                         2d
Now you can reach a random peer's Cyclon welcome page available on:
$ curl 192.168.99.100:30292/hello
The response should look like the following:
{
    "success": {
        "message": "Hello, world! This is a Cyclon peer running on 172.17.0.2."
    }
}
Now you can reach a random peer's EpTO welcome page available on:
$ curl 192.168.99.100:30141/hello
The response should look like the following:
{
    "success": {
        "message": "Hello, world! This is an EpTO peer running on 172.17.0.14."
    }
}