 |
 |
 |
|---|---|---|
| Karim Botros | Ivan MIKHAILOV | Hassan |
III. Navigation
VII. Task Management
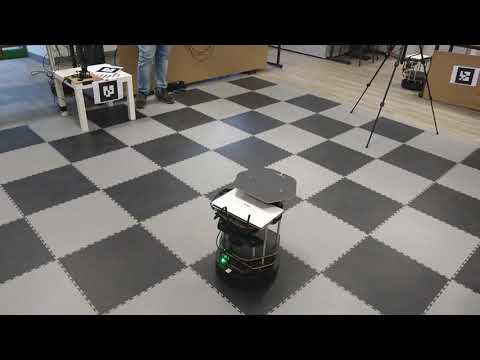
we are addressing the problem of visual servoing of a mobile robot "turtlebot 2" our beloved turlte. the problem is the localization of an indoor mobile robot is never accurate. so in order to achieve an accuracy of few centimeters or even milimeter scale. we need to do visual servoing to reach the target with minimum distance. so in easy words. our robot goes from outside the room to the center of the room using Turtlebot Navigation
Final results for the project are recorded on video and can be accessed on YouTube via this link or found in the corresponding sections of the readme: https://www.youtube.com/playlist?list=PLVNJu2rlBCSt2N_Ap0ZALNexSc9nmzhTA
For some "in the making" and sometimes funny videos, you can follow this link: https://www.youtube.com/playlist?list=PLVNJu2rlBCSv3iQQz9zZ36cAm_oZM_I4w
Full video of both Navigation and Visual Servoing for Fine Positioning (full seamless routine recording):
The project is based on ROS (Robot Operating System) environment running the eighth ROS distribution release named indigo and a TurtleBot2 as a robot. Turtlebot2 includes YUJIN Kobuki base, a 2200 mAh battery pack, a KinectV1 sensor, and an Asus 1215N laptop with a dual core processor. The system is run through a stationary PC, connected to the TurtleBot, and running Ubuntu 14.04 LTS.
Navigation Stack takes in current location of the robot, the goal pose, the Odometry data of Robot (wheel encoders etc) and data from a sensor as an input, and outputs the necessary velocity commands and forward them to the mobile base in order to move the robot to the designated goal:

A map is generated following the tutorial presetented on ROS WIKI page: http://wiki.ros.org/turtlebot_navigation/Tutorials/Build%20a%20map%20with%20SLAM
Following map generation of the enviornment, initial(starting and goal position) are extracted. Please refer to the repository for detials on how to proceed with this: https://github.com/Kivo0/Visual-Servoing-ROS/blob/master/Turtlebot_navigation.pdf
After we have initial and goal position of turtlebot we can proceed with next steps, i.e are connection with turtlebot and than controlling it via publishing initial and goal position.
To control our turtlebot which is the netbook(Asus) via the workstation(Dell).
$ ssh turtlebot@192.168.0.100
Then once connection with turtlebot is established, in the same terminal proceed with:
$ roslaunch turtlebot_bringup minimal.launch
In the new terminal we launch:
$ roslaunch turtlebot_navigation amcl_demo.launch map_file:=/home/turtlebot/ros/indigo/catkin_ws/src/rbx2_ar_tags/map/test_map22.yaml
In the new terminal, while making sure turtlebot is placed on its original initial position please publish on initial position topic:
$ rostopic pub -1 /initialpose geometry_msgs/PoseWithCovarianceStamped '{header: {stamp: now, frame_id: "map"}, pose: {position: {x: -4.96073627472, y: 1.06203043461 , z: 0.0}, orientation: {x: 0.0, y: 0.0, z: -0.371774223976, w: 0.928323179926}}}'
To proceed to the goal position copy in terminal following command:
$ rostopic pub /move_base_simple/goal geometry_msgs/PoseStamped '{header: {stamp: now, frame_id: "map"}, pose: {position: {x: 0.318982511759, y: -0.757121920586 , z: 0.0}, orientation: {x: 0.0, y: 0.0, z: -0.360750805748, w: 0.932662241196}}}'
While navigating problems incurred were related to collision with the edge of the room while turtlebot moves towards its goal, also sometimes due to speed turtlebot was not able to keep up on its original planned trajectory due to which it will stop moving. These problems can be solved by tuning parameters in navigation package. For details, on tuning turtlebot navigation package, please refer to this document: http://kaiyuzheng.me/documents/navguide.pdf
Results of navigation separately can be observed in a video on a YouTube channel, created specifically for this project:
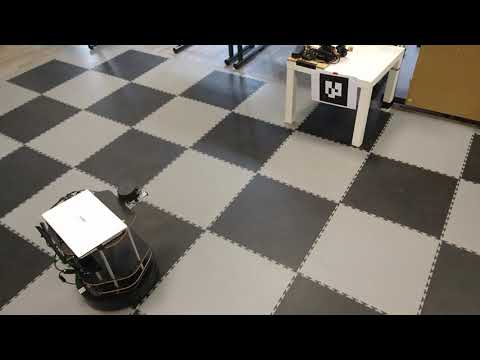
For the purpose of Fine Positioning we used Alvar for ROS as our main library (http://wiki.ros.org/ar_track_alvar). The reasons why Alvar was chosen are mentioned in the ROS survey written by our team and included in this repository. Nevertheless, the main idea is to use AR tags as an artificial marking on the target, which needs to be approached by a robot.
In the project we used several set ups, each of which provides certain advantages and disadvantages. Each set up is characterized by the size and the amount of tags:
- Bigger tags are generally better detected from a higher distance, but the precision drops on smaller distance up to inability to detect the tag when being too close, which is exactly the often encountered case for fine positioning.
- Smaller tags are better detected from up close, on bigger distances the tag is lost very often, resulting in some issues from unsteady motion to no detection at all.
Example of the AR tag and also the tag we used for the Fine Positioning (#5) can be observed on the figure below:

Considering the aforementioned properties, we tried several solitary (one-tag) set ups, including:
- one big tag of 15x15 cm
- one average tag of 10x10 cm
- one small tag of 7x7 cm
- one tiny tag of 5x5 cm
During the usage of one-tag set ups, we devised a new approach, which will involve the usage of a smaller tag, forming a pair of to tags, to counter the various issues, when the tobot approaches the target withing the distance of several centimeters. Generally, at that point the bigger tag doesn't fit in the field of view of Kinect, therefore we needed a smaller tag, but at the same time the approach should have still handled good distances. For this reason, Our Team was decided to use both tags at the same time - bigger and smaller.
The sizes can depend on the distance, but the general idea is that the small tag handles the closest possible positioning of the robot, while the bigger one everything else. Several multiple-tag set ups used by our team are listed below:
- two tags: 15x15 cm + 10x10 cm
- two tags: 15x15 cm + 7x7 cm
- two tags: 15x15 cm + 5x5 cm
- two tags: 10x10 cm + 7x7 cm
- two tags: 10x10 cm + 5x5 cm
- two tags: 7x7 cm + 5x5 cm
At the moment, we are using 15x15 cm + 5x5 cm set. One might wonder, how the multiple tag detection is handled. For this purpose ar_large_markers_kinect.launch file can be accessed and the parameters there, corresponding to the parameters of the tags, can be observed. We found out, that true multiple tag handling doesn't need to be implemented i.e. positioning of each tag in respect to each other are not necessary for our purpose. Therefore, only the biggest tag size is put in the aforementioned .launch file. In addition, both tags are exactly the same, not considering the size. So when the robot approaches the target and starts to lose the bigger tag from time to time, the smaller one compensates for these losses until the biggest one is lost completely or appears to be detected very rarely, and the small one is detected constantly due to it's smaller size.
This solution drastically improves precision and detection uptime (uptime is the time in which the kinect detects the target in this case it changed from alternating to steady continious signal), making it nearly flawless. It is advised to use two tags at all times, when up-close fine positioning is required. If the task requires the robot to be very close to the marker in range of 20 cm* to 5 cm* then only the smaller tag is needed.
The final set up used in the approach can be seen below and is available for printing in the original size:

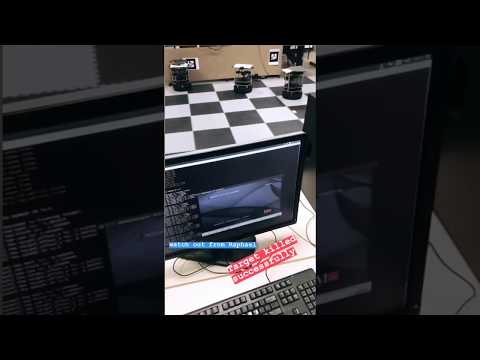
First part of the alogrithm after the robot arrives near the "marker" the search phase begins which is the first phase of our algorithm, its completed directly after the first mapping and localization phase ends = "letting the turtlebot localize itself and go near to the loading marker to load the goods". the search is done by rotating the robot continously more than 360° untill it detects our marker then it attacks the marker and kills it! please see our failed trials.
There are many ways to do to arrive at the target "All roads leads to Maker" by Botros, Karim .. myself!, Initially the alvar library can't center the robot or align it perpendicular to the target if the robot was already near at the begining of the servoing algorithm to the marker. So we thought of using the yaw a component of Euler angles which is computed from Quaternions number system which indicates the perpendicularity of the marker plane with the kinect plane. there are other components in Euler angles ex: Roll,Pitch but we are only interested in yaw for now, After many attempts and experiments recordings we achieved our task of making the robot perpindcular to the surface of the Marker.
After achieving perpendicularity, there can be an issue, when robot is misplaced to from the target on the y axis. It means, that now he is perpendicular to the surface the AR tag is placed on, but he is to the left or right of the marker itself, so he still has an angle to the marker's surface if measured absolutely i.e robot is not directly in front of the marker. This issue can happen sometimes, when the robot approaches the target from an angle, and though not essentially critical due to the fact that the displacement is relatively slow, We decided to introduce the method which will fix such potential issues, improve the precision of the algorithm overall and increase the stability of the robot's performance, making his final position range even more predictable and constant.
For this purpose we introduced simple, but effective solution, which will work automatically if the aforementioned situation takes place. The algorithm is executed as follows:
- The robot detects the direction it came from using the "yaw" parameter i.e if he approached target from the "left" or "right"
- Afterwards, he makes himself perpendicular to the surface to which the AR tag is attached as described in the previous chapter
- To position him in front of the AR tag itself he first turns until he is parallel to the tag
- Then, he moves linearly while being parallel to the tag in the direction opposite to the one he came from
- At last, he realigns himself perpendicularly to the tag again, being more centered on the center of the tag
It is important to notice, that "the direction the robot comes from" detected in the first step, is a generalization. Everything to the right of the center of the target will be "from the right" and everything left will be "from the left". In other words, the angles may wary, but the response will be the same. Therefore, when it is said that the robots is moving in parallel in the opposite direction from which he came as described in the last step, it just means that he moves straight in parallel to the right of the tag if he came from the left and vice versa, not at a certain angle to the tag.
Results of visual servoing part separately can be observed in a video on a YouTube channel, created specifically for this project:
it is hard task to achieve the same gap distance between the robot and the marker! that is because the robot increases its speed linearly to achieve the target therefore if the initial distance is close to the target distance the initial speed will be low and the robot will not be close to the target at the end. and also if the robot is far away the initial speed will be high and the robot might hit the marker. therefore we had to apply control to this linear model. note: "this model can be modeled with the non linearities such as the friction of the kabuki base wheels with the ground and weight changes on the robot and many other factors but we neglected these factors to make the system linear". so we get the current speed of the robot and apply the control equation and feed the new speed to the motors. Feedback PID speed Control.

In this chapter you can find useful commands, which will help you to launch the project part by part i.e. seperately use navigation and fine positioning parts of the project. This commands directly run the launch files, which take care of everything else.
To run Visual servoing for Fine Positioning, please, follow these steps:
- First, two SSH connections to your tutlebot should be created. In our case, the command was: ssh turtlebot@192.168.0.100
- Secondly, we launch the base and the corresponding features: roslaunch turtlebot_bringup minimal.launch
- Thirdly, the kinect is launched using: roslaunch freenect_launch freenect.launch publish_tf:=false
- Next, parameters of the markers are initialized using: roslaunch rbx2_ar_tags ar_large_markers_kinect.launch
- Finally, the preparations are finished, and the robot starts to perform his routine roslaunch rbx2_ar_tags ar_follower.launch It is important to mention, that ar_large_markers_kinect.launch and ar_follower.launch are run on the PC, while the minimal.launch and freenect.launch are run on turtlebot.
To run Mapping & Localisation for Navigation, please, follow these steps:
- First, run roslaunch rbx2_ar_tags navi_1.launch, which, in turn, brings up the minimal and loads the map of the area, which should be replaced, since you will probably use the robot in a different unknown to him environment.
- Second, run roslaunch rbx2_ar_tags navi_2.launch, which will set the parameters for the start and the finish of the pre-chosen path for the turtlebot, which you should adjust to fit to your map. Then it will launch rviz to observe your robot's movement and response from the sensors.
Please, notice, that the first launch file navi_1.launch should be run on the turtlebot, while navi_2.launch contains the command, which launches rviz, which can drastically decrease the performance of the turtlebot, so it is advised to run it on the PC.
In case you want to introduce some changes, there are some useful commands, which will allow you to have a more or less "compilation" abilities in regards to your code, which will greatly enhance the speed with which you can work. Basically, it gives you an ability to copy with replacement the files you have on your system to the turtlebot. So, when some changes are made, whis commands can be used as a "compilation method" to transfer files fast to the robot and be able to try them straight away.
For this purpose it is easy enough to update the whole project folder as followed: scp -r /home/mscv/ros/indigo/catkin_ws/src/rbx2_ar_tags turtlebot@192.168.0.100:/home/turtlebot/ros/indigo/catkin_ws/src/ Please, note, that the paths used above should be changed to your own, depending on your system paths.

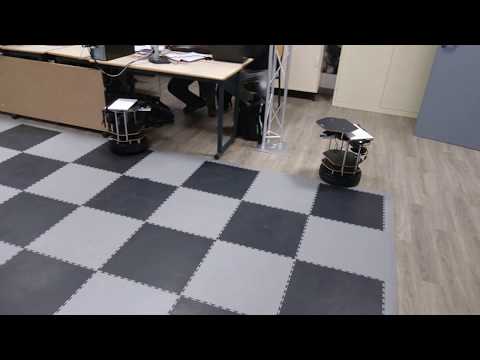
As soon as we got agreable results we thought about trying to create a way for combining our work with our colleagues work.To do a complete scenario of a Turtlebot that enters the room localize itself within a predefined map and then searches for the marker that is marked with "loading phase" and then the robot goes to the marker after arrival to the first marker the robotic arm puts a cube on the turtlebot and then the turtlebot goes to the next marker "unloading marker" to unload the cube, once the turtlebot arrives to the second marker the robotic arm takes the cube from the robot and put it on the station.
therefore we have tried many different approaches to create a way to combine our work with our colleagues work, so we have faced some problems:
- Conflict between AMCL package and Freenect Package:grey_exclamation:
- ROS must Recieve the ODEM of the ROBOT before running the Navigation part:grey_exclamation:
First we tried to modify the packages such as : AMCL and FReenect because they need some parameters to be set for the kinect sensor and both packages need the same parameter to be either false for amcl or true for freenect to work, so they have conflicts in these parameters. so we thought about changing these parameters online at the time of operation, second thought this was not a good option to change it in real time. so we had to run and kill the operations manually and set the parameters of the kinect sensor again to fit with the freenect package. this was not good enough. so we kept searching for a solution till we found that we can control the commands inside the terminal using bash as we get help from MARC Blanchon he provided us with the Resources on how to program on terminal we digged into these resources and then we created our terminal command Sequencer using old language called TCL this command is called from the terminal.sh in the source folder calls a file called Terminal_Control in this file we have combined the 2 packages the freenect and the amcl. and also we solved the error of not waiting for the odem to be recieved by ros in that file too. and in our task management any code from our colleagues can be added and sequenced using our management tool.

Email: Karim or Ivan for the management tool:exclamation:
