Hello and welcome to the Year of Programming 2017's challenges repository! Here
we will be posting daily periodic challenges for the community to complete.
- The administration team
- About Year of Programming
- Challenges
- Solutions
- Submitting your work
- Getting set up
- Workflow
- Submission Review
- Testing
- slandau
- okraarmband
- erocs
- myrrlyn
- jremillard
- sten
- manuel
- marcus
- aakash
- flickdm
- halogenandtoast
- shank-redemption
A common source of frustration among budding developers is acquiring the experience necessary to move past the early stages of programming and computer science. Year of Programming is an active community of dedicated participants that encourage each other to acquire daily experience in problem solving, programming and computer science through collaboration.
Periodically we will be releasing a new programming challenge by pushing it to our Github repository targeted at a wide audience.
As a participant, you will solve this challenge with the programming language of your choice and document the thought process behind solving this problem, explain how to compile your code and how to use your program.
You will then submit your code for review and your peers will review your code and give you feedback. Once enough people have reviewed and approved of your solution, we will merge your code onto the repository and the solution will be stored there for that challenge.
Most of our communication is done through our slack chat room. Through this chat room you can collaborate with others to help solve these challenges or anything you feel like discussing.
This will develop key skills required for problem solving and development for new developers such as:
- Solving problems through programming
- Technical writing
- Clean and readable code
- Code reviewing and giving feedback
- Version control using Git
- Communication skills through collaboration
Each challenge will be posted in its own folder, in numbered order. Each challenge folder will have a Challenge.md file describing the challenge, and may have some example code or data provided.
To participate, simply fork the repository and then make a folder for your solution, inside the challenge you are solving.
If I am solving the zeroth challenge in Rust, I would work in the folder
challenge_0/rust/myrrlyn, to organize solutions by their language and
then their author. This allows us to easily browse solutions by language, and
compare work!
To submit, open a pull request on the main repository. We'll make sure that merging won't cause any problems, and go from there.
When submitting a pull request please use the following format for your title:
[Language] Challenge # (Unreviewed)
Note: Your solution will not be instantly accepted onto repository. We will be reviewing your code, file formatting and directory structure of your code. If you satisfy the requirements, then we will accept and merge.
If you do not have git installed, please do that first.
Note: If you have never used the command line a $ before some text denotes a command and a line following that without the $ denotes the output of that command.
To confirm that you have git installed type in:
$ git --version
git version 1.9.1
It should respond by showing you the version of git you have installed.
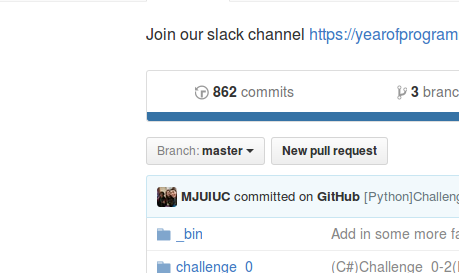
2. Fork The 2017Challenges Repository
Click on the button on the top that says fork.

You will now have a copy of the 2017Challenges repository in your profile.
3. Clone your fork
Click on the green dropdown button titled "Clone or download" and copy the URL there.
Note: I recommend cloning as SSH as it will allow you to use git without constant user authentication. If you are not comfortable with this yet, proceed with HTTPS.

Open up your command line tool and enter:
Note: Enter the following without the following without the angled brackets (e,g, git clone git@github.com:ManuelMeraz/2017Challenges.git)
$ cd ~
$ git clone <URL that you copied here>
Cloning into '2017Challenges'...
remote: Counting objects: 874, done.
remote: Compressing objects: 100% (13/13), done.
remote: Total 874 (delta 4), reused 0 (delta 0), pack-reused 860
Receiving objects: 100% (874/874), 95.41 KiB | 0 bytes/s, done.
Resolving deltas: 100% (324/324), done.
Checking connectivity... done.
Next we will be configuring your git setup.
Note: Simply replace the text inside the quotation marks with your name and email.
$ cd ~/2017Challenges/
$ git config --global push.default simple
$ git config --global user.name "John Doe"
$ git config --global user.email "your_email@example.com"
$ git remote add challenges https://github.com/YearOfProgramming/2017Challenges.git
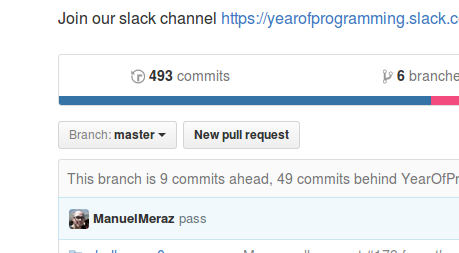
To keep from submitting multiple challenges in a single pull request, we will be branching off from the master branch for every challenge and keep the master branch clean.
The master branch of your repository should never be ahead of the the main 2017Challenges repository.
To check what branch you are on:
$ git branch
* master
This means you are on the master branch. To create a new branch first decide the programming language you will be coding in for your challenge and the challenge number and enter the following
$ git checkout -b language_#
Where language is the programming language and # is the challenge number.
$ git checkout -b python_0
Switched to a new branch 'python_0'
$ git branch
  master
* python_0
You are now on your python_0 branch. Good!
This is very important otherwise you will pollute your master branch with changes that you have made to your new branch.
Now that you have created your first branch to work on. Any changes you make such as deleting a file, adding a file, modifying a file, moving a file, etc will be detected as a change by git.
One important tool to use is git status
$ git status
On branch python_0
nothing to commit, working directory clean
At the moment, you should have nothing to commit because we have not done anything. Let's say you create a file
$ touch file
$ ls
_bin  challenge_0  challenge_1  challenge_2  challenge_3  challenge_4  challenge_5  challenge_6  challenge_7  challenge_8  challenge_9  file  LICENSE.txt  README.md  Unittesting.md
You'll see a file named file
$ git status
On branch python_0
Untracked files:
  (use "git add <file>..." to include in what will be committed)

        file

nothing added to commit but untracked files present (use "git add" to track)
Let's say you want to switch to another branch, you need to do
$ git add file
$ git stash
Saved working directory and index state WIP on python_0: 8eea422 Merge branch 'master' of github.com:YearOfProgramming/2017Challenges
HEAD is now at 8eea422 Merge branch 'master' of github.com:YearOfProgramming/2017Challenges
$ git status
On branch python_0
nothing to commit, working directory clean
You can now switch branches
$ git checkout master
Switched to branch 'master'
$ git status
Your branch is ahead of 'origin/master' by 178 commits.
  (use "git push" to publish your local commits)

nothing to commit, working directory clean
When you're done, switch back to your working branch
$ git checkout python_0
Switched to branch 'python_0'
$ git stash pop
On branch python_0
Changes to be committed:
  (use "git reset HEAD <file>..." to unstage)

        new file:   file

Dropped refs/stash@{0} (6607bd0909f703e182159d49c97ced7730a8a3fc)
You may now resume your work.
If you switch to another branch without git stash you will move over all of the changes you made in your branch to another branch, thus polluting it.
Let's clean up that file named file now.
First to unstage the add you did. Then confirm that the file file is the only one that will be removed, and finally remove it.
$ git reset HEAD file
$ git clean -n
Would remove file
$ git clean -f
The challenges will be structured in the following format
/                                     -> root directory

README.md                             -> Contains the information in this help page
challenge_0/                          -> challenge_<number>

            README.md                 -> File containing challenge prompt
            r/                        -> lowercase directory with your preferred language.
            php/                      -> If it does not exist, then create one.
            python/
            cpp/
            csharp/
            .../
                    /john             -> your username in slack
                    /nick
                    /nancy
                    .../

                           README.md  -> Documentation for your program. Be creative!
                           src/       -> contains your source code
Assuming that you are in the root of the directory you will look for the challenge you want to complete.
/challenge_#/
Move into the directory for the challenge you want to complete and see if a directory already exists for your preferred programming language.
If it exists, move into that directory. Otherwise, make a new directory for your language.
/challenge_#/language/
Note: The format for directory naming for programming languages is all lowercase plain text with no special characters(e.g. csharp).
Once inside your preferred programming language directory you will create a directory with your slackusername or name you want to be identified by for your work.
/challenge_#/language/name/
Inside this directory you will have 2 items:
- A file named 'README.md' and inside you will document how your program works.
- Your source code, preferably in a directory titled 'src'
Note: When you are documenting your program, pretend you are someone who has never seen that programming language and instruct them on the steps to run your program and how to use it. Here is a working template and here is an example.
Your set up should be as follows so far:
/challenge_#/language/name/README.md
/challenge_#/language/name/src/file_1
/challenge_#/language/name/src/file_2
/challenge_#/language/name/src/...
Assuming you are in the directory under your name you will enter the following
$ git add .
$ git commit -m "[Language] Challenge # (Unreviewed)"
$ git pull challenges master
$ git push origin language_#
Note: Replace the text inside with the relevant information.
If you go to the page where your forked repository is contained your updated code should be there. By default github will you you the master branch. There is a drop down menu to select the branch you want to view if you would like to review your work.
Click on the "New pull request" button to submit your work for review. Be sure to include the challenge number and language of your solution!
At this point your master branch should be untouched and should be at the same point, or behind the 2017Challenges repository. When submitting your pull request select the branch from your repository that you would like to submit from the dropdown menu.
As soon as your pull request gets merged, go ahead and switch to your master branch and delete the branch that you submitted and got accepted. You will now have it in your master branch.
$ git checkout master
$ git pull challenges master
$ git branch -d language_#
To acquire a new challenge that has just been posted you open your command line and enter. If you are not on the master branch make sure to stash your work and checkout to master.
$ git pull challenges master
This will download the newest solutions and challenges to your computer
When a challenge is released we will notify everyone in the Slack chatroom. If you have the app installed on your phone, you will receive a notification.
To acquire a new challenge that has just been posted you open your command line and enter. If you are not on the master branch make sure to stash your work and checkout to master.
$ git pull challenges master
Note: Your text editor might open up to commit a merge. You can simply close it and continue.
If you type in the command
$ ls
challenge_0  challenge_1  challenge_2  challenge_3  challenge_4  challenge_5  LICENSE.txt  README.md  Unittesting.md
You should have something like the output here.
Create a new branch for the new challenge
$ git checkout -b language_#
Where language is the programming language and # is the challenge number you will be completing.
Move into the challenge directory you want to complete and follow the same process as before for completing a challenge. Make sure to follow the documentation guidelines and formatting guidelines.
After you have pushed your code to your forked repository as follows
$ git push origin language_#
Then you can submit a pull request.

All credit goes to @selectivealso from our slack chat for this awesome image!
##Submission Review
Reviewing and testing code is just as important as writing it. Peer to peer review is a core component of what we're striving to accomplish with our year of programming challenge. We would appreciate it if everyone who submits a solution reviews at least one other persons submission. All submitted code should be well documented and work for the provided test cases.
Pulling seperate pull requests to test code is cumbersome and we realize that. To help with this, we suggest using an online compiler so that you can check over anothers code without having to leave your browser. A good online compiler is repl.it which has many languages available to work with!
###please follow these guildlines for pull request reviews
- Code correctness
- Does the code compile and run?
- If it compiles/runs, does it make sense?
- Code Style
- Is the code readable?
- Give positive feedback on what you liked!
- What can they improve on?
- Code Documentation
- Are there comments when needed or unnecessary comments?
- Did they include a README.md with some basic documentation?
- Path Structure
- Is the directory naming in all lower case for language and challenges?
- The directory for the username and solution file don't follow any format
- Encourage the use of a src/ directory for multiple files!
- Merge Pull Request
- Is everything good? Check this off.
You can copy and paste this:
- [ ] **Code Correctness**
- [ ] **Code Style**
- [ ] **Code Documentation**
- [ ] **Path Structure**
- [ ] **Merge Pull Request**
###Review Title System
When You do perform a pull request, you should set the title of it so that others know no one has looked at it yet.
- If you just submitted the pull request, your title should look like this:
[language]challenge_[chalNumber](UnReviewed) - If your code is actively being reviewed, your pull request title should look like this:
[language]challenge_[chalNumber](Pending) - If your reviewer agrees that your change is good to merge, set your pull request to this:
[language]challenge_[chalNumber](ReadyForMerge)and a mod will merge your code to the main repository.
Please check your github notifications frequently Once you've seen that you've been given an approval by any two people, write a comment aknowledging that you've seen them. Even a simple "Seen" will do.
Taking this approach to code review will help to streamline the process and make reviews easier for everyone involved. Take the time to check your github notifications so that you can check to see if anyone has reviewed your code yet.
At the moment we can test python scripts and and any compiled executable. If the challenge README has a section for testing, you can use this script.
######Requirements
- Have your solution to the challenge contain the name solution in its title (e.g. solution.py, solution.exe, solution, etc)
- Have it accept the input and output requirements for the challenge
That's it!
We have a bash script to test your program
/2017Challenges/_bin/test
Move to the root of the 2017Challenges directory to use it.
Usage:
./_bin/test <challenge number> <programming language> <identity>

<challenge number> is the challenge you are on (e.g. 5)

<programming language> is the name of the directory for the programming language you
chose (e.g python, cpp, csharp, etc)

<identity> is the name of the directory that you created that identifies you
Example:

./_bin/test 4 python Johnson

This program will go to the challenge you are testing and pass in the testfiles
within that challenge to your solution. Your solution must be named solution
followed  by the extension of your choice (e.g. solution.py, solution.exe, etc). Your
program must expect a line(s) of standard input and the solution must be printed out.
######Sample Program
Challenge 1 - Reverse a String
solution.py
#!/usr/bin/python3

# Your line input
str = input()

#Your line of output
print(str)