The application kit contains :
- Mini controller with 5 tilt directions and a 360° knob rotation.
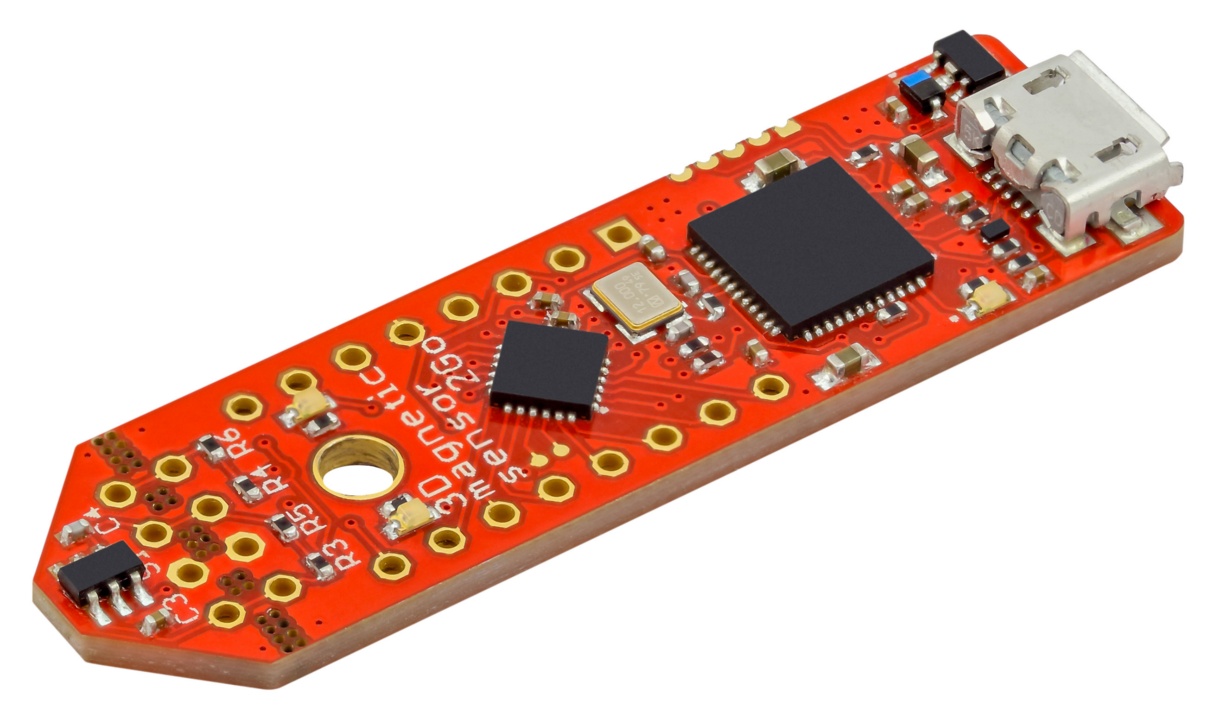
- The Infineon XENSIV(TM) 3D Magnetic Sensor 2GO kit : a budget-priced evaluation board equipped with a magnetic sensor for three dimensional measurement combined with an ARM® Cortex™-M0 CPU. It has a complete set of on-board devices, including an on-board debugger.

The Mini controller is a joystick with five tilt positions as well as a 360° knob rotation. The principle idea is to detect all motion degrees by combining a single magnet with one 3D magnetic field sensor.
Magnetic circuit patented by Infineon Technologies AG
The Mini Control code contains the following files:
- m00_Config.py
- m01_SoreCalibData.py
- m02_Calibration.py
- m03_TestStateDetection.py
- m04_TestStateDetectionGUI.py
- m96_visualization.py
- m97_sensorCom.py
- m98_magMapEval.py
- m99_BfieldSimulation.py
Files m96-m99 provide functions for sensor communication, B-field computation, visualization and evaluation of the magnetic map and will not be discussed in this summary.
pip install {lib}
- numpy
- scipy version 1.3+ (subpackge optimize the differential_evolution code)
- pyserial
- magpylib v2.2.0+ (included in the folder)
- tkinter (for visualization only)
- bitstring
To calibrate and test the system follow the steps below:
This step is to be performed only on the first use of the uC. The Firmware needs to be flashed into the uC. The Firmware is located on the folder FW. Run flash.bat to flash the uC.
Run the script m01. This script will store the user calibration data. The user is required to move the joystick to different, designated positions. There are four rotation positions that are indicated on the system knob and five tilt positions:
Perform the following steps:
- Rotate to start position (Forward)
- Start script
- Tilt to all four positions (first 1, then 2, then 3, then 4). Hold each position until screen output tells you to continue to the next one.
- When all five states are stored go to tilt0 (Center) and rotate to the next position as demanded by the screen output.
- Continue like this until all 20 states are stored, at which point the script will automatically exit.
Run script m02. Follow the output (mean squared badness value). It should be less than 0.01 in the end. If this is not the case the system might not be very well calibrated. Possible reasons:
- The algorithm might have failed (rerun the script, check convergence behavior, increase popsize or maxiter, reduce tol).
- The calibration data is bad: repeat Step 2 then rerun m02.
- The system might be bad mechanically.
The system is now calibrated. Run m03/m04 to test the calibration. This will generate a look-up table with N=360 states per circle (this will work fast with the uC) and will generate a console/graphical output of the form [TILT,ROT] based on this look-up table. Algorithmic measures have been taken to generate a “nice” output: