Picket is a soldier or troops placed on a line forward of a position to warn against an enemy advance.
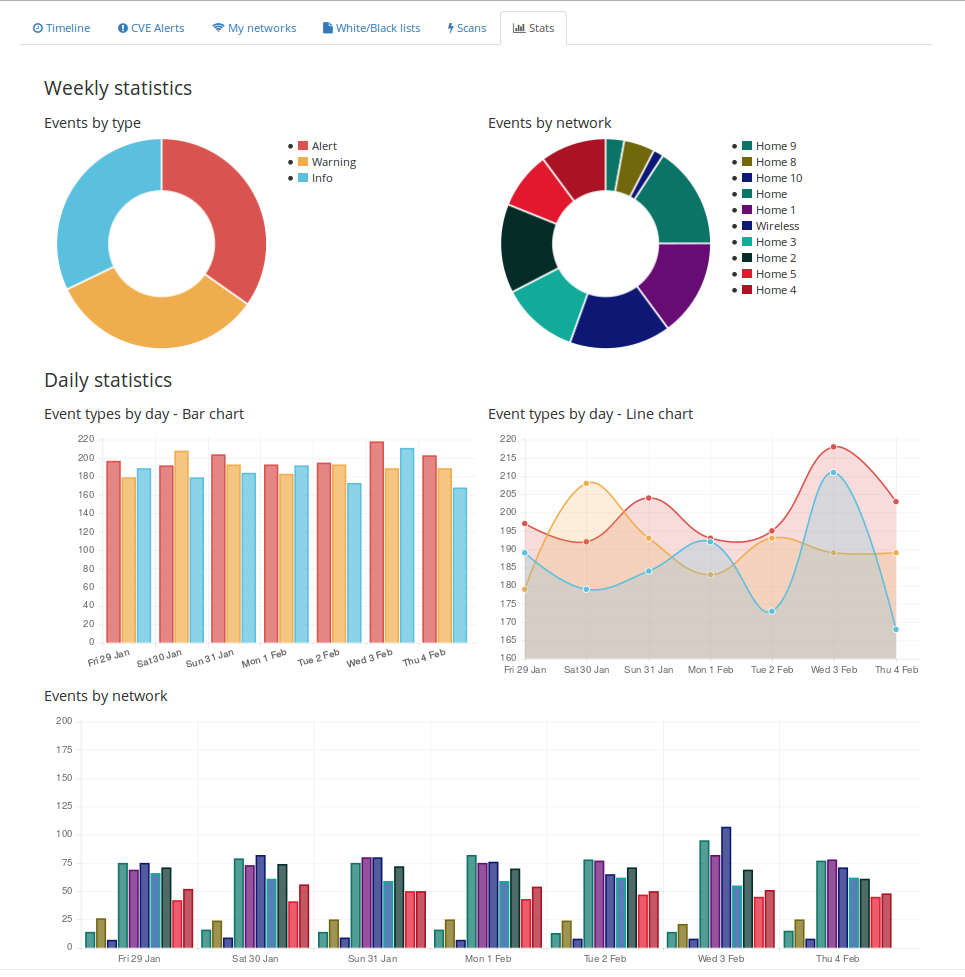
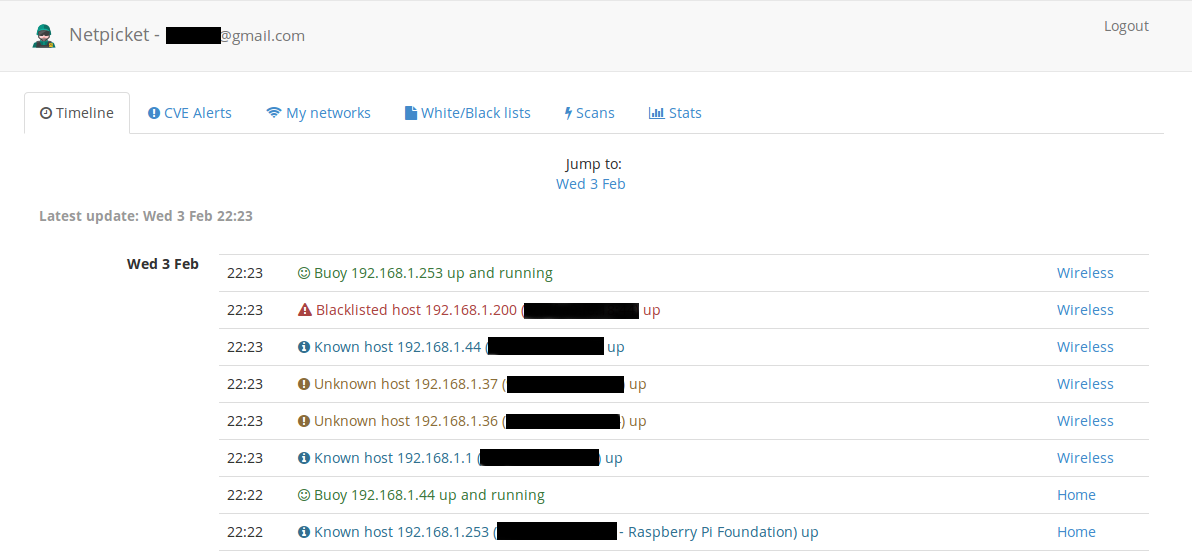
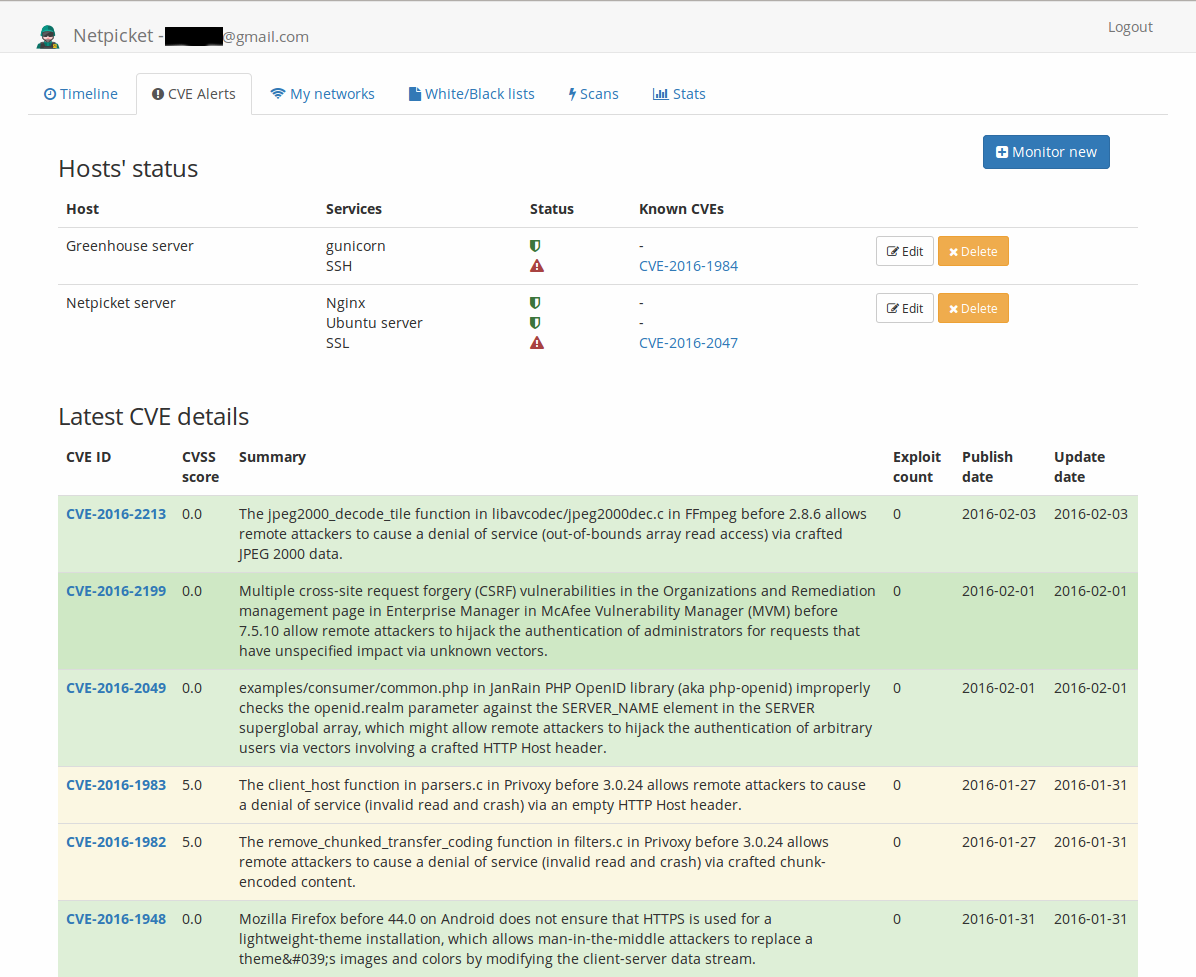
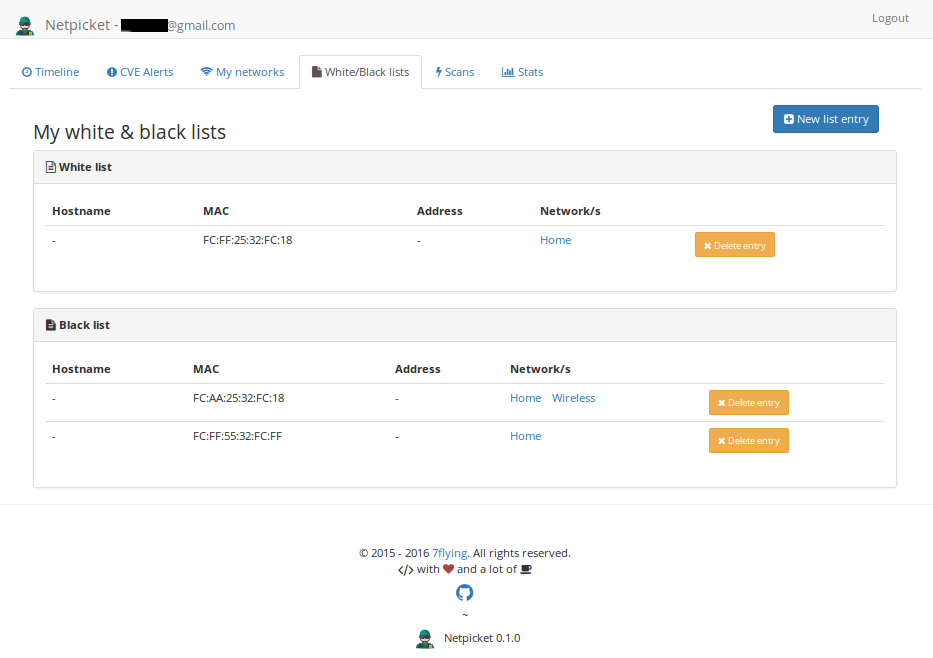
Netpicket will help you (i) monitor your networks, (ii) send alerts based on MAC white/black-listing, (iii) track CVEs to check if your hosts are secure and (iv) display nice statistics.
This project was originally developed for the subject Protocols, technologies and services of the Internet.
Work in progress, may (surely will) contain bugs.
You'll need a central server to host Netpicket's dashboard and a machine/buoy in each network you wish to monitor.
Project root netpicket/netpicket-web-py
The authentication it is done via a Google account, so you will need to generate an auth API key for your project. Then export the client secret:
export G_CLIENT_SECRET="the-secret"-
Install dependencies
sudo pip install -r requirements.txt
-
Setup SQL database
There are two options for this. If the
TESTINGflag is set toTruewe will connect to a sqlite db engine, otherwise we will connect to a MySQL db engine.You can change both the flag and add any other engine at:
config.pySetup the following variables:
# Mandatory for both configurations:
export DB_NAME="your-db-name"
# Just for MySQL:
export DB_USER="your-db-user"
export DB_PASS="your-db-pass"
export DB_HOST="your-db-host"
Then, create the db:
python db_create.py.Netpicket will not use the SQL extensively, it is just for the typical
Usertable. So a sqlite db may be enough. -
Setup NoSQL database
Again, if
TESTINGis set toTruewe will try to find a local Redis instance, otherwise we will look for a Redis host somewhere else.From now on, we are assuming a local Redis instance.
Download and compile the latest Redis:
wget http://download.redis.io/redis-stable.tar.gz
tar xzf redis-stable.tar.gz
cd redis-stable
make
You may want to change
redis.confto load the db dump in case that Redis goes down, this way you will not lose your data. This is done setting inredis.confthe directory where yourdump.rdb(or any other name) will reside:# The working directory. # Note that you must specify a directory here, not a file name. dir /path/to/mydirectory/Finally launch Redis:
redis-server. -
Launch Netpicket dashboard!
gunicorn -b 0.0.0.0:8000 -k gevent wsgi:app
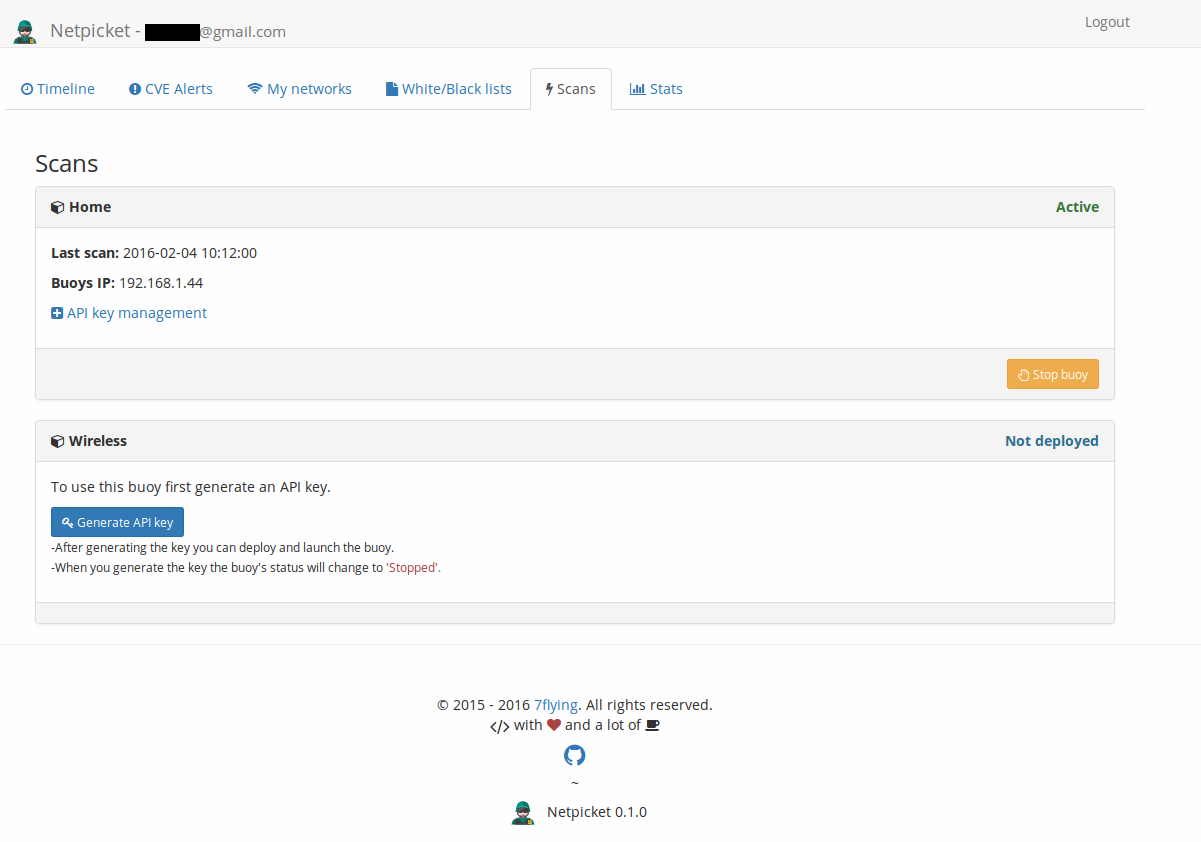
A buoy is a network scanner. There are instructions on how to launch a buoy in the scans tab of Netpicket's dashboard. Repeated here for completeness.
Project root: netpicket.
-
Copy
requirements.txtandnetscanner.pyto your buoy. -
Install dependencies:
sudo pip install -r requirements.txt -
(Assuming that you have created a network and a key for that network on Netpicket dashboard)
If you are connecting to a local dashboard set
LOCAL = Trueonnetscanner.py, otherwise set it to false and put your host url onself.urlofNetScannerclass atnetscanner.py.Then launch the buoy:
sudo python netscanner.py <your-api-key> <network-to-scan>Note that we need admin privileges since we are looking for MAC addresses.
Also note that you need a network string like: 192.168.1.*. (We are currently using
nmap -snto scan the network.)
- Timeline
- CVE alerts
- White & black lists
- Network monitoring / Scans
- Statistics