/client- Create React App front-end for identity service/server- Flask private identity server/ssi- Streetcred Self Sovereign Identity service
- You will need a
.envfile in yourssidirectory (/ssi/.env). This provides your Streetcred credentials to thessiservice. Your.envfile will follow the same format as show in this demo here. The.envfile should be laid out as such:
# Developer Credentials #
ACCESSTOK = '< Your Access Token Here >'
SUBKEY = '< Your Subscription Key Here >'

# Credential Definition #
CRED_DEF_ID = '< Your Credential Definition Here >'
- To generate your own developer credentials you will have to create an organisation on the Streetcred developer portal. This will provide you with an Access Token and Subscription Key which you can add to your
.envfile.
- Create a new organization and select the Sovrin Staging Network from the streetcred developer portal.
- In the .env file, add your organization's subscription key and access token to the respective fields.
- You will now use a Schema ID to generate your own Credential Definition ID. The Schema ID defines the data attributes of any future credentials created from it, in this case they are
emailandpassword. The Credential Definition ID ties the general Schema to your Organisation, allowing you to publish Verifiable Credentials from your Organisation against the layout of the Schema.
- To generate a Credential Definition ID (
CRED_DEF_IDin your.envfile) use the followingSCHEMA_ID: PLaot51DVtaGBZQoJPMdiY:2:opus-account:1.0. The transaction that wrote this schema to the ledger can be found here. - We will use Streetcred's Swagger documentation to send an API call and generate your unique Credential Defintion ID against your organisation. Navigate to the
[POST /definitions/credentials/{SchemaId}endpoint](https://app.swaggerhub.com/apis-docs/Streetcred/agency/v1#/Definitions/CreateCredentialDefinitionForSchemaId). - Click the lock button on the right hand side and authorize swaggerhub by pasting "Bearer " + your access token in the access token field & your subscription key into its field
- Click the Try it out button to prepare the API call to write the credential definition to the ledger
- Copy
PLaot51DVtaGBZQoJPMdiY:2:opus-account:1.0into the schema_id field in swagger hub. - Click "execute" and after a couple seconds you will see "curl", "request URL", and "server response". Copy the definitionId value from the "server response" section and add it to your .env file for the CRED_DEF_ID value
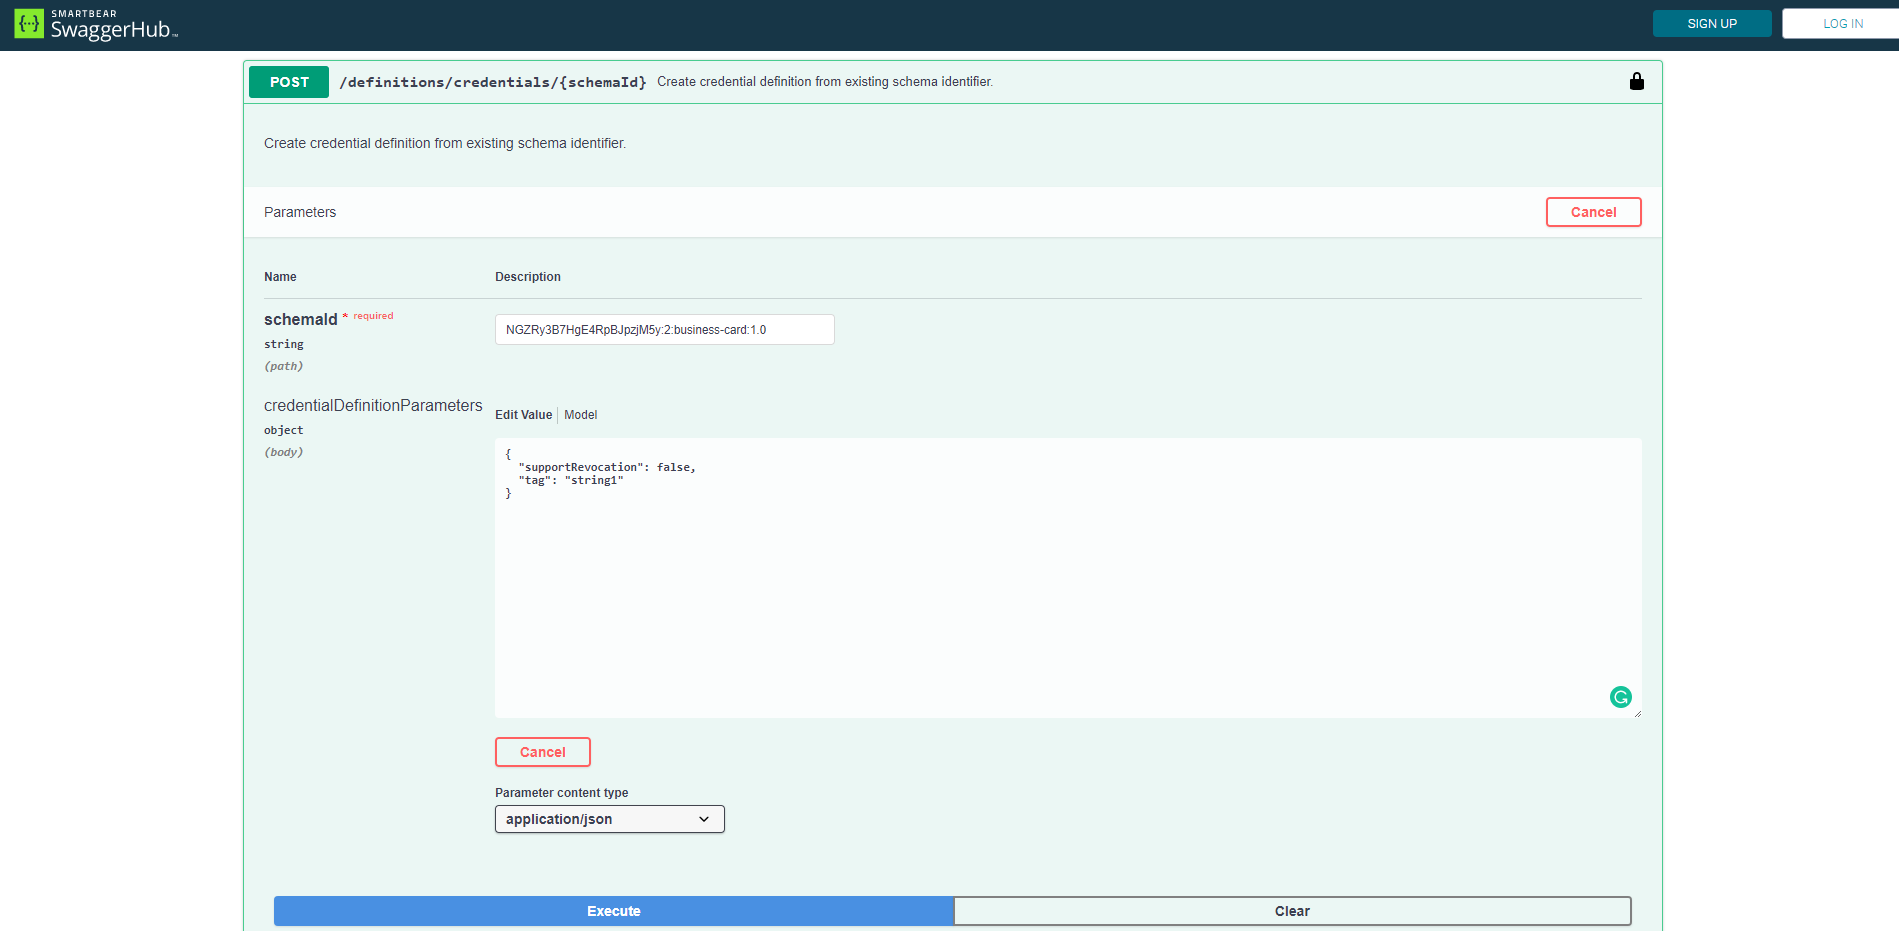
NOTE: If you get a 504 Gateway Timeout error, go to the GET /definitions/credentials endpoint, click try it out and then execute to get your newly minted credential definition.
Writing a credential definition to the ledger as an organisation, creates a public key specific to both the organisation and the schema. No your organisation can create signatures on credentials with a set of attribute fields defined by the schema.
-
Make sure you have
dockerinstalled on your system. Next, rundocker-compose build. Currently if you change any of the React front end code, of the SSI Express logic then you will have to re-run thedocker-compose buildstep. I am looking at fixing this in the future so there is hot reloading. -
run
docker-compose up. This will start all three containers (client/server/ssi). The front end will be accessible athttp://localhost:80.
Currently, the SSI feature is very new and only supports the registration of new users. Upon registering for an account users will have a QR code displayed to them, upon scanning this QR code they will be issued with a Verifiable Credential which displays their email and password.
Once the application is up and running, all you need to do is navigate to the front end (http://localhost:80) and register with a dummy email account (NOTE: once you have registered with an email account it will be added to the locally running Postgre database and unless you wipe this DB session you will not be able to use that email address again). This will then display the QR code, which should be scanned with your Streetcred wallet app.