- Introduction
- Example
- Installation through pip
- Manual installation
- Installation on HPC
- Implementation Notes
- Contact
PYCP2K is a python package providing a dynamic object-oriented interface to CP2K, an atomistic and molecular simulation software.
PYCP2K allows the user to create and run entire CP2K simulations with python scripts. The simulation parameters can be dynamically created and altered thanks to an object tree that replaces the traditional CP2K input scripts.
The benefits of using PYCP2K over using the traditional CP2K input files:
- Use python data structures and algorithms to create and modify the input
- Create and run CP2K simulations with one python script.
- Modular simulation setup by e.g. using functions to create parts of the input
- Structure creation and loading with ASE
- Autocompletion if provided by your IDE (tested with VIM plugin YouCompleteMe and the Spyder IDE)
- There are lots of python libraries (numpy, scipy, matplotlib, etc.) to also analyze the results - all with python.
Technically the interfacing to CP2K happens simply by writing CP2K input files and reading the output files. There is no direct interface to the fortran code.
An example script that calculates the energy and forces in a silicon lattice using DFT. To see a fully documented version of this example and other examples, look at the examples folder.
from pycp2k import CP2K
from ase.lattice.cubic import Diamond
#====================== Create the structure with ASE ==========================
lattice = Diamond(directions=[[1, 0, 0], [0, 1, 0], [0, 0, 1]],
symbol='Si',
latticeconstant=5.430697500,
size=(1, 1, 1))
#================= Define and setup the calculator object ======================
calc = CP2K()
calc.working_directory = "./"
calc.project_name = "si_bulk"
calc.mpi_n_processes = 2
#================= An existing input file can be parsed =======================
calc.parse("template.in")
#==================== Define shortcuts for easy access =========================
CP2K_INPUT = calc.CP2K_INPUT
GLOBAL = CP2K_INPUT.GLOBAL
FORCE_EVAL = CP2K_INPUT.FORCE_EVAL_add() # Repeatable items have to be first created
SUBSYS = FORCE_EVAL.SUBSYS
DFT = FORCE_EVAL.DFT
SCF = DFT.SCF
#======================= Write the simulation input ============================
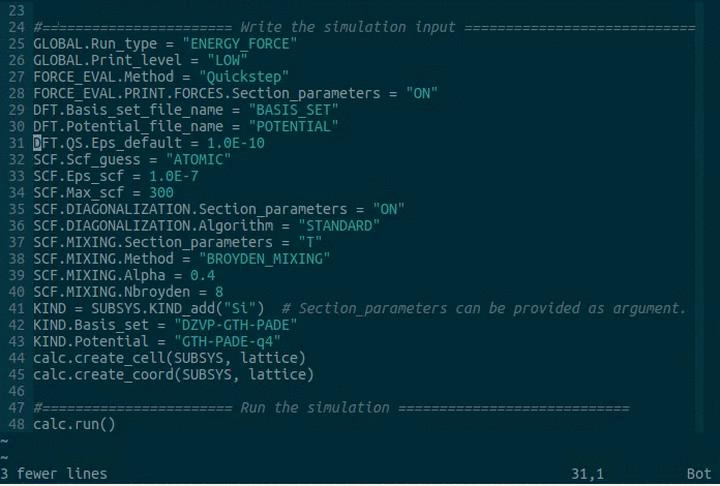
GLOBAL.Run_type = "ENERGY_FORCE"
FORCE_EVAL.Method = "Quickstep"
FORCE_EVAL.PRINT.FORCES.Section_parameters = "ON"
DFT.Basis_set_file_name = "BASIS_SET"
DFT.Potential_file_name = "GTH_POTENTIALS"
DFT.QS.Eps_default = 1.0E-10
DFT.MGRID.Ngrids = 4
DFT.MGRID.Cutoff = 300
DFT.MGRID.Rel_cutoff = 60
DFT.XC.XC_FUNCTIONAL.Section_parameters = "PADE"
SCF.Scf_guess = "ATOMIC"
SCF.Eps_scf = 1.0E-7
SCF.Max_scf = 300
SCF.DIAGONALIZATION.Section_parameters = "ON"
SCF.DIAGONALIZATION.Algorithm = "STANDARD"
SCF.MIXING.Section_parameters = "T"
SCF.MIXING.Method = "BROYDEN_MIXING"
SCF.MIXING.Alpha = 0.4
SCF.MIXING.Nbroyden = 8
KIND = SUBSYS.KIND_add("Si") # Section_parameters can be provided as argument.
KIND.Basis_set = "DZVP-GTH-PADE"
KIND.Potential = "GTH-PADE-q4"
calc.create_cell(SUBSYS, lattice)
calc.create_coord(SUBSYS, lattice)
#============ Run the simulation or just write the input file ================
calc.write_input_file()
calc.run()There is a default implementation available which does not require any user input. CP2K version 5.1 is assumed (it should work with most other versions). The cp2k executable is called cp2k.popt and no mpi-command is given. If you want to change the name of the executable and the mpi-command, please modify pycp2k/config.py.
Otherwise, the installation is as easy as:
pip install pycp2kIf version 5.1 does not work for you, we recommend a manual installation (see below).
These installation instructions were tested on Ubuntu 16.04 x64:
-
Pull this repository to any location on your computer:
git clone --depth 1 https://github.com/SINGROUP/pycp2k.git -
The correct input structure is created from the .xml file that can be created by calling the CP2K executable with flag --xml. During the setup you will have the option of creating the .xml file by using a CP2K executable on your computer, or by using a pre-existing .xml file. The .xml files may differ between CP2K versions, and if you change CP2K version or update pycp2k, you may need to rerun this installation. When doing a reinstall, it is best to remove the old class hiearchy by deleting the folder pycp2k/pycp2k/classes.
-
Install the package by running the setup script in terminal. During setup you will be asked how you want to create the input structure (using executable or existing xml file) and what should the default CP2K and MPI commands be. For setup use (use the --user flag when necessary to avoid issues with root access):
python setup_manual.py install
These instructions were made for and tested on Triton, the computing cluster at Aalto University, but they should be extensible to any other computer cluster with the appropriate changes.
- Installation:
-
Load the modules required for installation. If you use the default CP2K version, you must load the module containing CP2K, because the cp2k executable is called during installation (if you don't use an existing xml file). Python >= 2.7.6 should also be loaded. If on the other hand you plan on using your custom compiled version, remember to have it in you path.
-
Clone this repository to somewhere in your work directory:
git clone --depth 1 https://github.com/SINGROUP/pycp2k.git -
Install the package locally with (use the --user flag when necessary to avoid issues with root access):
python setup_manual.py installIf you loaded the cp2k module you should be able to create the input structure from the cp2k executable. When the setup asks for default MPI executable provide choose either srun --mpi=openmpi or srun --mpi=pmi2 depending on which MPI library you're using.
-
- All section names are in uppercase to prevent clashes with python keywords (global, print, etc.)
- The keyword names are capitalized. This is in order to avoid clashing with subsection names (yes, a section may have a keyword and a subsection with the same name) and python keywords.
- Section and keyword names 'X' that start with a numeric value have been renamed to 'NUMX'. This is because python doesn't support variable names which start with numbers
- Section and keyword names which include the plus sign '+' have been renamed so that it is replaced with 'PLUS'. This is because python doesn't allow the plus sign within variable names.
- Section and keyword names which include the minus/hyphen sign '-' have been renamed so that it is replaced wih '_'. This is because python doesn't allow the minus/hyphen sign within variable names.
- All the repeatable sections X have to be added with a function 'X_add()'. This function returns a reference to the newly created object which you should store into a new variable for later access. Optionally you can provide the 'Section_parameters' as an argument to this function. The list of the repeatable sections can be accessed from attribute 'X_list'.
- You can use aliases and even use several aliases for the same item in the scripts. However, the default name will be used in the input file.
If you have any issues, or general questions regarding the package, please use github's issue system. Just simply open a new issue and put your message there. This way the discussion is open for other users, and may also help them in any possible problems.