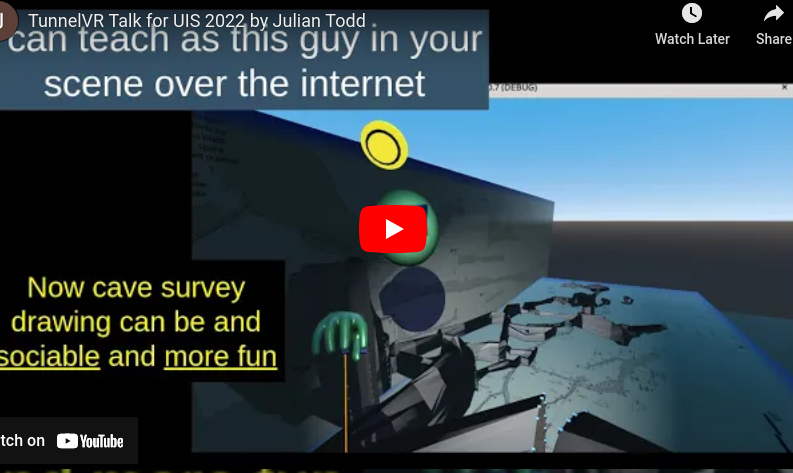
TunnelVR is a follow-on from TunnelX -- a long-running program for drawing up cave surveys. It's based on the excellent Godot Game Engine that's used for designing Virtual Reality games on an almost plug and play basis.
Being like a game, the intention is to make drawing up cave surveys fun and collaborative.
You can make improvements to the map with your friends in VR. It is easier and more intuitive
because it is in 3D from the perspective of how you see it in the real life, rather than
as a technical 2D drawing with overlapping layers.
Go to the releases page and download, unzip and run the binary executable for your operating system. Linux, Windows and Oculus Quest Android are available, and iOS is sometimes available when someone makes a build on a Mac.
This is super easy owing to the power of Godot.
Clone this repo
Download and run the Standard release of Godot for your operating system.
Scan project directory for tunnelvr and then open it.
Download the godot_ovrmobile asset if you are deploying to the Oculus Quest
Hit the "Play" button on the top right
Add the following to your NixOS configuration, often in
/etc/nixos/configuration.nix for example.
nix.binaryCachePublicKeys = [ "tunnelvr.cachix.org-1:IZUIF+ytsd6o+5F0wi45s83mHI+aQaFSoHJ3zHrc2G0=" ];
nix.binaryCaches = [ "https://tunnelvr.cachix.org" ];
nix.trustedBinaryCaches = [ "https://tunnelvr.cachix.org" ];If you do not have a VR system, you can still run and control TunnelVR on a normal PC with a mouse:
- Cursor keys or WASD keys will move forwards, backwards and rotate your camera view left and right.
- Shift-Up/Down or W/S keys rotates your view up and down (nodding your head)
- Esc-key or '1' toggles mouse capture. The mouse controls the hand-laser-cursor used for drawing
- Right mouse (when captured) brings up a context sensitive menu. For example, if cursor was on a wall, the Right mouse allows for changing the material.
- Ctrl-Up/Down turns off gravity and flies forwards or backwards in the direction of view. Try looking down first (Shift-S) then flying backwards (Ctrl-S) to get a view of the scene from above.
- 'M'-key toggles control panel menu. Use this to join the network (select Network Off -> tunnelvr.goatchurch.org.uk) will connect you to the main server where you can meet with other players and be shown around
- Thumb-stick -- forwards and backwards and sideways slides in direction of view
- Trigger -- slides on the ground in direction of the controller axis (short orange laser line)
- Grip -- turns off gravity and allows flying or hovering (hold for as long as you wish to stay off the ground)
- Grip+Trigger -- Flies in direction of controller axis
- Grip+Trigger+Thumbstick forward -- Flies in direction of controller at 5x speed.
- Menu button (inset button lower left) -- Open dialog window with further controls
Cave walls are made by creating polygons in vertical (sometimes horizontal) XC panes and then joining nodes between these polygons to create tubes that are divided into sectors.
There is a long laser pointer with a range of 50m that makes contact with surfaces with a red ball.
-
Trigger on unselected node -- activates XC Plane, and selects the node. If a node was already selected (it's yellow and there is yellow cursor line joining to it), then it adds or subtracts a line to it.
-
Trigger on selected node -- deselects node
-
Trigger on XC Plane with node selected -- continues drawing a sequence
-
Grip+Trigger on XC pane with node selected -- Moves selected node
-
Grip+Trigger on selected node -- Deletes node
-
Grip+ungrip on selected XC pane -- deselects XC Plane
-
Grip+ungrip on node -- deselects XC Plane and hides nodes
-
Trigger on an active tube, then release on disk then click a point on the disk -- Creates an intermediate node which distorts the wall of the tube
-
Trigger on an intermediate (purple) node, then release on disk then click a point on the disk -- Moves the intermediate node.
-
Trigger on an intermediate (purple) node, then release on disk then grip+click a point on the disk -- Deletes the intermediate node.
-
Grip on target+select menu option+release -- executes a context sensitive command or changes material
-
Thumb-stick left/right -- snap rotates view 45 degrees left or right (consistent with most other VR games)
-
Right hand facing face and moved rapidly towards face -- shorten laser pointer to enter rope drawing mode
-
Right hand facing face and moved rapidly away from face -- return to normal pointer mode
For either hand:
- thumb and forefinger pinch -- same as trigger button
- thumb and middle finger pinch -- same as grip button
- thumb and pinky and ring finger -- menu button (Thumb-stick features are not accessible.)
-
SelectXC
-
HideXC
-
DeleteXC
-
DeleteTube
-
DoSlice - Splits or extends a tube.
To split a tube create an empty XC that crosses the tube, then Grip click on the tube and select DoSlice to split it into two tubes with an XC in the plane of the empty one. To extend a tube create an empty XC beyond the end of the tube, then create a single node in it. With that node selected Grip-click the tube and select DoSlice.
The cave is made from a series of cross sections connected by one or several lines to define a tube. When more than one line connects two cross sections, the tube is divided into sectors which can be individually coloured.
Most cross sections have a single contour. If there is more than one area defined in the cross section, then the tube connecting to the next cross section is either to a single area, or to the outer contour, depending on which nodes the connecting lines join to.
Tubes can be distorted by the addition of intermediate nodes added to the sector lines. Nodes of a cross section can be pulled out of the plane by selecting and holding down the right hand trigger on a node for 1 second, and then releasing at the appropriate position along the perpendicular line.
Side junctions are formed by setting the material of a sector to Hole (transparent), then Right hand grip while pointing at the hole to bring up the context sensitive menu, and selecting 'HoleXC' to generate a hole type cross section (with green nodes), that can be used exactly like a normal cross section, except that it is tied to the hole.
In rope drawing mode you have a short laser with a blue spherical cursor. If you push this into a wall and pull the trigger it starts a network of rope nodes you can draw into space.
If the rope network as zero or two odd connected nodes, then it's a rope and simulates dangling down under gravity.
You can also make stalactites, rocks and signposts in rope drawing mode.
Cave data is sourced from Cave-Registry NorthernEngland
in processed survex 3d format. It requires one of the computers on the network to be able to
execute python and dump3d from a command line to convert this into the geometry format that TunnelVR needs.

Hidden parameters
If you have an XC selected (or none selected and a centreline exists), the --resources dropdown in the GUI pane allows you to "Print XCproperties" or "Print Centreline" to see and control the hidden parameters. These are
- potreeurlmetadata -- url link to the metadata.json of a potree file.
- geometrymode -- "tunnelvr" for normal, or "housahedron" for new house drawing thing
- splaystationnoderegex -- regex to identify splay stations from the normal survey stations
It is possible to convert a ROPEHANG type into a CENTRELINE type XCdrawing if one does not exist by changing the drawingtype parameter and clicking "Set XCproperties". This is provided to make it convenient to create this object in a pointcloud world for aligning 2D drawings and associating potree geometry and the housahedron setting. The potree transform is taken from the centreline transform, so you need to make sure that rotation=[-90,0,0] to account for Z-vector up in its format
Any running copy of TunnelVR can act as a server by selecting Network Off -> As Server. If another instance is running on the same local area network, then doing Network Off -> Local-network will find and connect to the designated server.
Download the headless server version, unpack the linux zip file, then execute:
./Godot_v3.3.2-stable_linux_server.64 --main-pack tunnelvr_v0.6.3.pck
Execute this in a screen terminal window to allow it to persist.