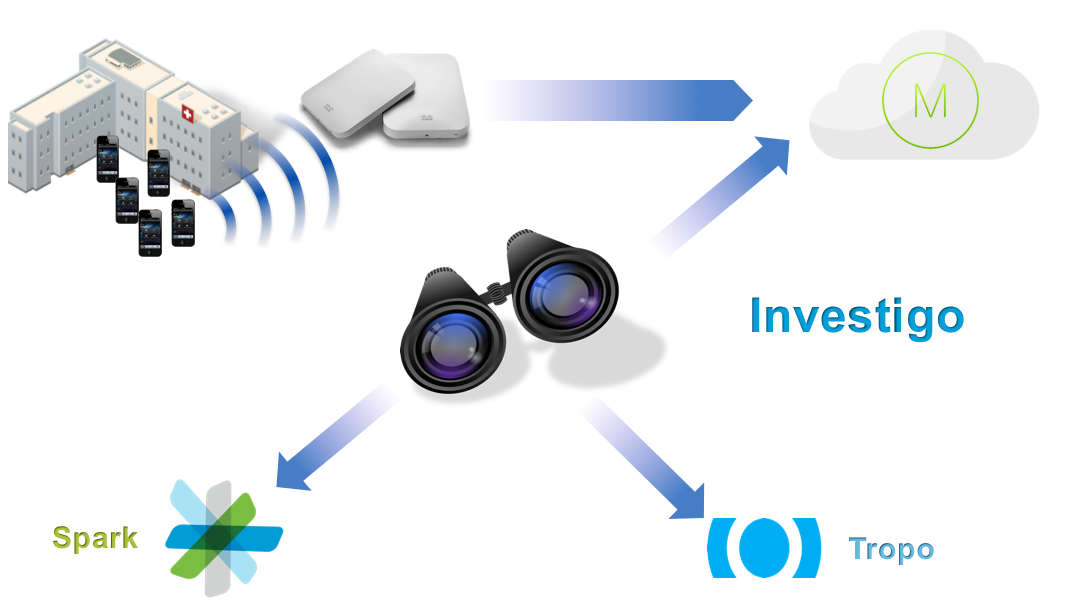
Investigo is Latin for track or trace out, investigate. Investigo is a bot for Spark, Cisco's unified communications service, which enables customers to use wireless infrastructure to locate Wi-Fi capable assets. The Investigo is a mash-up bot that uses several solutions: Spark, Tropo and Meraki wireless access points, spanning from the enterprise to the Internet of Things world.
- This project utilizes data provided by http://live-map.meraki.com, which shows anonymized location information of Meraki employees in the HQ of the company.
- There's a server running this project on https://investigo-prod.herokuapp.com/
- Here's a demo of the bot: https://www.youtube.com/watch?v=5tSRDfU75w0
- Track a specific wireless device using its name;
- Find the bot on Spark using its email: investigo@sparkbot.io
- Start a 1:1 conversation with Investigo on Cisco Spark and use the available commands.
- There might be a delay on the first command you run (the server needs to be woken up)
Available commands on Spark:
- list assets (provides a list of registered assets)
- find asset name of the asset (locates the asset on the map)
- find MAC Address (find a wireless device using its MAC address)
- fix name of the asset (updates the MAC address of the asset to an address that is currently being seen on the network)
- open (gives a link to the web console of the app)
If you want to use it on your Meraki network, here are the steps:
-
Spin up the server that will receive the location information from Meraki Dashboard. Follow the guide: https://github.com/meraki/scanning-api-app
-
Download the code available at: https://github.com/rafael-carvalho/investigo-meraki
-
Configure your server settings:
- Install all libraries described on requirements.txt.
- Make sure you have a PostgreSQL server running.
- Make sure you change all environmental variables on the .env file:
ADMIN_NAME=admin's name on Spark
APP_SETTINGS=config.DevelopmentConfig
DATABASE_URL=postgres://...
NOTIFICATION_SMS_PHONE_NUMBER=+12345678900
SECRET_KEY=changethis
SHOW_WEB_LINK=True
SPARK_TOKEN=get your token from https://developer.ciscospark.com
-
Run your server:
python run.py -
This server needs to be accessible from the Internet. If you don't have a public IP:
- You can use http://ngrok.com for to expose your localhost to the Internet.
- Alternatively, you can host your app on Heroku. ProcFile provided on the github repository
-
Go to your code and change
web/externalapis/meraki/__init__.pyto point to the server you created on step 1. -
Add a JSON file describing your location to the same folder as app/static/server_config/meraki/meraki-hq-san-francisco.json and change the file path on the same file of the previous step. Don't worry about the id's on this file.
-
Setup the server:
- Use a browser to go to your server's homepage:
https://public-ip.com - Click settings on the top menu
- Select cloud as your deployment mode
- Add a cloud server
- Use demo network
- Use a browser to go to your server's homepage:
-
Create a Spark webhook and point all messages to your public IP:
- You can use Spark's API documentation for that: https://developer.ciscospark.com/endpoint-webhooks-post.html
- Or you can use the helper script: https://github.com/rafael-carvalho/update-spark-webhook
This solution is meant for educational/proof of concept purposes only. Any use of this tool is at your own risk. There is no guarantee that they have been thorough testing in a comparable environment and we are not responsible for any damage or data loss incurred with their use.