
The live website can be viewed Timeless Men Watches
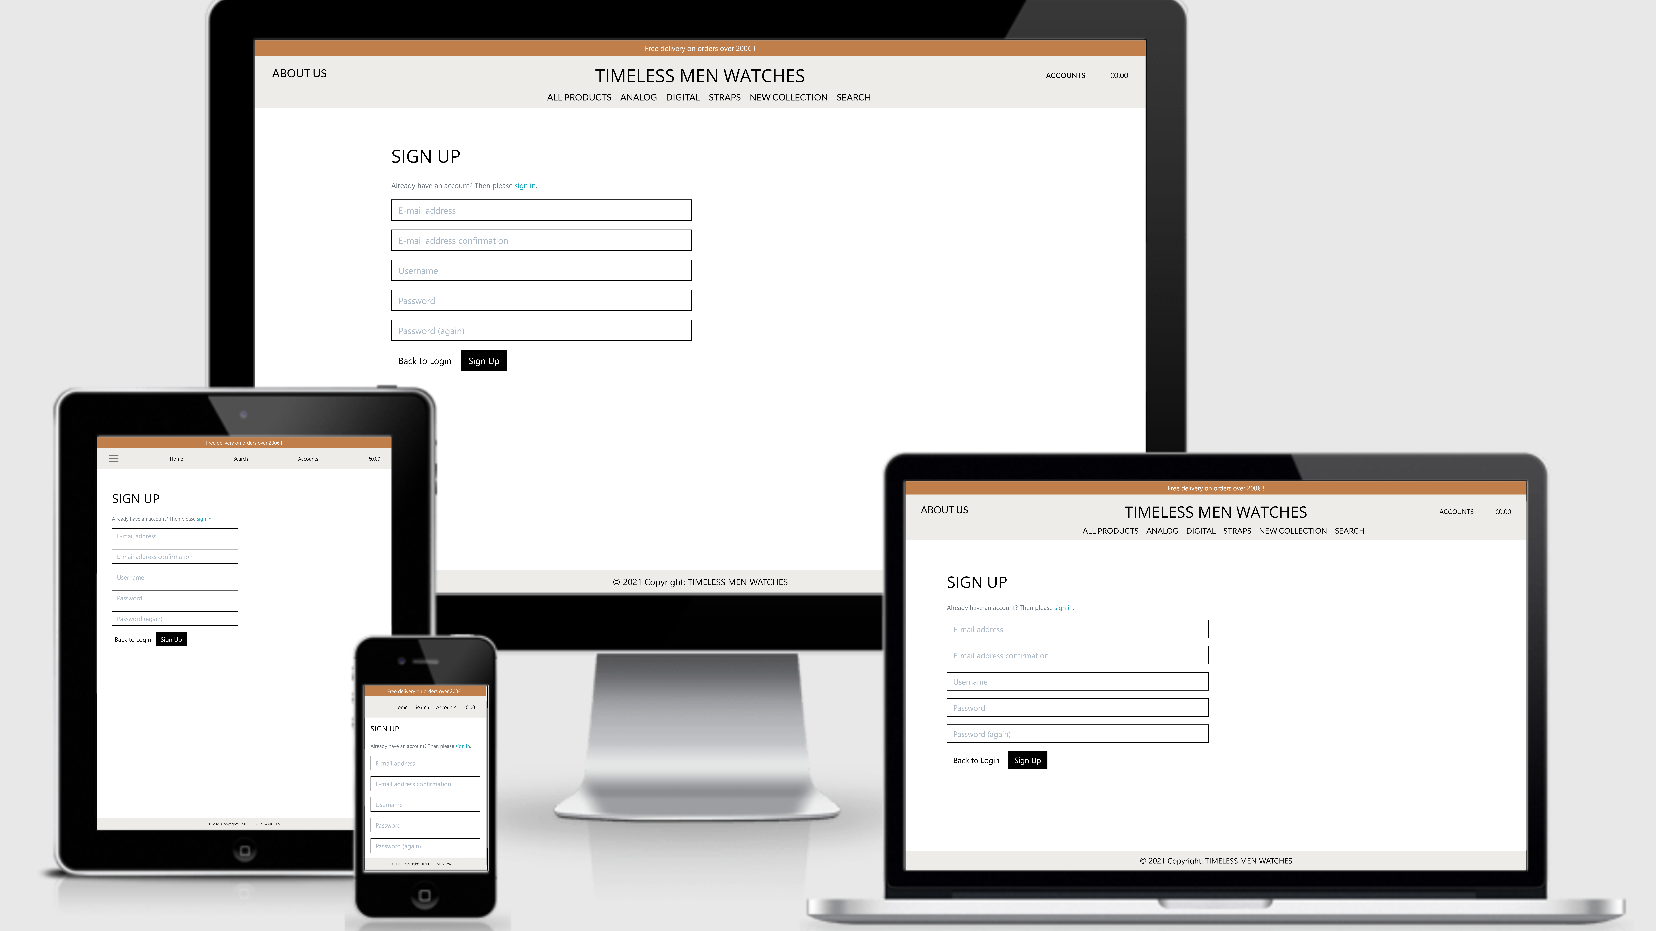
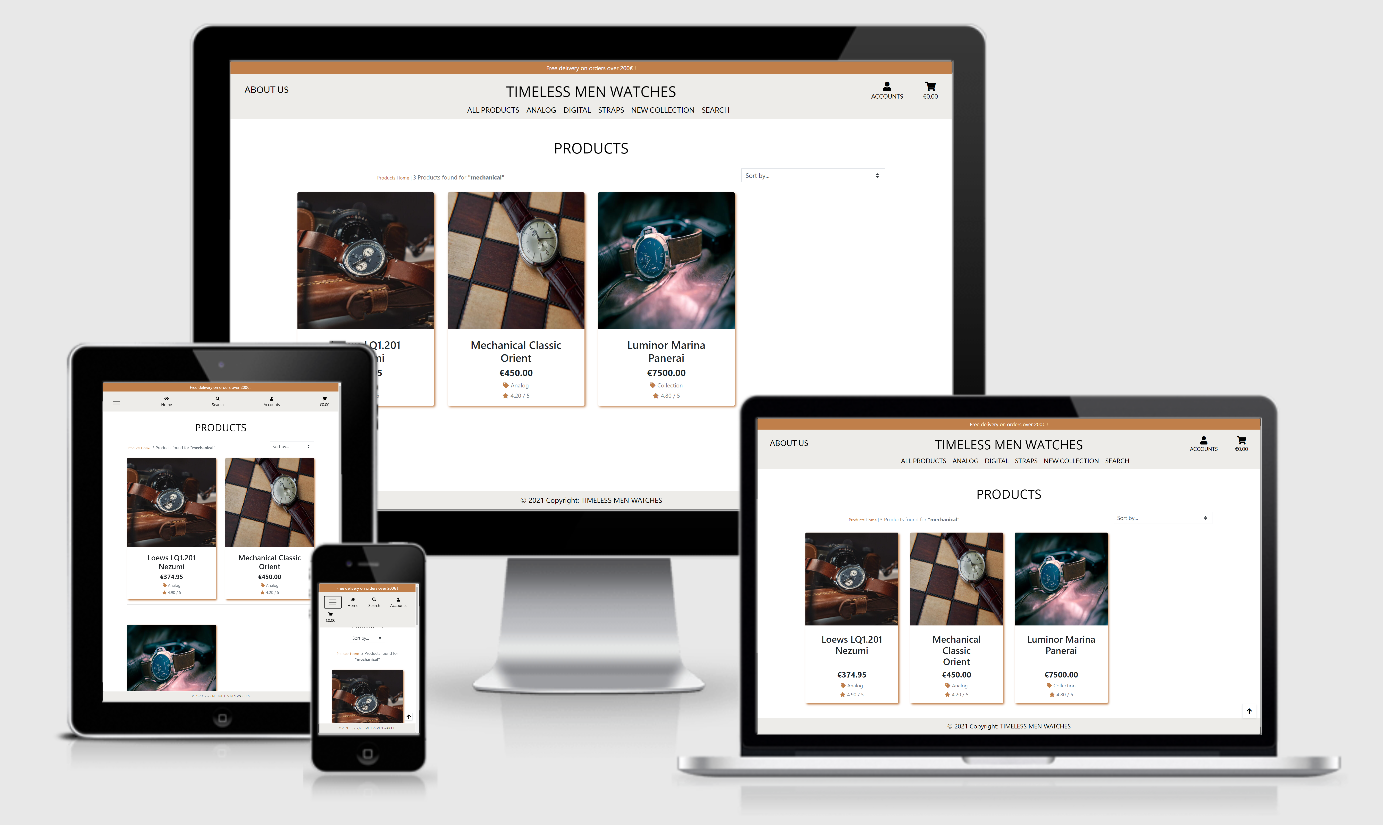
Testing viewports Responsive mockup
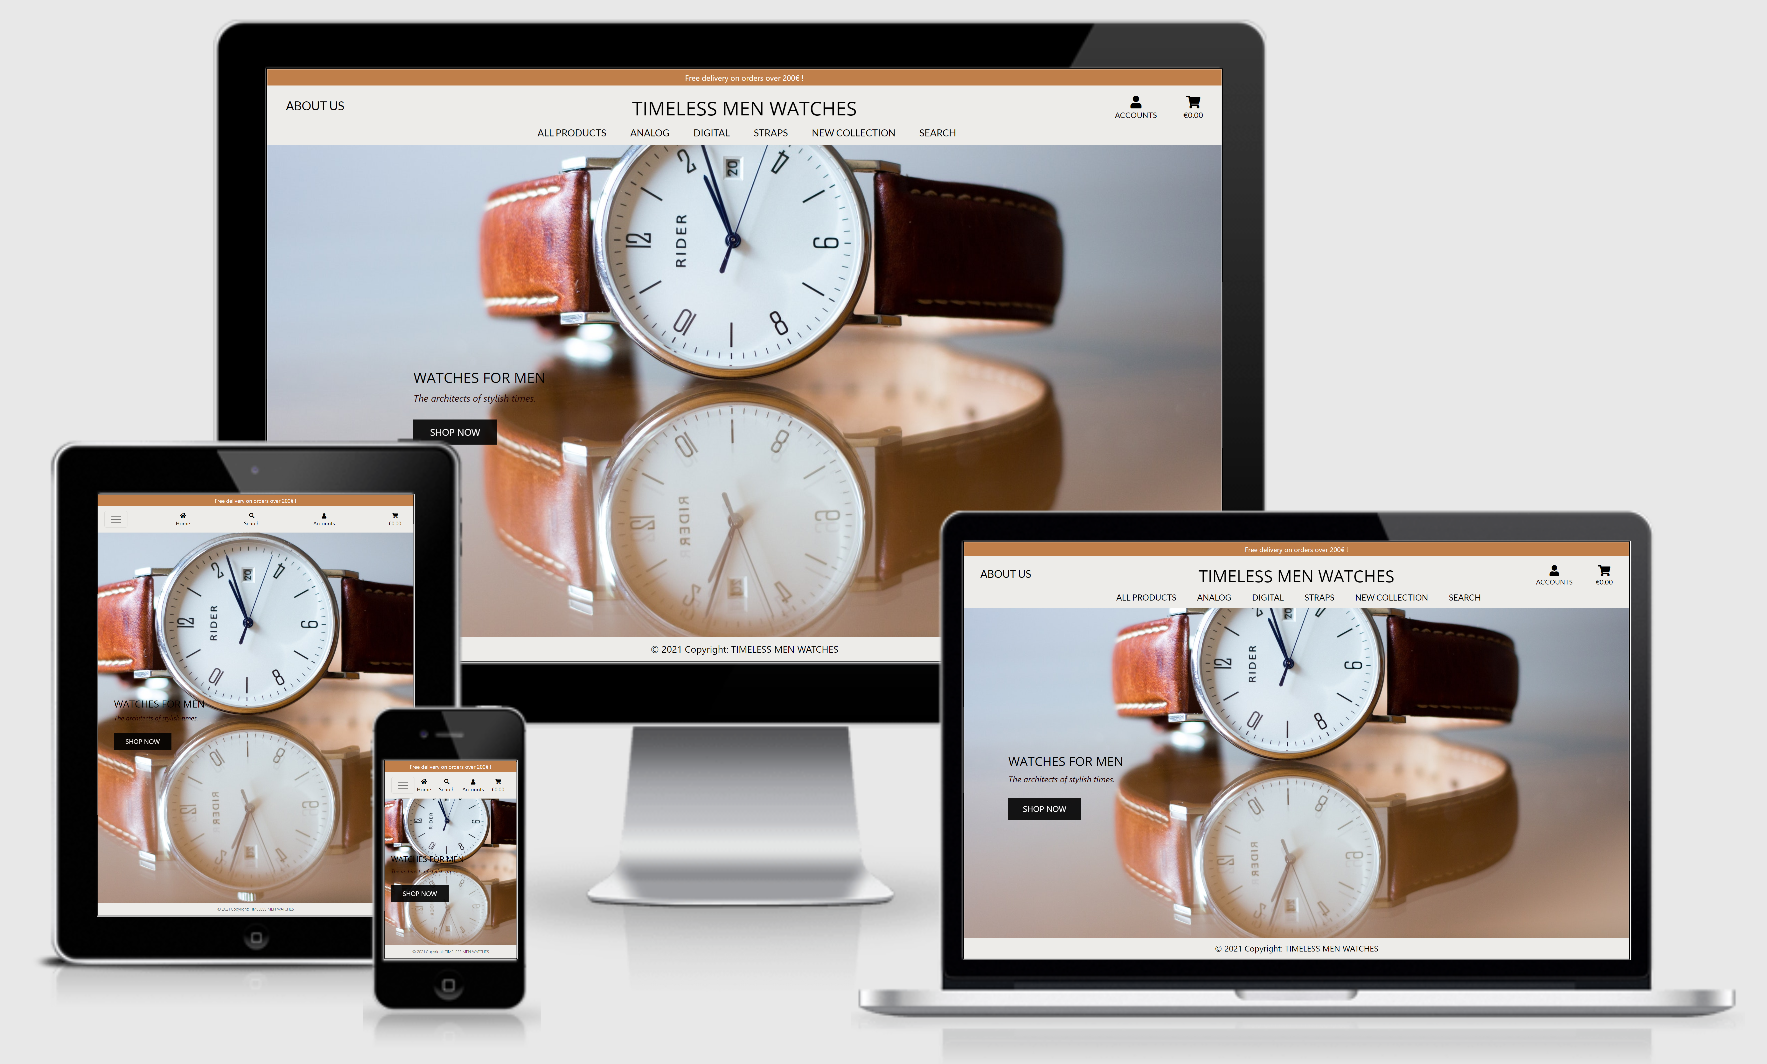
Based on a thorough research on several related sites, 'Timeless Men Watches' induces a simplistic idea of e-commerce in order to underline the basic 'CRUD' operations on databases. The intented purpose is to address and attract mostly men, but not only, with a refined taste for the 'fundemental' accessory of a styled man. The site's architecture is a minimalistical one to allow the user to focus more on the products themselves and not to be baffled with many unnecessary pop-ups or unwanted browsing. In other words it is a straight forward navigation and focused more on the product itself for a more detailed understanding and representation.
The goal of this project is to create a Full Stack web application to utterly demonstrate the knowledge and skillset obtained throughout the course. A passing grade in this project is required to graduate the course and obtain the Certification Degree. The site is using Python and Django Framework with a back-end database (PostgreSQL) for the back-end stack. HTML5, CSS3 with Bootstrap 4.5 as framework and jQuery are being used on the front-end stack.
- Prospects,mostly men, intrested to purchase watches and accessories.
- Prospects who want to get a deeper insight into history and functionality of a watch.
- Men who want to purchase a full service of a watch: guidance, assistance and warranty.
Click to see - User Stories Table
| User story ID | As a | Want to be able to... | So that I can... |
|---|---|---|---|
| Viewing and Navigation | |||
| 1 | Customer | View a list of products | Select item to purchase |
| 2 | Customer | View individual product details | Identify the price, name, brand, description, rating, category, etc |
| 3 | Customer | Easily view the total of my purchase at any time | See how much I have spent |
| Registration and User accounts | |||
| 4 | Site user | Easily register for an account | Have a personal account to be able to view my profile |
| 5 | Site user | Easily login or logout | Access my personal account information |
| 6 | Site user | Easily recover my password in case I forget | Recover access to my account |
| 7 | Site user | Receive an email confirmation after registration | Verify that my account registration was successful |
| 8 | Site user | Have a personalized user profile | View my personal order history and order confirmations, and save my payment information |
| Purchasing and Checkout | |||
| 9 | Site user | Search for a specific item from the product list | Find a specific item from the product list that I would like to purchase |
| 10 | Site user | Easily see what I've searched for and the results displayed separately | Check availability |
| Purchasing and Checkout | |||
| 11 | Customer | Easily select an item when purchasing it. | Ensure I do not accidentally select the wrong item |
| 12 | Customer | View items in my cart pending to be bought | Grant the total cost of my purchase |
| 13 | Customer | Adjust the number of items in my cart | Easily make changes to my purchase before checkout |
| 14 | Customer | Easily enter my payment information | Check out quickly if desired |
| 15 | Customer | Assess that my personal and payment information is safe and secure | Confident to provide the needed information to make a purchase |
| 16 | Customer | View an order confirmation after checkout | Verify that I haven't created any mistakes |
| 17 | Customer | Receive an email confirmation after checking out | To have an evidence of what I've purchased for my records |
| Admin and Store Management | |||
| 18 | Store Owner | Add a product | Add new products in my web-shop |
| 19 | Store Owner | Edit/Update an product | Change name, brand, description, case, strap, warranty, price and image of a product |
| 20 | Store Owner | Delete a product | Remove products that are not available |
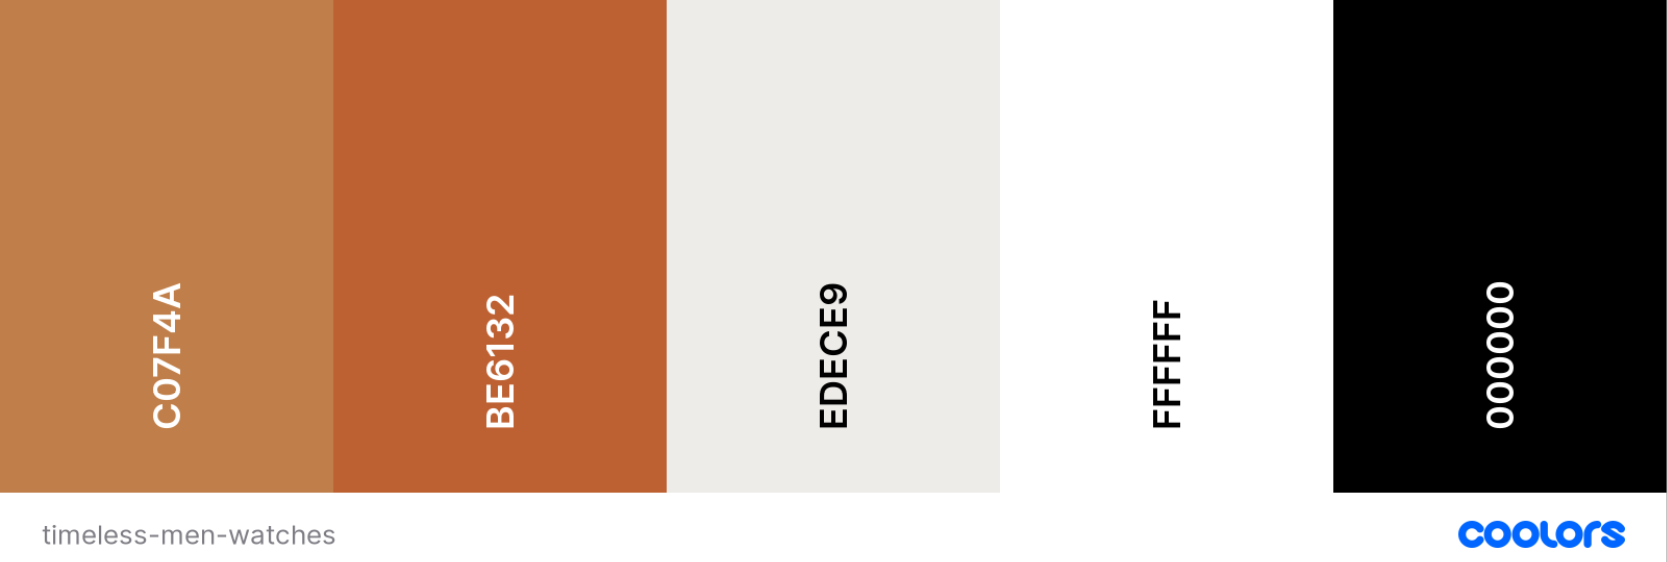
I have choosed a color scheme that is very close to natural tones and inspires elegance and rafinament. Basically every man's first choice for accessories.
To create the scheme I've used Coolors
I've used GoogleFonts with the current schema:
Open Sansfor the title and headers;Latofor the nav links;Robotofor the rest of the site; I've chosen these fonts because they complement well to each other and they are one of the most popular in this arrangement.
I've used FontAwesome as the main icon library across the project (e.g. forms, cart, search and user icons in navigation).
During the development phase I worked with sqlite3 database which is installed with Django.
For deployment(production), a PostgreSQL database is provided by Heroku as an add-on.
- The User model used in this project is provided by Django as a part of defaults
django.contrib.auth.models. More information about Django’s authentication system can be found here.
Database relationship can be found here.
Timeless Men Watches website is composed by six applications: home, about, products, cart, checkout, profiles with different sections affiliated.
The structure of the site is described in the section below:
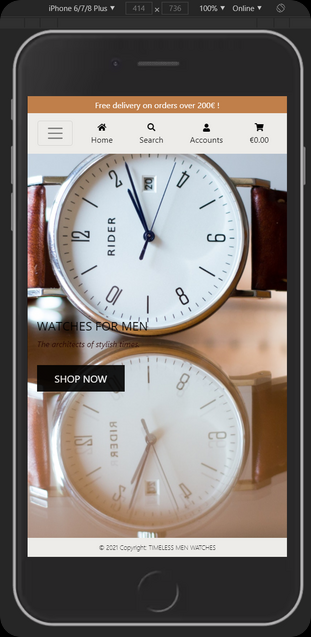
- Navigation bar (mobile top header) - - The navbar links vary depending on whether the user is logged in or not. When the user is logged in the
ProfileLogoutandProduct Managementlinks are shown. - Search - The search function allows the user to search by keywords or filter by price, name, rating and category.
- Main-nav with quick links to the main pages:
home,about us,all products,category_nameandsearchfunction, including alsoaccountsandcartthat are displayed on every viewport. Landing page with a simple and intuitive response for every type of user to become a potential client, seen on most common viewport.
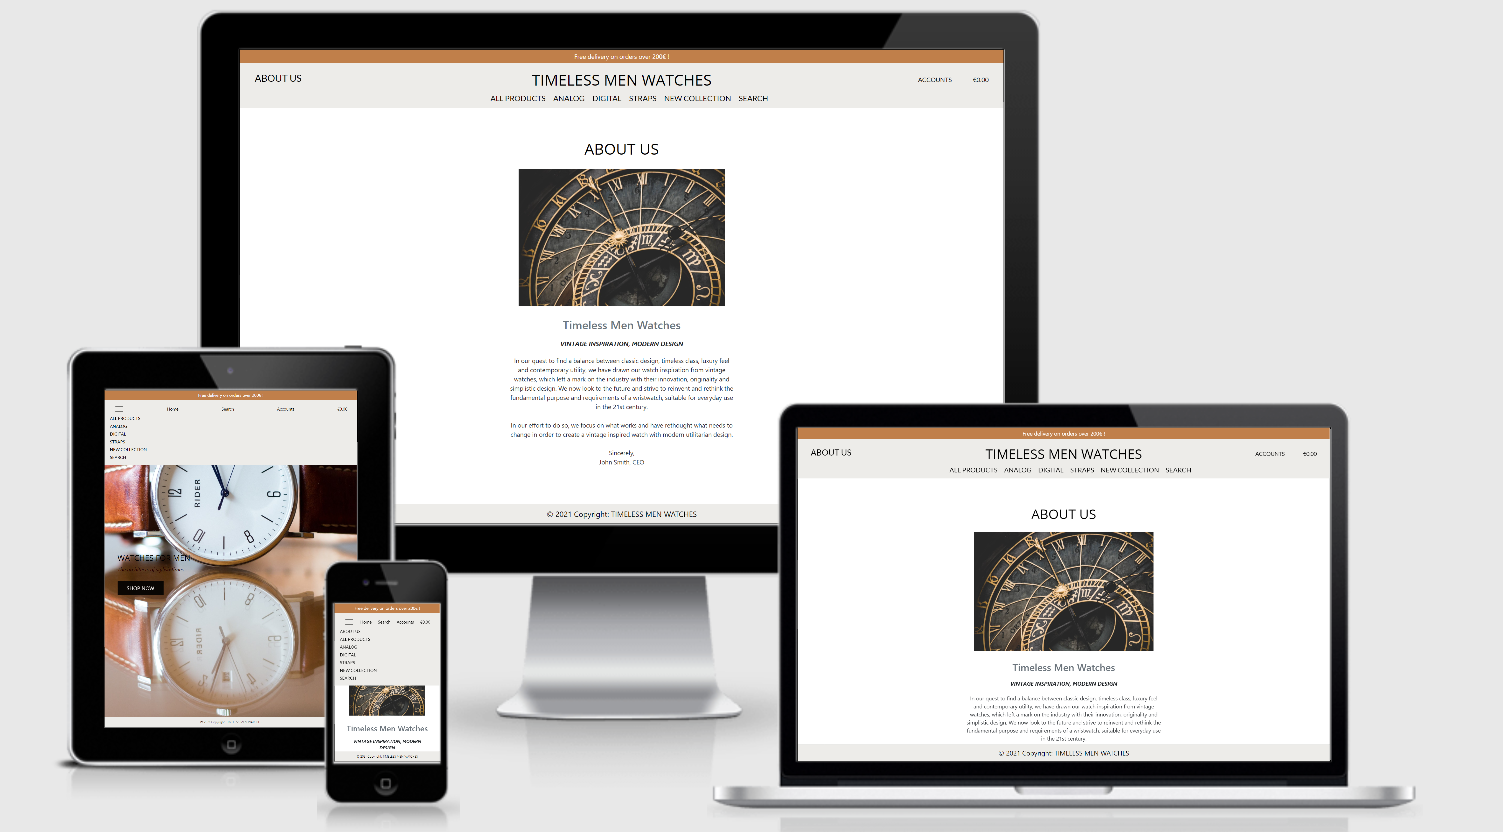
- A summary of the business concept as an introduction for the user.
- Allow new user to register for an account and allow existing users to login to their account.
- Register - User must provide a unique username and email address, which are checked against existing entries in the database. An email address and password is required, which must be entered twice to check it has been input correctly.
- Message - On successfully registering the user will be redirected to the home page. An alert message will notify the user that the account has been created and they are now logged in.
- The login page only requires the user to input there username and password. There is a link to the register page so a user can create an account, and a password reset link if a user has forgotten or lost their password and remember checkbox to store logging details.
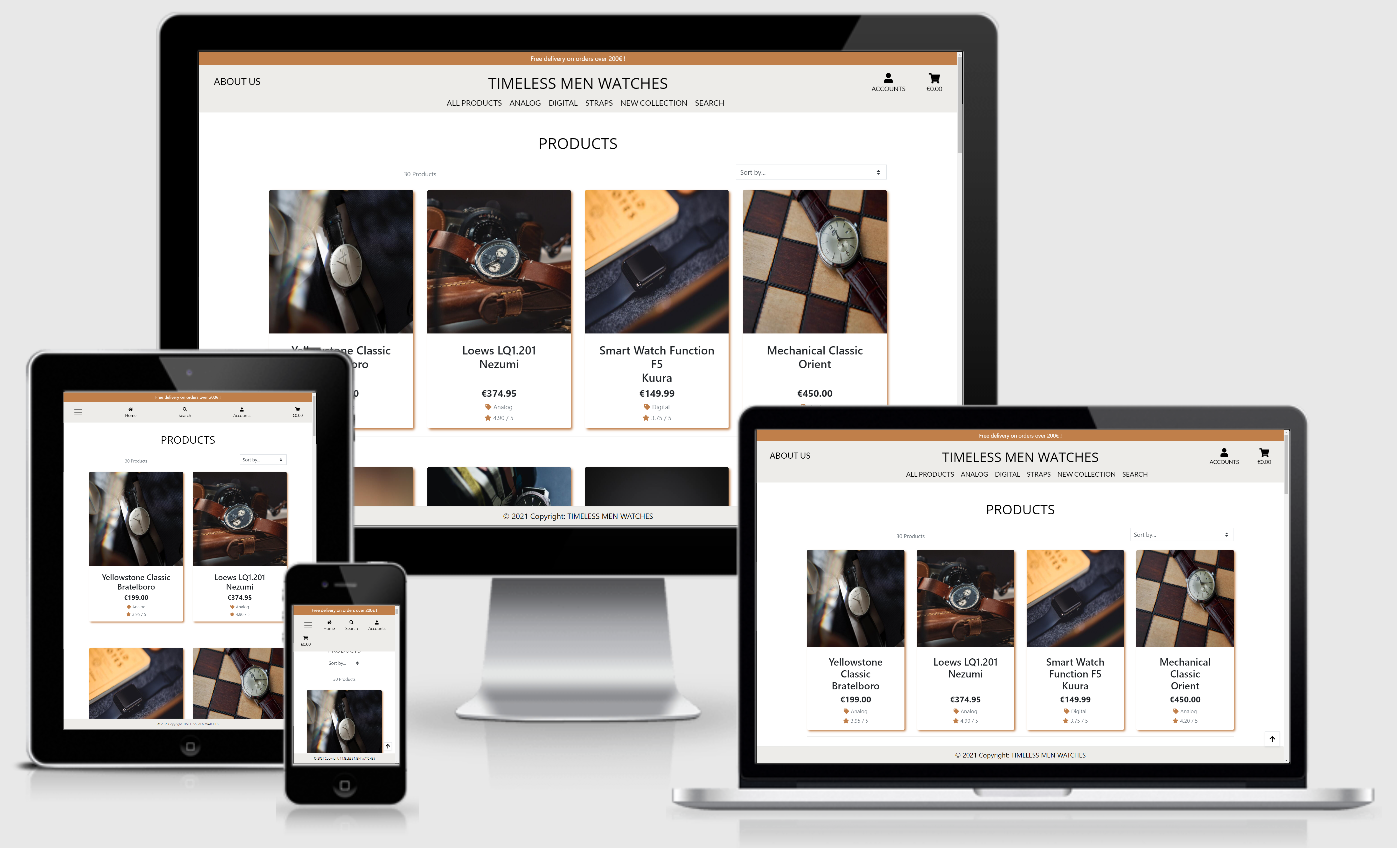
- All users are able to view this page, displays a general information about all the available products.
- Products can be viewed either by using
all productsor by simply clicking theshop nowbutton from home page. - Services count number informs the user the current services total.
- Sort box functionality added to filter by price, name, rating, category.
- Individual product can be added to the cart.
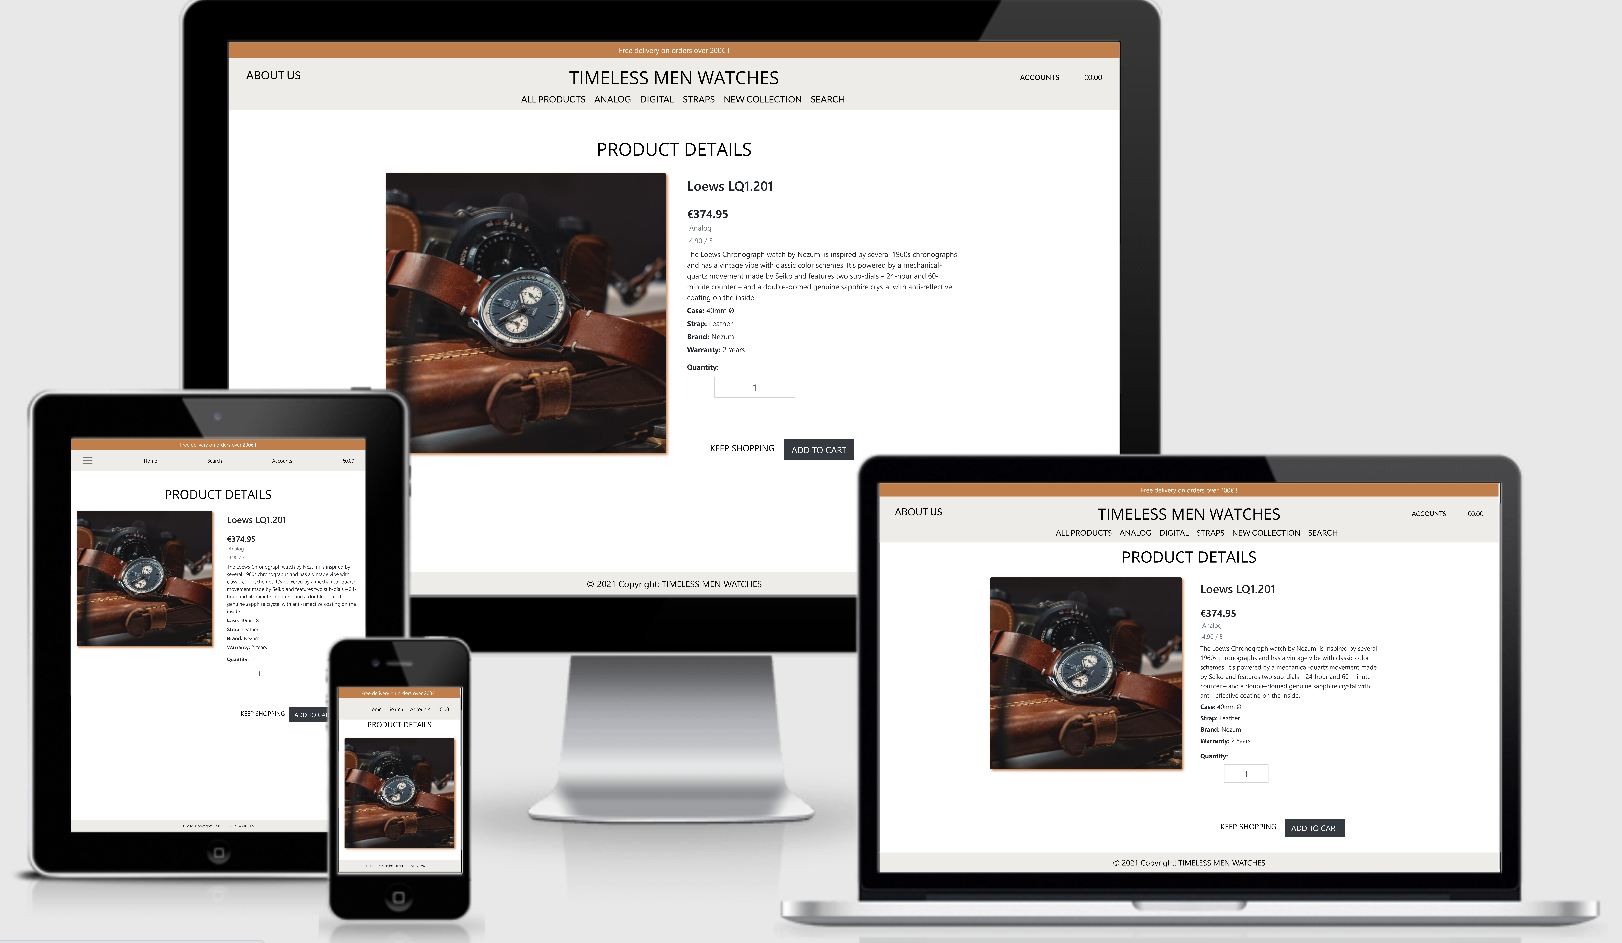
- All users are able to view this page, displays more information about the selected product
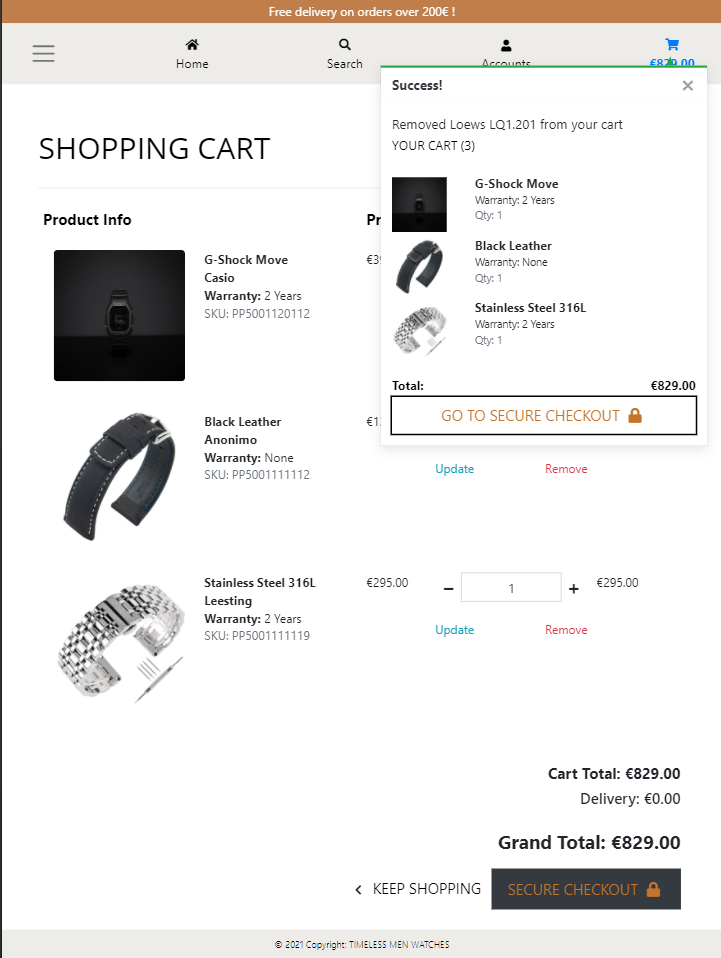
- Your items - Display a summary of the item in the cart where each product has a name, brand, warranty, SKU(number_id) and price attached.
- Edit quantity - User can amend the quantity of the services by clicking the '-' or '+' to increasing or decreasing the quantity in cart.
- Remove from shopping bag - Allows the user to remove the service from the cart.
- Continue shopping - Redirects the user back to the browse all products page to continue shopping.
- Designated page to return the results of the search functionality
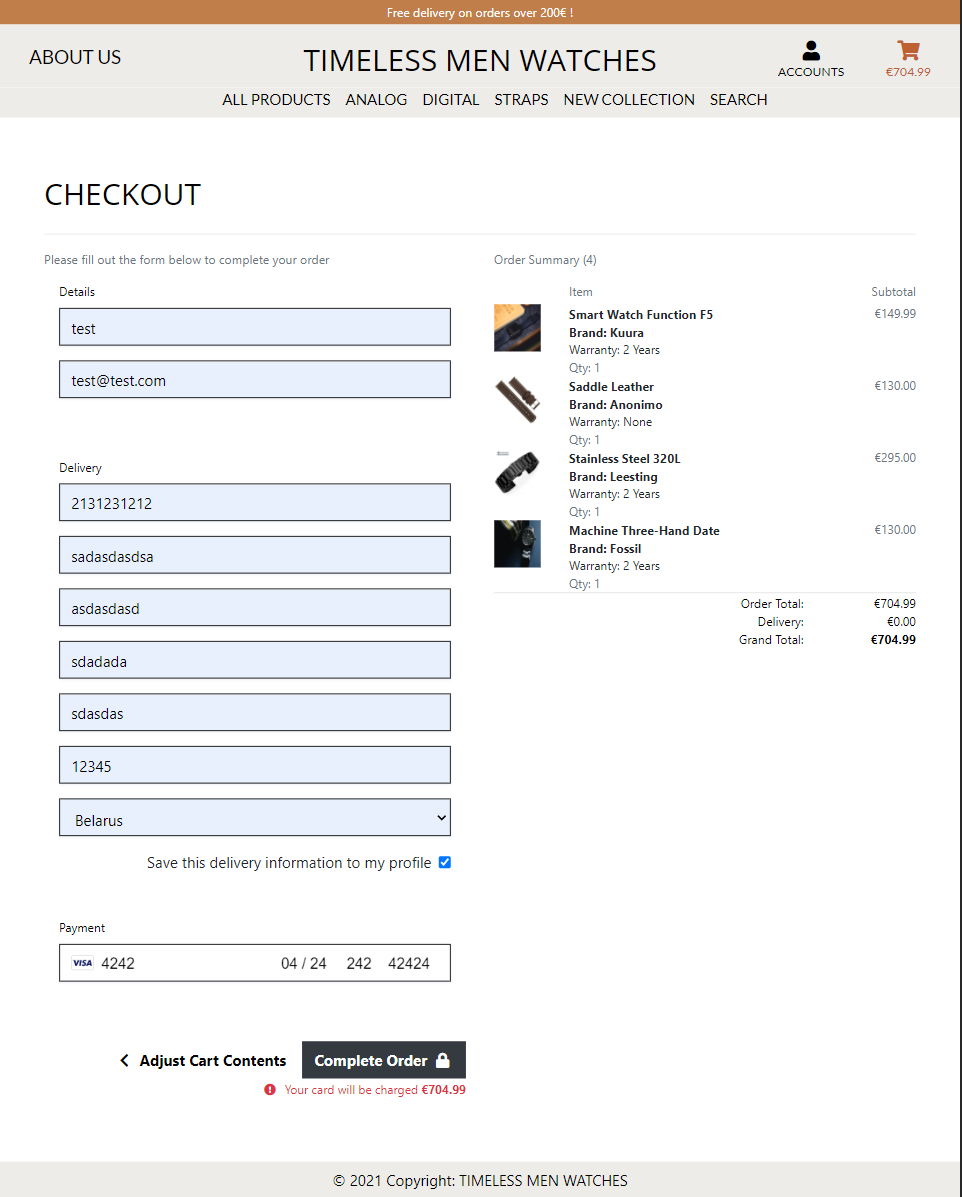
- Order summary - Display a summary of the products in the bag with each product showing the an image, title, brand, warranty, quantity and price.
- Pay with card - Allows the user to make a card payment.
- Stripe - Allows the user to pay securely using Stripe payment
- Purchase Form - This form connects to the Stripe API to process a user's card details. No card details are stored locally or on the server, they are only sent to Stripe and then discarded.
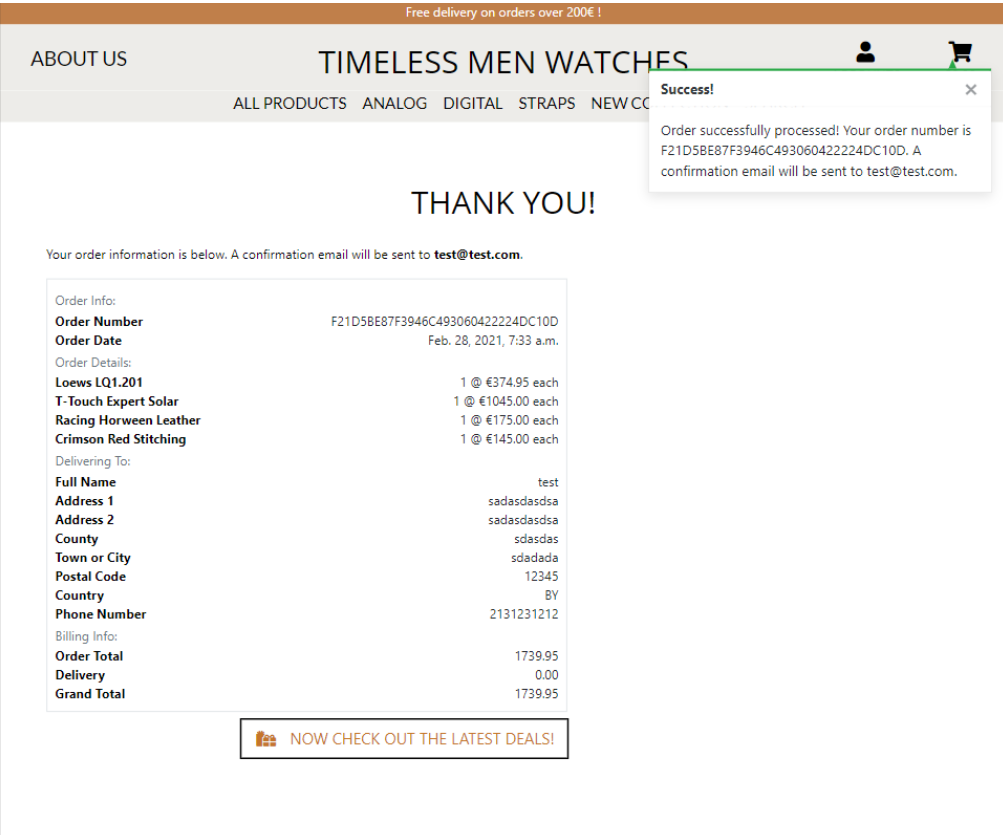
- Thank You page - User receives confirmation that the order has been placed and is given a order reference number.
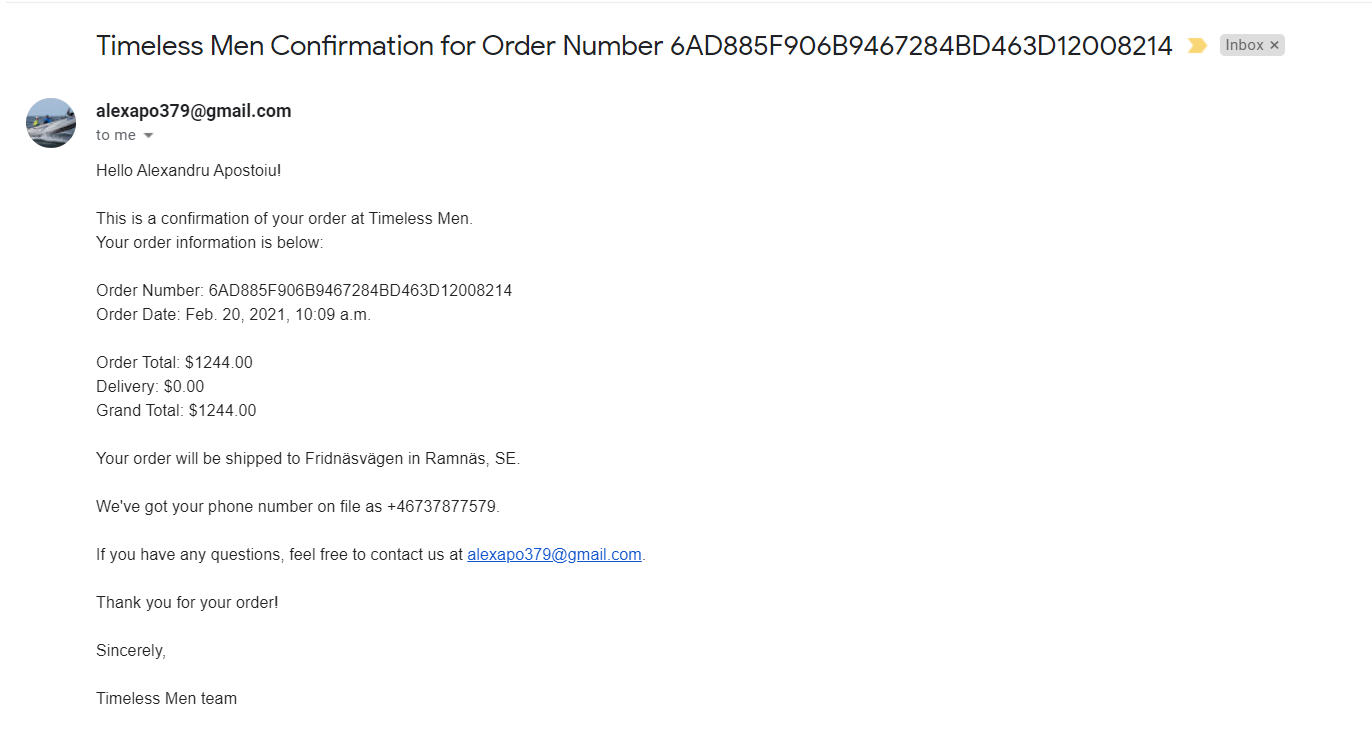
- Email - User receives email confirmation there order has been placed and receives a order summary.
- Order summary - Display an order summary listing each product showing the an image, title, brand, warranty, quantity and price, besides of the billing information.
- Message - confirmation that the order was placed.
- Back to products buttons in case user wants to buy more products.
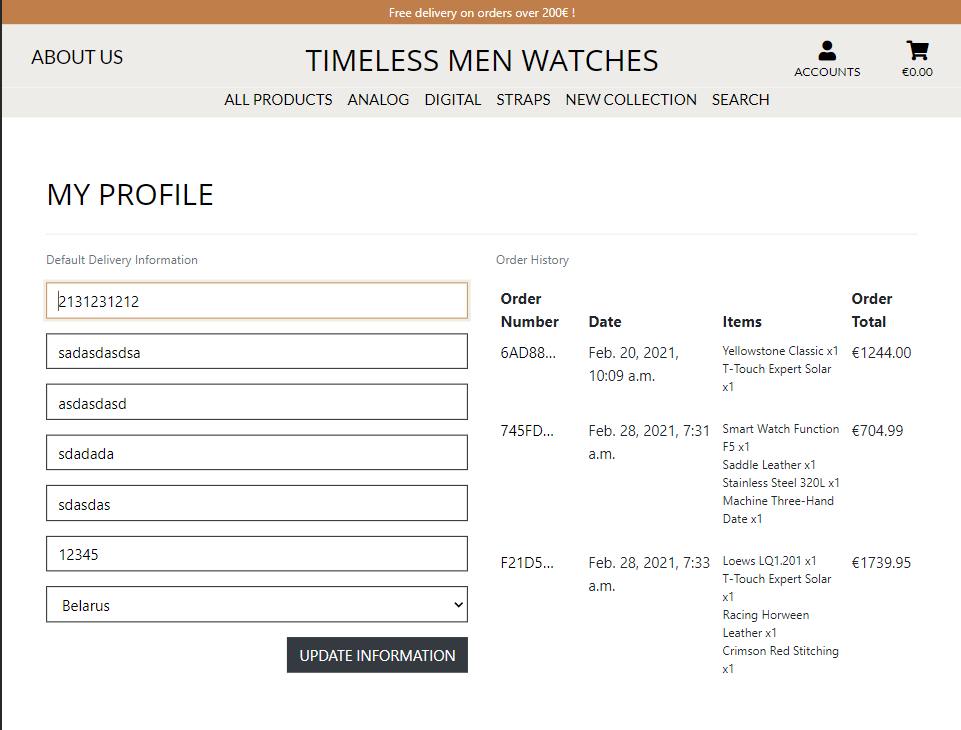
- Only available to logged in user.
- Billing information can be updated from this view.
- Order History- Users are able to view a summary of their previous orders placed. Users can click on the hovered order number link which provides a detail view of the selected order. Users can click Back to Profile to go backwards.
- Users can log out from this tab.
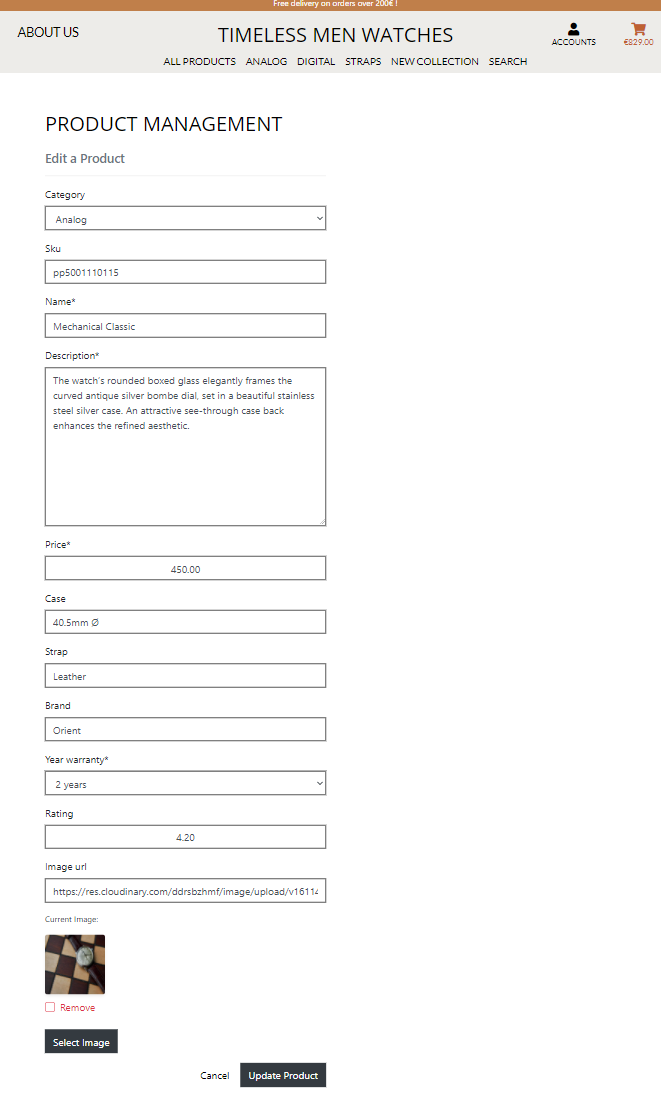
- Only available to logged admin user!
- Add | View | Edit | Delete a product admin can log in to add new product or edit and delete available products.
- Allauth templates customized for this project.
Custom 404 and 500 pages contain error messages and error handlers to catch these errors. A custom message with a link allows the user to redirect back to the home page.

A 'must' have necessity to prevent edit/delete a product by mistake.
Automatic counting for this will be a top priority feature to be implemented in the future, rewarding the client to have more visibility of what the potential customers are searching.
This feature allows users to 'log in' using social networks accounts such Google and Facebook. With that feature would enhance user's experience and make the 'login process' easier and faster.
Another important features that I've noticed searching the internet for sources of inspiration on other similar sites.
Any website can have endless possibilites to extend. Here are some 'minor' ones that I left to consider:
- Pagination for and easier navigation throughout the products while the database grow larger.
- Reviews page where a blog-type section gets interactive with the comunity of customers.
- Detailed page for the warranty of a product.
- Notification for any product that it is on
Salewhile the page is active. - Discounts and bonification as actions for improvement the client fidelity.
- Privacy policy and legal terms section.
- HTML
- CSS
- JavaScript
- Python
- Jinja - templating language for Python, to display back-end data in HTML.
- Django - Python framework for building the project.
- Bootstrap - as the front-end framework for layout and design.
- Google Fonts - to import fonts.
- FontAwesome - to provide icons used across the project.
- JQuery - to simplify DOM manipulation and to initialize Bootstrap functions.
- Gunicorn - a Python WSGI HTTP Server to enable deployment to Heroku.
- Psycopg2 - to enable the PostgreSQL database to function with Django.
- Stripe - to handle financial transactions.
- Django Crispy Forms - to style Django forms.
- [MATH and datetime] were also used for basic math operations and datetime
- GitPod - an online IDE for developing this project.
- GitHub provides the hosting for software development control version using Git.
- Am I Responsive to test responsiveness and to create the images portrait in this readme file.
- PIP - for installation of necessary tools.
- AWS S3 Bucket - to store static and media files in prodcution.
- Boto3 for compatibility with AWS.
- Travis - for integration testing.
- Cloudinary - to host images used in README and also product's images to provide URLs.
- Unsplash - to download images for the products and landing page.
- Figma - to create wireframes.
- Coolors.co - to create colour palette used in the README.
- SQlite3 - a development database.
- PostgreSQL - a production database.
Database relationship:

- GitHub - as a remote repository to push and store the committed changes to my project from Git.
- Heroku - as the hosting platform to deploy my app.
Devices and platforms used for testing:
- Google Chrome.
- Mozilla Firefox.
- Opera.
- laptop, laptop with touch (width 1440px);
- Galaxy S5;
- Pixel2, Pixel 2XL;
- Iphone 5/SE, Iphone 6/7/8;
- Iphone 6/7/8 Plus, IphoneX;
- Ipad and Ipad Pro;
*HTML: I have used https://validator.w3.org/ in order to validate the HTML code.
*CSS: I have used https://jigsaw.w3.org/css-validator/ in order to validate the CSS code & CSS prefixes were checked against with https://autoprefixer.github.io/
*JavaScript: I have used https://jshint.com/ in order to check the JavaScript code.
*PEP8 Online: (http://pep8online.com/) was used to validate Python.
Errors not handled:
- Missing href: The href attribute on a and area elements is not required; when those elements do not have href attributes they do not create hyperlinks.
- An exception to PEP 8 is our rules on line lengths. Don’t limit lines of code to 79 characters if it means the code looks significantly uglier or is harder to read. We allow up to 119 characters as this is the width of GitHub code review.
- Ignore avoid using null=True on string-based fields such CharField.cornf for the non-required address formats.
- Ignore avoid using null=True on string-based fields such URLField and ImageField for the images.
In addition to the manual testing, I used Travis CI for Continuous Integration testing of my code. So far 34 tests had been implemented.
The Coverage library was used throughout testing to help keep track of how much of my code was covered by the tests.
The tests provide an overall coverage of 45%.

To generate your own coverage report install the package using pip install coverage
-
Run
coverage run manage.py test -
Then
coverage htmlto generate the report -
The report can be viewed in a browser by opening the
index.htmlfile from inside thehtmlcovfolder with the commandpython3 -m http.server. -
Feature work Test coverage percent validation based on threshold for the development process.
The 'Timeless Men Watches' project was developed using the GitPod online IDE and using Git & GitHub for version control. It is hosted on the Heroku platform, with static files on Gitpod and user-uploaded images being hosted in AWS S3 Basket.
To be able to run this project, the following tools have to be installed:
Apart from that, you also need to create accounts with the following services:
- You can clone this repository directly into the editor of your choice by pasting the following command into the terminal:
git clone https://github.com/morphy80/timeless_men.git
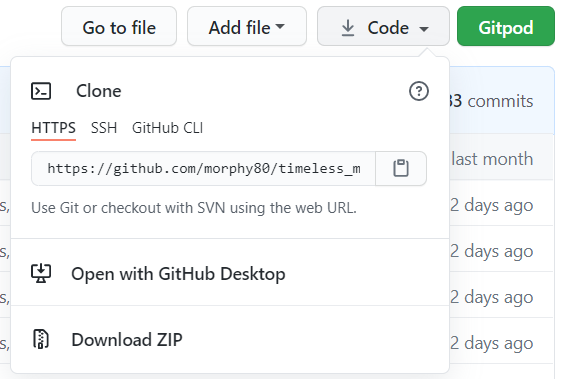
Note: You can read more information about the cloning process on the GitHub Help page.
- Set up environment variables.
Note, that this process will be different depending on IDE you use.
In this it was done using the following way:- Create
.envfile in the root directory. - Add
.envto the.gitignorefile in your project's root directory - In
.envfile set environment variables with the following syntax:
import os
os.environ["DEVELOPMENT"] = "True"
os.environ["SECRET_KEY"] = "<Your Secret key>"
os.environ["STRIPE_PUBLIC_KEY"] = "<Your Stripe Public key>"
os.environ["STRIPE_SECRET_KEY"] = "<Your Stripe Secret key>"
os.environ["STRIPE_WH_SECRET"] = "<Your Stripe WH_Secret key>"
- Create
Read more about how to set up the Stripe keys in the Stripe Documentation
- Install all requirements from the requirements.txt file putting this command into your terminal:
pip3 install -r requirements.txt - In the terminal in your IDE migrate the models to crete a database using the following commands:
python3 manage.py makemigrations
python3 manage.py migrate - Load the data fixtures(categories, products) in that order into the database using the following command:
python3 manage.py loaddata <fixture_name> - Create a superuser to have an access to the the admin panel(you need to follow the instructions then and insert username,email and password):
python3 manage.py createsuperuser - You will now be able to run the application using the following command:
python3 manage.py runserver - To access the admin panel, you can add the
/adminpath at the end of the url link and login using your superuser credentials.
To start Heroku Deployment process, you need to clone the project as described in the Local deployment section above.
To deploy the project to Heroku the following steps need to be completed:
- Create a requirement.txt file, which contains a list of the dependencies, using the following command in the terminal:
pip3 freeze > requirements.txt - Create a Procfile, in order to tell Heroku how to run the project, using the following command in the terminal:
web: gunicorn timeless_men.wsgi:application git add,git commitandgit pushthese files to GitHub repository.
NOTE: these 1-3 steps already done in this project and included in the GitHub repository, but ilustrated here as they are required for the successfull deployment to Heroku.
As well as that, other things that are required for the Heroku deployment and have to be installed: gunicorn (WSGI HTTP Server), dj-database-url for database connection and Psycopg (PostgreSQL driver for Python). All of the mentioned above are already installed in this project in the requirements.txt file.- On the Heroku website you need to create a new app, assign a name (must be unique),set a region to the closest to you(for my project I set Europe) and click Create app.
- Go to Resources tab in Heroku, then in the Add-ons search bar look for Heroku Postgres(you can type
postgres), select Hobby Dev — Free and click Provision button to add it to your project. - In Heroku Settings click on Reveal Config Vars.
- Set the following config variables there:
| KEY | VALUE |
|---|---|
| AWS_ACCESS_KEY_ID | <your aws access key> |
| AWS_SECRET_ACCESS_KEY | <your aws secret access key> |
| DATABASE_URL | <your postgres database url> |
| EMAIL_HOST_PASS | <your email password(generated by Gmail)> |
| EMAIL_HOST_USER | <your email address> |
| SECRET_KEY | <your secret key> |
| STRIPE_PUBLIC_KEY | <your stripe public key> |
| STRIPE_SECRET_KEY | <your stripe secret key> |
| STRIPE_WH_SECRET | <your stripe wh key> |
| USE_AWS | True |
- Copy DATABASE_URL's value(Postrgres database URL) from the Convig Vars and temporary paste it into the default database in settings.py.
You can temporary comment out the current database settings code and just paste the following in the settings.py:
  DATABASES = {
        'default': dj_database_url.parse("<your Postrgres database URL here>")
    }
Important Note: that's just temporary set up, this URL should not be committed and published to GitHub for security reasons, so make sure not to commit your changes to Git while the URL is in the settings.py.
9. Migrate the database models to the Postgres database using the following commands in the terminal:
python3 manage.py makemigrations
python3 manage.py migrate
10. Load the data fixtures(categories, products, itinerary, itinerary_items, events) into the Postgres database using the following command:
python3 manage.py loaddata <fixture_name>
11. Create a superuser for the Postgres database by running the following command(you need to follow the instructions and inserting username,email and password):
python3 manage.py createsuperuser
12. You need to remove your Postgres URL database from the settings and uncomment the default DATABASE settings code in the settings.py file.
Note: for production you get the environment variable 'DATABASE_URL' from the Heroku Config Vars and use Postgress database, while for development you use the SQLite as a default database.
13. Add your Heroku app URL to ALLOWED_HOSTS in the settings.py file.
14. You can connect Heroku to GitHub to automatically deploy each time you push to GitHub.
To do so, from the Heroku dashboard follow the steps:
- Deploy section -> Deployment method -> select GitHub
- link the Heroku app to your GitHub repository for this project
- click Enable Automatic Deploys in the Automatic Deployment section
- Run
git pushcommand in the terminal, that would now push your code to both Github and Heroku, and perform the deployment.
Alternatively, in the terminal you can run:
heroku login- after adding and comitting to Git, run the following command:
git push heroku master
- After successful deployment, you can view your app bu clicking Open App on Heroku platform.
- You will also need to verify your email address, so you need to login with your superuser credentials and verify your email address in the admin panel. Now you will be able to view the app running!
The static files and media files (that will be uploaded by superuser - product/product images) are hosted in the AWS S3 Bucket. To host them, you need to create an account in AWS and create your S3 basket with public access. More about setting it up you can read in Amazon S3 documentation and this tutorial.
In order to send real emails from the application, you need to connect it to your Gmail account, setting up your email address in EMAIL_HOST_USER variable and your app password generated by your email provider in EMAIL_HOST_PASS variable.
- The project's code was developed by following the Code Institute video lessons and based on the understanding of the Boutique Ado Django Mini-Project, but was customized, modified and enhanced to fit the project purposes. Some comments with credits to that were added to some parts of the code, where needed.
- Stack Overflow was extremely helpful and useful during the process of building this project, credits for the certain solutions are given in the comments.
- I also constantly referred to the following documentation sources during the development: Django, Stripe.
- Most of the images were taken from Unsplash. This version is only an educational exercise.
I would like to thank everyone who has helped me throughout the development of this project:
- My mentor Guido for his guidance, very useful tips and advice!
- Code Institute tutors Michael, Tim, Johan, Stephen, Miklos, Cormac, Igor and others for their help to debug issues, assistance and support!
- Many thanks to my fellow students, Slack community and, of course, to my special friend rubber ducky and my family for the time, patience, help and support!
For the project itself I received inspiration from boutique_ado and my tututors and also from other students via Slack.
This site is made for educational purposes only!