Flask API for training Regression models and displating plotly dashboard.
Resources were used for specific literature/code, it is provided in the respective implementation file. The code provided here is implicitly expected not to be replicated for homeworks, assignments or any other programming work. It is welcome to take inspiration, but it is implicitly expected to cite this resource if used for learning, inspiration purposes. Please refer code of conduct.
This is a repository for Regression algorithms using scikit-learn and display results using Plotly/Dash interactive plots and a dahsboard.
Clone the repository:
git clone https://github.com/sushmaakoju/regression-api.git
cd regression-api
Assuming you already installed Python3.8.x, ( Optional pre-requisites: Java and Spark/Hadoop setup) install following python requirements.
-
Make sure you have command prompt from cloned repository:
cd regression-api or cd regression-api-master -
Install the requirements for the starting the flask api:
pip install -r requirements.txt -
To start api on Windows, just execute following command from command prompt:
start_api.bat -
To start api on Linux/MacOS, type following and
.\start_api.sh -
To test the api has successfully installed, open following url in browser:
http://127.0.0.1:8050/You should see following displayed:
{'result':"Welcome to Regression api!"} -
Once you start the api, you would have following urls for demo for test dataset:
-
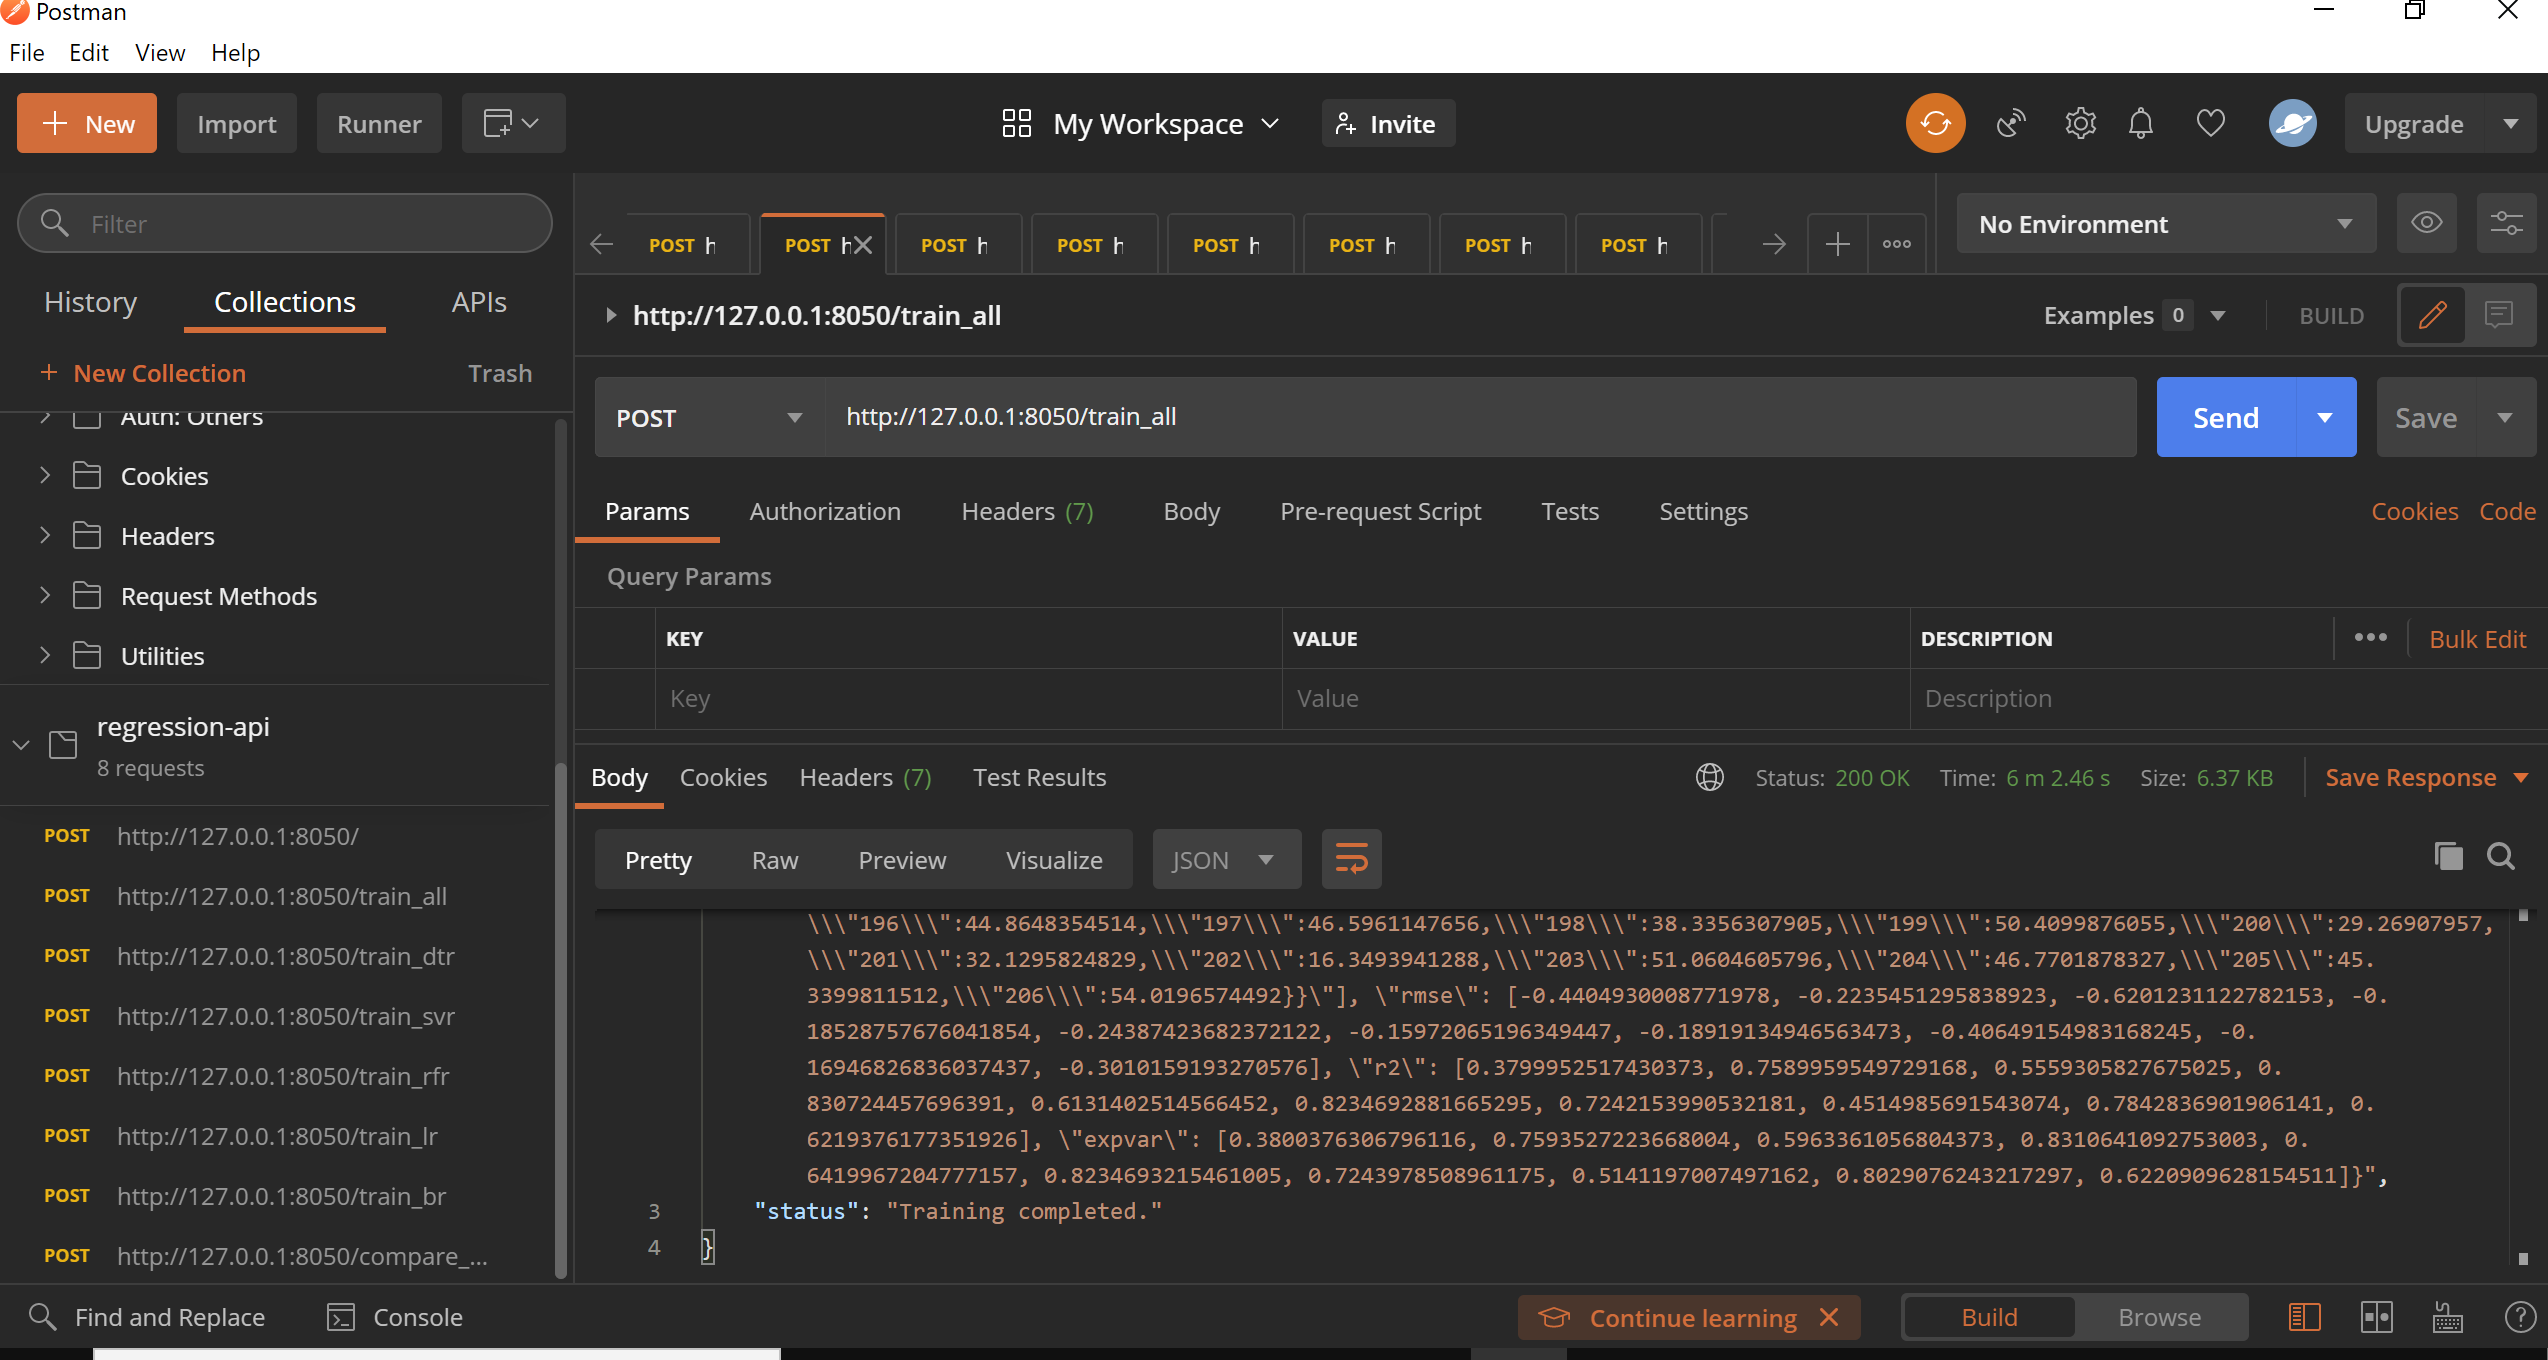
To test the api using Postman, please follow the steps:
-
Download and install postman https://www.postman.com/downloads/
-
Configure requests in Postman as follows:
- Create a New Collection "Regression-API" and create a New request with following url, request type
-
Create request for each of following Api URLS:
-
Assuming you started api using start_api script from previous step, Click "Send" from postman for one of requests and see if request is successfully.
-
-
Once you run any one of above results, navigate to http://127.0.0.1:8050/results/ to see Dashboard. The dashboard should look like this:

-
Dataset credits:
Pre-requisites:
- Java version 8+
- Python 3.8.x
-
Check Java version ()
java -version -
If you don't have Java installed, download and install it from here: Java 8x
-
Download Spark 3.0.1 with Hadoop 2.7.4 version from Spark
-
Verify checksum for Spark:
certutil -hashfile complete-path-to-downloaded-spark-targz-file SHA512 -
Compare checksum from checksums section for spark 3.0.1 Hadoop 2.7.4. This should be same as displayed in certutil command.
-
To install, create a Spark folder
mkdir Spark cd Spark -
Extract downloaded-spark-targz-file named as "spark-3.0.1-bin-hadoop2.7.tar" to C:\Spark
-
Download winutils.exe for Hadoop from winutils for 2.7.4
-
Create a folder Hadoop and copy the winutils.exe file in hadoop\bin folder.
    mkdir hadoop
    cd hadoop
    mkdir bin
-
Go to Environment Variable from Conttol Panel -> System -> Advanced System Settings. Go to "User variables for username" section.
-
For Spark, click on New and enter Variable name as SPARK_HOME and Variable value as:
C:\Spark\spark-3.0.1-bin-hadoop2.7 -
For Hadoop, click on New and enter Variable name as HADOOP_HOME and Variable value as:
C:\hadoop -
For Java, click on New and enter variable name as JAVA_HOME and Variable value as:
C:\Program Files\Java\jre1.8.0_xxx -
Select Path variable in User Variables section and click on Edit and add following 3 entries:
%SPARK_HOME%\bin%HADOOP_HOME%\bin%JAVA_HOME%\bin -
Save all the settings.
-
Open command prompt, Navigate to C: and type:
C:\Spark\spark-3.0.1-bin-hadoop2.7\bin\spark-shellor just type to test if Environment variables set earlier:
spark-shell -
Following Scala prompt must launch.

-
Navigate to http://localhost:4040/ on browser and you can see Apache Spark UI as follows:

-
Create a document with name "test" without any extension in C: and add some few lines with line
breaks, example from
here: placeholder text. -
From Scala command prompt, type Following commands:
val x =sc.textFile("test")
x.take(2).foreach(println)
-
Type ctrl-d to exit Spark shell.
- Refer instructions from ubuntu
- Refer instructions from ubuntu-debian
- Refer instructions from macOS
- Refer instructions from using Dataproc
- Refer instructions to run Spark jobs on Google cloud google-cloud
- Refer Dataproc documentation gc-dataproc