The OpenMV project aims at making machine vision more accessible to beginners by developing a user-friendly, open-source, low-cost machine vision platform.
OpenMV cameras are programmable in Python3 and come with an extensive set of image processing functions such as face detection, keypoints descriptors, color tracking, QR and Bar code decoding, AprilTags, GIF and MJPEG recording, and more. Additionally, the OpenMV Cam comes with a cross-platform IDE (based on Qt Creator) designed specifically to support programmable cameras. The IDE allows viewing the camera's frame buffer, accessing sensor controls, uploading scripts to the camera via serial over USB (or WiFi/BLE if available) and includes a set of image processing tools to generate tags, thresholds, keypoints, and etc...
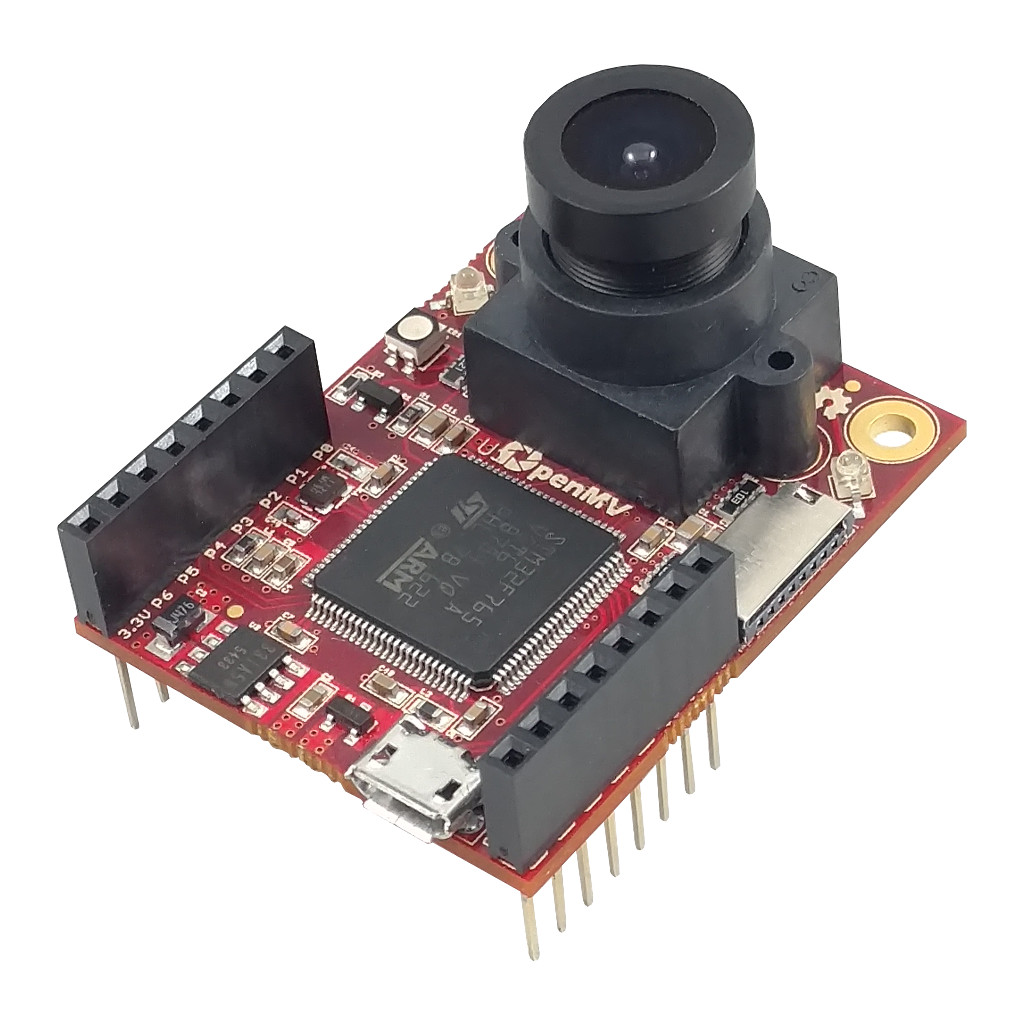
The first generation of OpenMV cameras is based on STM32 ARM Cortex-M Digital Signal Processors (DSPs) and OmniVision sensors. The boards have built-in RGB and IR LEDs, USB FS support for programming and video streaming, a uSD socket, and I/O headers breaking out PWM, UARTs, SPI, I2C, CAN, and more. Additionally, the OpenMV Cam supports extension modules (shields) using the I/O headers for adding a WiFi adapter, a LCD Display, a Thermal Vision Sensor, a Motor Driver, and more.
The OpenMV project was successfully funded via Kickstarter back in 2015 and has come a long way since then. For more information, please visit https://openmv.io
For information on how to build the firmware for the OpenMV Cam please see our Firmware Guide.
The OpenMV Cam comes built-in with an RPC (Remote Python/Procedure Call) library which makes it easy to connect the OpenMV Cam to your computer, a SBC (single board computer) like the RaspberryPi or Beaglebone, or a microcontroller like the Arduino or ESP8266/32. The RPC Interface Library works over:
- Async Serial (UART) - at up 7.5 Mb/s on the OpenMV Cam H7.
- I2C Bus - at up to 1 Mb/s on the OpenMV Cam H7.
- Using 1K pull up resistors.
- SPI Bus - at up to 20 Mb/s on the OpenMV Cam H7.
- Up to 80 Mb/s or 40 Mb/s is achievable with short enough wires.
- CAN Bus - at up to 1 Mb/s on the OpenMV Cam H7.
- USB Virtual COM Port (VCP) - at up to 12 Mb/s on the OpenMV Cam M4/M7/H7.
- WiFi using the WiFi Shield - at up to 12 Mb/s on the OpenMV Cam M4/M7/H7.
With the RPC Library you can easily get image processing results, stream RAW or JPG image data, or have the OpenMV Cam control another Microcontroller for lower-level hardware control like driving motors.
You can find examples that run on the OpenMV Cam under File->Examples->Remote Control in OpenMV IDE and online here. Finally, OpenMV provides the following libraries for interfacing your OpenMV Cam to other systems below:
- Generic Python Interface Library for USB VCP, Ethernet/WiFi, UART, Kvarser CAN, and I2C/SPI Comms
- Provides Python code for connecting your OpenMV Cam to a Windows, Mac, or Linux computer (or RaspberryPi/Beaglebone, etc.).
- Supports USB VCP on all systems. E.g. direct USB connection to the OpenMV Cam.
- Supports Ethernet/WiFi on all systems.
- Supports RS232/RS422/RS485/TTL UARTs on all systems. E.g. the old school DB9 port on the back of a PC, USB to serial RS232/RS422/RS485/TTL adapters, and TTL serial on I/O pins on SBCs like the RaspberryPi/Beaglebone.
- Supports Kvarser CAN on Windows and Linux (Kvarser does not support Mac).
- Supports I2C/SPI on Linux SBCs like the RaspberryPi/Beaglebone, etc. (coming soon)
- Provides Python code for connecting your OpenMV Cam to a Windows, Mac, or Linux computer (or RaspberryPi/Beaglebone, etc.).
- Arduino Interface Library for CAN, I2C, SPI, UART Comms
- Works on all Arduino variants.
- CAN support via the MCP2515 over SPI or via the CAN peripheral on the ESP32.
If you only need to read print() output from a script running on the OpenMV Cam over USB then you only need to open the OpenMV Cam's Virtual COM Port and read lines of text from the serial port. For example (using pyserial):
import serial

ser = serial.Serial("COM3", timeout=1, dsrdtr=False)

while True:
    line = ser.readline().strip()
    if line: print(line)
The above code works for Windows, Mac, or Linux. You just need to change the above port name to the same name of the USB VCP port the OpenMV Cam shows up as (it will be under /dev/ on Mac or Linux). Note that if you are opening the USB VCP port using another serial library and/or language make sure to set the DTR line to false - otherwise the OpenMV Cam will suppress printed output.