WYSPA is an anonymous social media network, allowing users to post, comment on, and listen to messages anonymously.
View deployed site on Heroku.
Wyspa
ˈwɪspə | NOUN
1: WYSPA (Acronym): Whisper Your Secrets Publicly and Anonymously – The Anonymous Social Media Network. "Are you on WYSPA?"
2: Wyspa : An anonymous message. "Have you listened to any Wyspas today?"
Wyspa is an anonymous social media network, designed to inspire self-expression; it encourages the acknowledgement of, and engagement with, other posts to increase their visibility. All posts have user-determined expiry dates, and can be viewed on a global map, based on their scrambled geolocation.
The project was developed using HTML, CSS, JavaScript, and Python, and utilises a NoSQL document-based database via MongoDB.
What would your ideal social media network look like?
"I don’t want to need to have a large following/network in order to get the most out of the platform."
"I don’t want to be judged by my friends and family for how I’m feeling."
"I want to be able to support those who need it."
"I want to feel like my contribution makes a difference."
"I want a more creative interface, and various degrees of interaction, in comparison to modern social media networks."
Whisper: http://whisper.sh/
Whisper is a Social Media Network which allows users to make anonymous posts, which are called "Whispers", and as of 2015 had 250 million monthly users. The platform has a dedicated app (for Android and IOS), however users can access and utilise the service via a browser (desktop/mobile). Whispers are created by providing a short extract of text, which are then overlayed onto either a user-provided or database generated image. Users can engage with each other through either post comments, or private pseudonymous chats. In terms of user experience, when first visiting the site its intention and purpose is unclear, as it appears to have become heavily influenced by brand advertising and blog posts; in order to find the "Whispers", a user must first engage with a blog post, which in turn displays a random selection of relevant Whispers underneath. In its current state, without any prior knowledge of the site or its concept, it may not be clear how to use the site, or what its purpose is.
Facebook: https://www.facebook.com/
Facebook is currently the most popular social media network, with approximately 2.5 billion monthly active users. The concept of Facebook is primarily focused on a user’s "network"; insomuch as that the content they are shown is depicted by the size of their network. Users who have a much more diverse and growing network will be shown a wealth of content, as opposed to newer users (who have fewer "Friends"), who will have generic (if not limited) content being provided. Facebook is not an anonymous network, and all content, including personal data, is stored indefinitely unless requested otherwise by the user. The site’s intention and user interface is extremely effective; the implementation of the "endless scroll" effectively engages users, to the extent the platform has been criticized for being addictive.
"As a visitor to the website, I want to know what the website does, so that I can decide whether I’m interested in engaging within it.""As a potential user, I want the usage to be either self-descriptive or the instructions clearly communicated, so that I can interact with the site with ease.""As an unregistered user, I want to be able to view content on the site without having to register, so I can decide whether to make an account.""As an unregistered user, I want to be able to make an account and log in, so that I can benefit from the features of a registered user.""As a logged in user, I want to be able to make posts anonymously, and engage with other posts anonymously, so that I can express myself or support others without exposing any personal details.""As a logged in user, I want to be able to edit or delete content, so that I have control over the content I have stored on the platform.""As a user, I want to be able to see a Map of, and individually interact with, all Wyspas so that I can decide what content I see and interact with.""As a mobile user, I want to be able to utilise all aspects of the site, so that I can interact with the website on the go."
Ideal User: An individual who wants to express themselves anonymously, or support and communicate with others anonymously.
Project Goal: Provide a platform on which users can express themselves anonymously, allowing them control over their contributions, and giving them a sense of "involvement" in how the platform works.
User Needs:
- To be able to navigate the site with ease.
- To be able to create an account and log in.
- To be able to create, edit, and delete a Wyspa.
- To remain anonymous at all times.
- To be able to view a world Map of Wyspas.
Project Objectives :
- To create a social media network that allows anonymity.
- To give users a sense of involvement and contribution to how the platform works.
- To engage the user through unique features.
- To allow the user to navigate and control the application with ease on all platforms and devices.
- Allow a user to navigate, and interact with, the site with ease.
- Take a minimalistic approach to layout, content, and structure, whilst always presenting sufficient and relevant information.
- Ensure the layout and design is responsive to all media sizes.
- Allow a user to create an account, log in, log out, and delete their account.
- Allow a user to create Wyspas anonymously.
- Allow a user to edit and delete their own Wyspa.
- Allow a user to comment on any Wyspa, and delete any comments they have made.
- Allow a user to remove any comments left on their own Wyspa.
- Allow a user to engage with other Wyspas through "Listens".
- Allow a user to request a random Wyspa to view, comment on, and listen to.
- Allow a user to navigate a world Map presenting all Wyspas available, positioned according to their geolocation.
- Allow a user to interact with each Wyspa individually.
- Allow a user to identify the Mood of the Wyspa through colour.
- Allow a user to identify how many Listens the Wyspa has had through size of its marker.
- The website’s primary content is entirely user generated; the creation and editing of Wyspas within in the database.
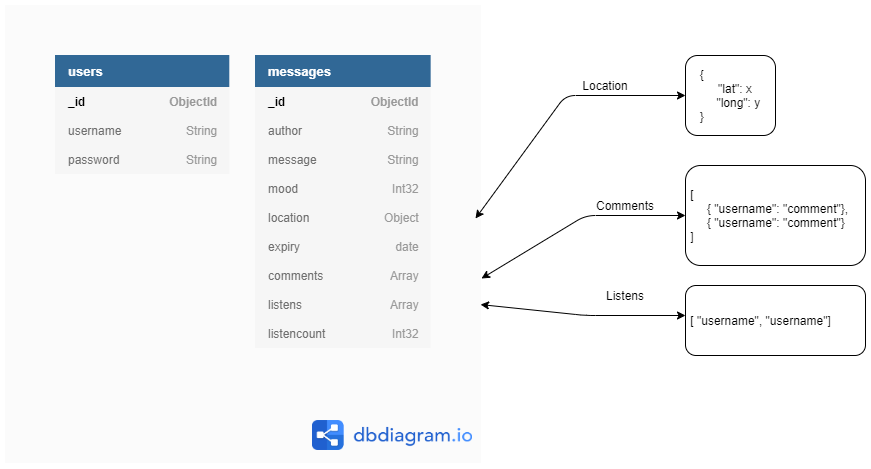
- When creating a Wyspa, the following information will be recorded, and for the following purposes:
- Author: This will be pre-populated by the server, allowing backend verification of Wyspa ownership.
- Message: This will be provided by the user, in free-text form. This will be the message the user would like to communicate, and therefore the message other users are able to read.
- Location: This will be provided in a verbose manner by the user (i.e. London), converted to Lat-Long (51.500153° N, -0.1262362° E), and scrambled (N/E +-0.1). This will be used to position the Wyspa on the Map.
- Mood: This will be chosen by the user, out of choices presented to them. This will be used to colour the Wyspa marker on the Map.
- Expiry Date: This will be set by the user. This will depict when the document removed from the database.
- Comments: This is an entry which all logged in users will be able to contribute to; these comments will be displayed on the individual Wyspa page.
- Listens : This is an entry which will log the users who have listened to a Wyspa; this will be used to prevent any single user listening to a Wyspa more than once.
- Listen_Count: This is an entry which counts the total amount of Listens contained within a whisper. This will be used for both sorting the database entries for the Map, depicting the size of the Map marker, and for displaying the amount of Listens a Wyspa has on the individual Wyspa page and profile page.
Wyspa has been designed to combine persistent elements, which a user may want to access at any given location, with unique elements, which a user may want to visit with a specific intention. This allows the content to be condensed and minimalistic, yet intuitive and user friendly.
The header of the page contains the NavBar, the Logo, and the Help function. It is a static element, and is affixed to the top of the page at all times. Where the page body content exceeds the viewport of the screen, the NavBar has been designed not be a "sticky" element, so as to utilise the full viewport when required.
On larger viewports, the navigational elements are separated into separate links within the NavBar. On medium viewports and lower, the navigational elements are collapsed into a SideNav, which can be activated with a toggler in the upper-left corner.
The Logo is centrally placed within the Header element, regardless of viewport.
The Help functionality is embedded into every page, with the interactive icon placed in the top right of the header, regardless of viewport.
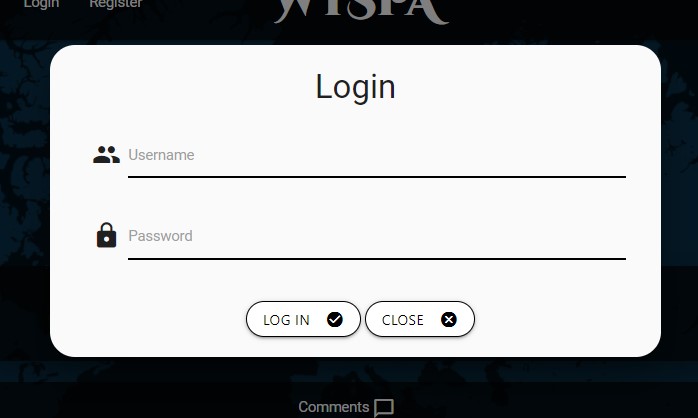
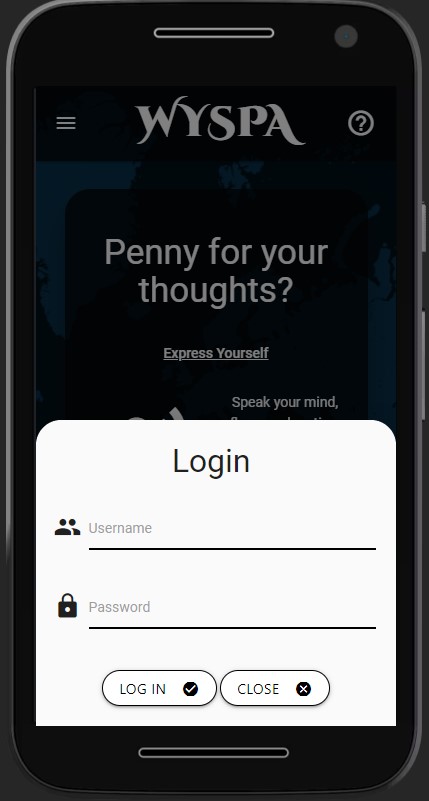
The Login / Register functionality is embedded into every page; this allows a user to log in or register, via a slide-up Modal, or log out, regardless of their location on the site.
The footer is statically positioned at the bottom of the page. Similar to the header, this is not a sticky element, and when content exceeds the viewport of the device, the footer is pushed out of the viewport. The footer contains a link to the project’s GitHub repository; however, its primary intention is to enclose the webpage to produce a letterbox style aesthetic.
The Index page contains an overview of the website, describing and linking the main three features, along with a call to action.
The My Voice page offers a profile section, where users can view and manage their existing Wyspas, create new Wyspas, or delete their account.
The Wyspa page provides users with a randomly selected Wyspa. From here, users can read, listen to, comment on, and edit Wyspas.
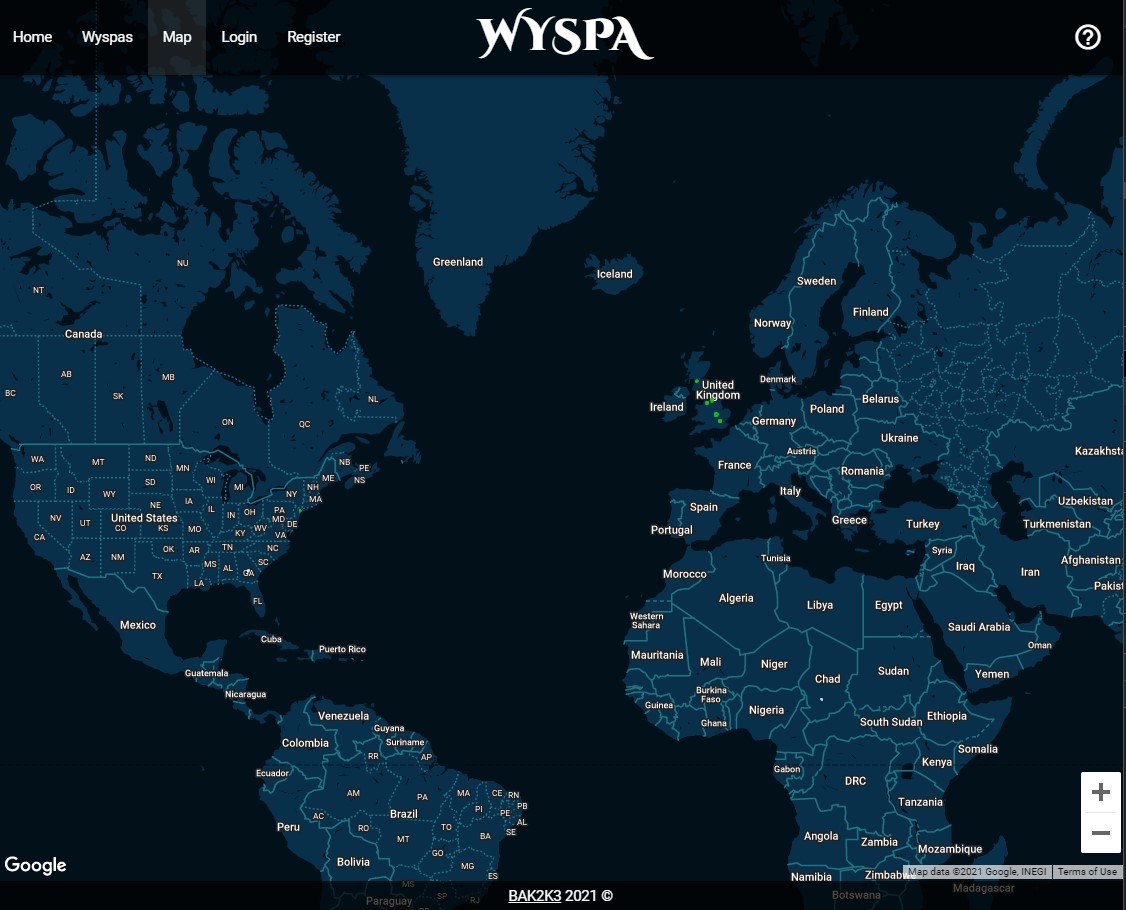
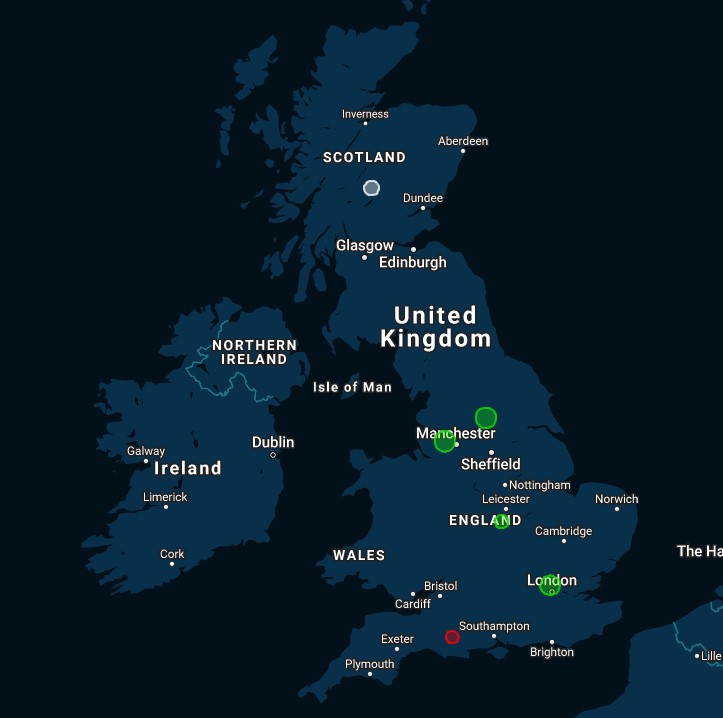
The Map page provides a Map of the world, with the existing Wyspa’s markers placed depending on their geolocation, their size depending on how many Listens they have, and their colour depending on the mood of the Wyspa.
The NavBar contains the four unique page locations, along with the log in, register, and log out functionality, where applicable. When a user is located on one of the four unique locations, the active position is represented with alternative shading and styling on the relevant link within the NavBar. This allows a user to know where they are at any given time. This feature is applied to all viewports, with the styling varying slightly depending on whether a full NavBar or SideNav is in use.
If a user is not logged in, the NavBar/SideNav provides the relevant Log In/Register links. When a user interacts with the Log In/Register link within the NavBar, a slide-up Modal appears which presents them with the required functionality. When a user is logged in, the Logout link replaces the Log In/Register links.
Interacting with the Help icon initialises a centrally positioned Modal which presents the user with additional information relevant to the page they’re currently engaged with. While the functionality of the help feature is baked into the persistent HTML across the site, the content is dynamically generated depending on a user’s location. While the interface for each aspect of the site is designed to be intuitive and self-explanatory, this feature provides additional information if a user requires it.
Each time the user visits the Wyspa page, a Wyspa from the database is selected at random and presented to the user.
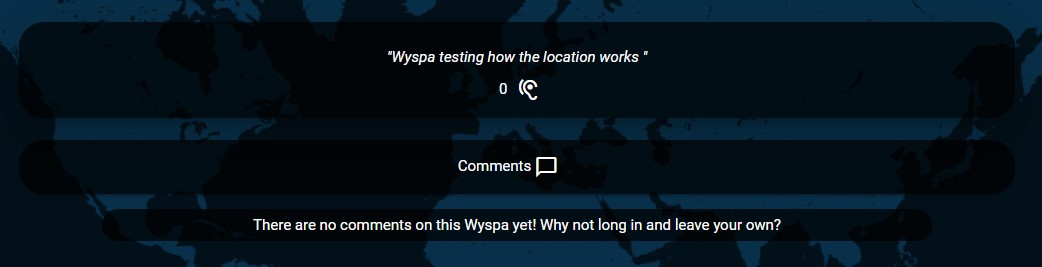
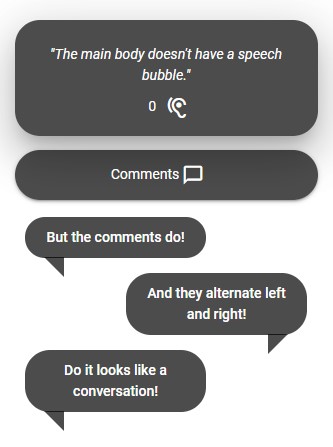
The content of the Wyspa is the primary aspect of this page, and is therefore placed in central view of the user and cannot be hidden. Underneath the content of the Wyspa is "Listen" counter, displaying how many users have "Listened" to the Wyspa, along with an interactive icon which allows a user to "Listen" to the Wyspa. Next to this icon lies a Random Wyspa icon, which randomly selects a new Wyspa from the database. If the author of the Wyspa is currently logged in, an edit icon is also provided here, navigating the user to a dedicated edit page.
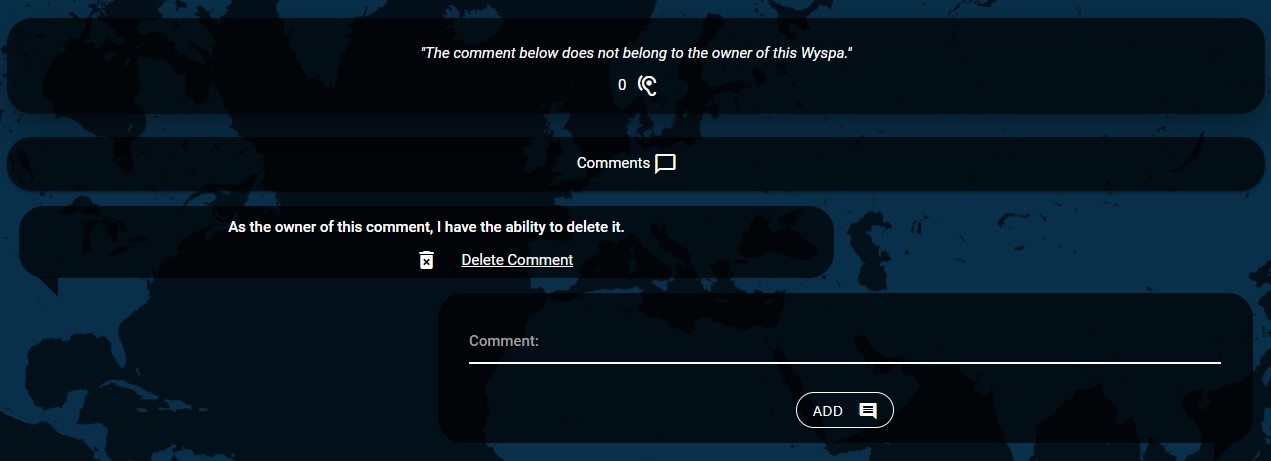
The comments for the selected Wyspa are hidden in a collapsible interactive element. This gives the user interactive control over how different aspects of the content are displayed. When this element is shown, the comments are displayed vertically, alternating left and right to produce a conversational aesthetic. For each comment, an interactive delete icon is presented to both the owner of the Wyspa, and the owner of the comment. This icon is displayed directly underneath the relevant comment, within its container.
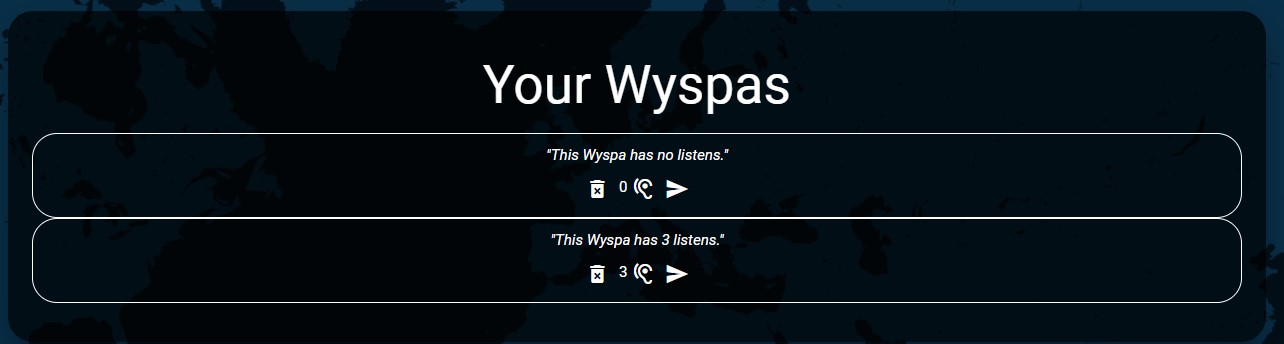
My Voice shows a list of all active Wyspas the user has within the database. Each Wyspa’s message is displayed, along with a counter displaying how many Listens the Wyspa has, an interactive icon allowing the user to directly access the Wyspa, and an interactive delete icon. Consideration was given to add the edit icon within this contextual menu, however this resulted in a cluttered screen space, and prevented the tooltips from displaying as intended due content overflowing.
Underneath the existing Wyspas is a collapsible element in which contains a Wyspa Creation form. The form contained within this element is self-descriptive with a user-friendly design, and is easy to complete and navigate. When the user interacts with the collapsible element, the heading text changes from "Create a Wyspa" to "The world is listening…". This is reverted when this element is collapsed.
Underneath the Wyspa Creation form is a Delete Account container. A user must interact with this element to reveal a button which states Permanently Delete. This button will also produce a confirmation modal.
The Map feature takes the user directly to an interactive World Map, whereby all currently active Wyspas are displayed. A user can interact with a Wyspa by clicking on it, taking them directly to its Wyspa page. A Wyspa’s colour, size, and placement are all influenced by how users interact with and contribute to it. The Map itself is easy to navigate on all viewports, with intuitive zoom and drag functionality.
All interactive icons throughout Wyspa contain tooltips; on Desktop, these appear when the user highlights the icon with a cursor. While the icons are self-descriptive, the tooltips provide an extra depth of engagement and interactivity. However, in its current state, a Mobile friendly tooltip has yet to be implemented, due to the nature in which they are interacted with and displayed. As such, Tooltips are disabled for Mobile users; however, the help functionality contains all additional and relevant information for each page and each interaction if required.
Toasts are used across Wyspa to communicate short snippets of important information without obfuscating the viewport, and without overloading the user with information. These can be dismissed via a "Dismiss" button within the Toast, or can be swiped away on mobile. These have been implemented to re-affirm a user’s action, or to draw a user’s attention to an error, providing an effective means of feedback to the user.
Due to the resolution of the wireframe documents, it is recommended that these PDFs are downloaded to be viewed in the browser, rather than using GitHub’s native PDF viewer.
Header and Footer Wireframe: Link
Index Wireframe: Link
My Voice Wireframe: Link
Wyspa Wireframe: Link
Map Wireframe: Link
Edit Wireframe: Link
WYSPA utilises a NoSQL document-based Database via MongoDB for storing User credentials and Wyspas. The project uses two Collections: Users, and Messages. The format and structure of these collections are illustrated below:
The project encompasses the Dark Mode aesthetic, aligning with the secretive yet personal and sensitive nature of the project. Its intention is to be engaging, alluring, and cohesive.
The primary colour scheme implemented across the project is a blue monochromatic scheme. The colours complement each other, yet are distinguishable when side-by-side.

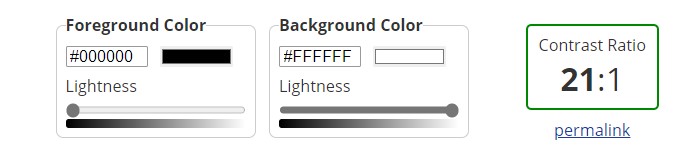
Text against a dark body is pure white, while text against a white body is pure black. Whilst the chosen text colour scheme may seem basic, it complements the overall monochromatic blue colour scheme very well, and produces excellent contrast between the types of content being displayed.
White Text on Black Background
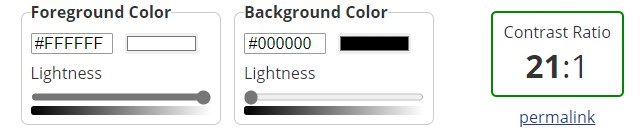
Black Text on White Background
Cinzel Decorative was chosen for the Logo. This font is flamboyant, loud, and it stands out. The Logo is the only item within the project that uses this font, due to its iconicity, intending to make the logo, brand, and name recognisable.
Roboto was chosen for the Body text of the project. This font is simple, legible, and due to it being the default font for Android devices, is recognisable and relatable.
The Map Feature uses Google Maps as its interactive Map, with a custom style designed through SnazzyMaps. The colour scheme utilises the full scale of the blue monochromatic colour scheme, with all major labels and icons removed. This results in a simple Map, leaving only country border lines, country names, and city names when zoomed in.
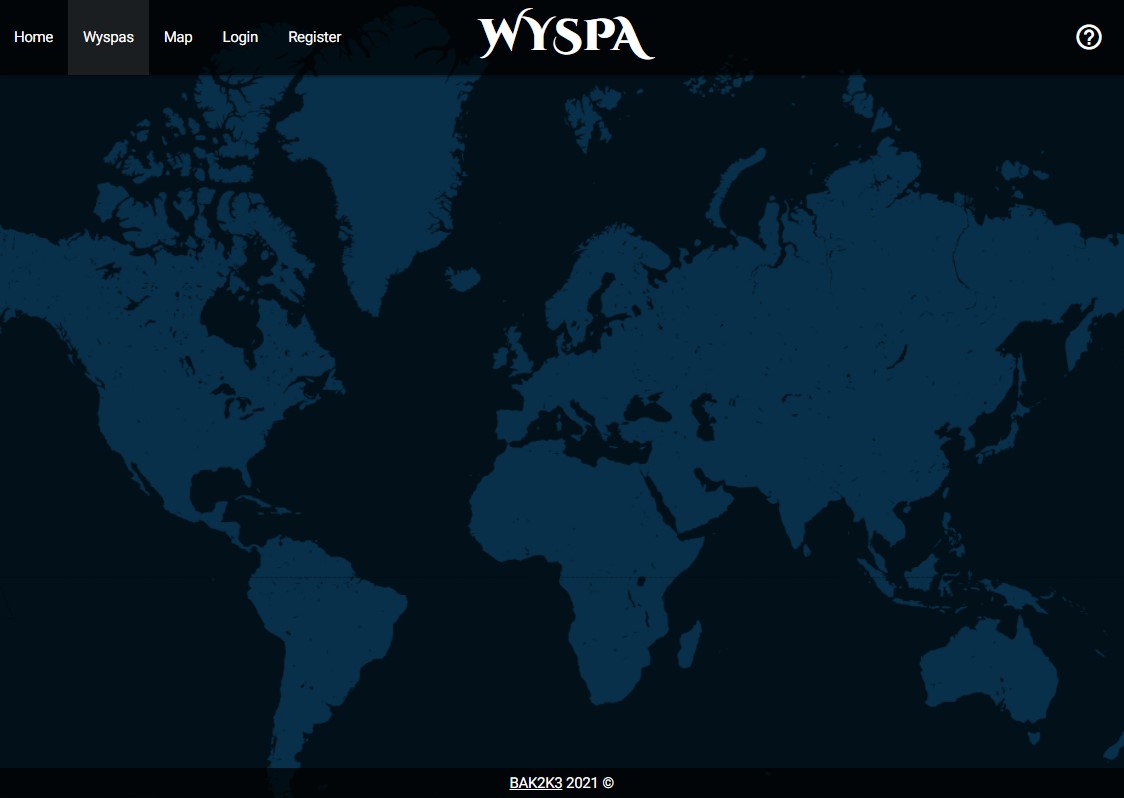
The Static Background Image used throughout the rest of the site is a static customised version of the interactive Map, edited in Gimp, and provides a basic world map outline with the same colour scheme, but with less identifiers.
As the background image and Map are based on the same design, this provides a sense of repetition and flow as a user navigates through the website. Transitioning between any page and the Map feature produces the effect of the static background coming to life.
The project heavily relies on opacity in order to create a blended and cohesive aesthetic. These are either to draw the user’s attention to certain features, or to create a dynamic background colour on which to overlay text. Opacity is utilised in the following elements:
- Header/Footer
- Card Panels (Including Speech Bubbles/Wyspa Content/Wyspa Creation)
- Modals (Opacity is applied to background overlay)
- Sidebar (On medium and below viewports)
- Toasts
- Tooltips
For the Card Panels, border shadows are also used to lift the content off the static background image, providing the content depth.
Within the Wyspa section, comments on individual Wyspas are formatted in a similar manner to Card Panels, with the addition of small triangular elements to create the illusion of a Speech Bubble. These alternate left and right, depending on the order in which the comments are generated, producing a conversational aesthetic.
The layering of content is crucial in Wyspa; Z-axis control is implemented on every page in order to appropriately layer content depending on its priority and interactivity. The order of Z-Axis control is as follows, from lowest priority to highest priority:
- Background Image / Google Maps
- Main body element
- Footer
- Header
- Tooltips
- Modals / SideNav
- Toasts
As a result of this, the Header and Footer can always be interacted with when interaction is intended. While the SideNav or a Modal is active, these take priority and the background content is made unavailable via an overlay. The Toast Container is always at the front most layer, yet does not disrupt interactivity with content visible to the user.
Whilst WYSPA is heavily dependent on user anonymity, User Management is required in order to grant users control over Wyspa Management, as outlined below. As such, the following functionality was implemented, allowing users to create accounts, log in, log out, and delete their account.
A User class has been created, containing all of the relevant attributes and methods required for the website to allow users to log in, along with add and remove the relevant documents within the Users collection on MongoDB. Below are the primary features of User Management, and how they have been implemented.
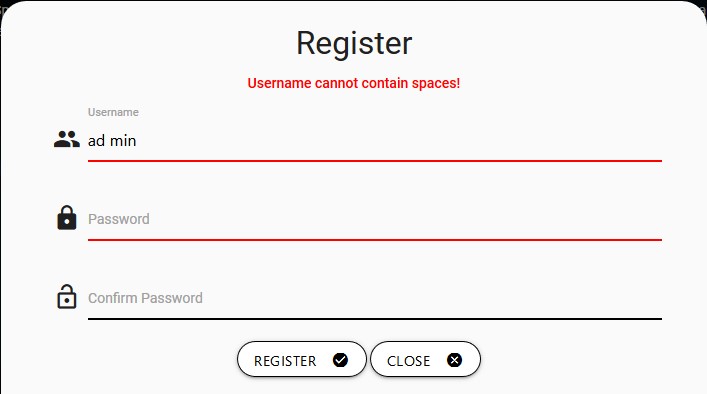
User registration allows the user to create a document within the Users database. When the user interacts with the Register feature, within the NavBar/SideNav, a slide-up Modal is presented which contains a form for submission. The form contains the following fields and requirements:
Username: Must not contain whitespace
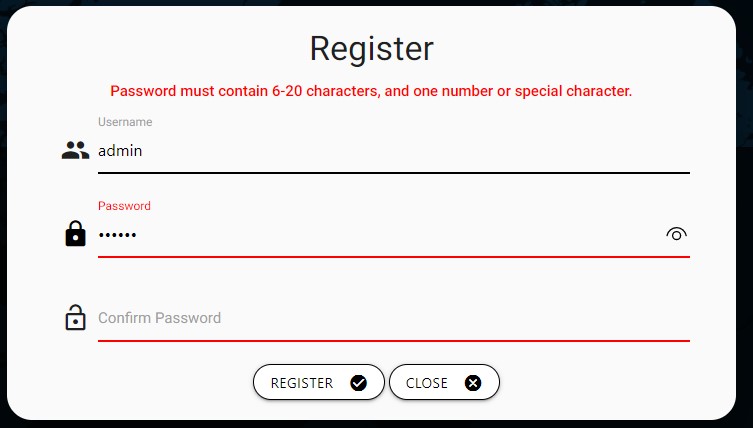
Password: Must be between 6 and 20 characters, with one number or special character.
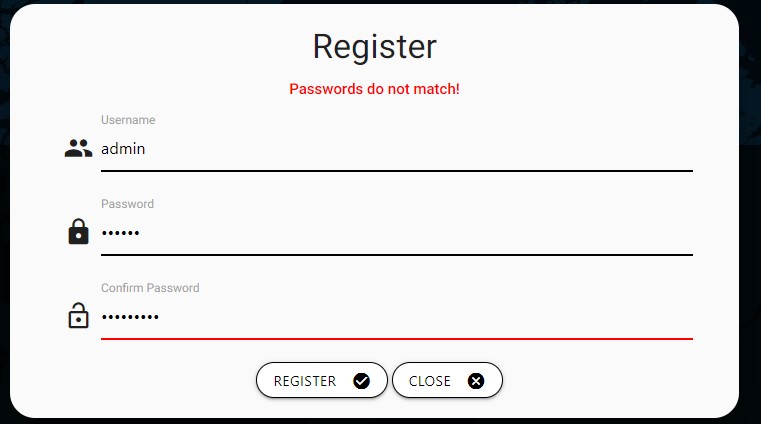
Confirm Password : Must match the password field exactly.
Prior to form submission, browser-side verification occurs. The Register button contained within the Modal is only enabled when all form criteria is fulfilled; any errors which are preventing the form from being submitted are highlighted to the user visually through the use of both input colour and descriptive text.
JavaScript events are tied to each of the input fields, which change the colour of the respective field Red when the required format is not fulfilled, and provide a verbose description of the error under the header of the Modal. The input fields are verified when the user either changes which field they are focused on, or attempts to submit the form, and the errors take form order priority.
Double submission prevention has been implemented by adding an "is-submitting" class to the form on successful submit; any subsequent attempts to submit the form are prevented when this class is present.
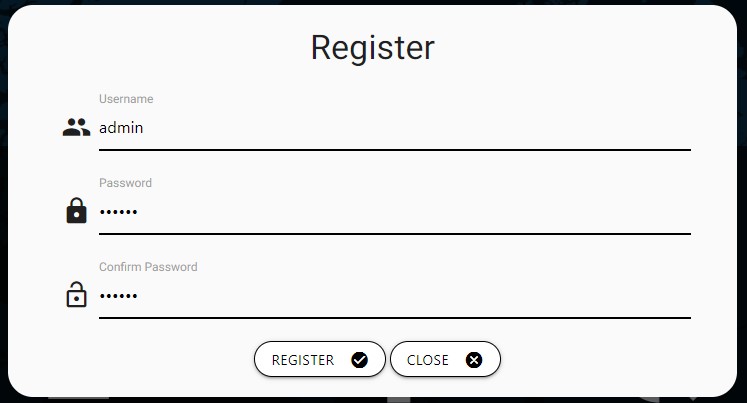
If the user is successful in submitting the form, server-side verification is completed on the username and password, providing an extra layer of security to the platform.
The server first queries the database, to ensure the Username does not already exist. This prevents two users from creating an account with the same username.

The server then verifies the validity of the Password, ensuring it meets the required format, and ensuring both Passwords match.
Once validated, a new document is created in the Users database which stores the Username, and a hashed version of the Password.

Logging into Wyspa grant users the ability to create, modify, and delete Wyspas within the Database. This is done by storing the logged in user’s username (referred to as author in the Messages collection) within a session. This functionality utilises Flask-Login for session management. When the user interacts with the Log In feature, within the NavBar / SideNav, a slide-up Modal is presented which contains a Form for submission.
For the Log In functionality, it was decided not to implement browser-side verification, as the level of security implemented in the registration verification ensures that a valid account had been created; by focusing on server-side verification for the Log In functionality, this presents a much cleaner user interface.
When a user enters a username and password, the server queries the Users database for the requested username; if the username does not exist or the hashed passwords do not match, the user is presented with a Toast informing them that either the username was incorrect, or the password was incorrect.
In order for the Wyspa: Expiry functionality to function as intended, both the Log In and Register forms contain a hidden field which is automatically pre-populated with the user’s time zone.
When the server logs a user in, whether it is following successful registration or during the standard log in process, the information in this form is also stored in the user’s session under timezone. See Wyspa: Expiry for further details on this.
When a user is logged in, the ability to log out is presented to them in the NavBar/SideNav. This feature utilises Flask-Login to remove the currently logged in user from the session. On successful log out, a user is presented with a confirmation Toast.
A user has the ability to delete their account. This functionality is accessed via the My Voice page, is hidden within a collapsible element, and requires confirmation. This prevents a user from accidentally deleting their account. When account deletion takes place, the user’s entry in the Users database is removed, and all Wyspas in the Messages database, where the user is the author, are also deleted.
WYSPA's primary functionality revolves around user generated content; however, this is not limited to the message body contained within a Wyspa. Wyspas are messages which contain multiple parameters, set by the user and affected by other logged in users, each of which influence how the platform works and how a user interacts with the platform.
A Wyspa class has been created, containing all of the relevant attributes and methods required for the website to create, read, update, and delete documents within the Messages collection on MongoDB. Below are the primary features of Wyspa Management, and how they have been implemented.
From the My Voice section of the website, when logged in, a user can create a new Wyspa. Using a responsive form, the user can add the body of the message, a location of their choosing, a mood, and an expiry date. This is the primary interface for creating a Wyspa, and has form validity implemented to ensure that it is completed appropriately, and to ensure the data is in the correct format to be parsed by the Server.

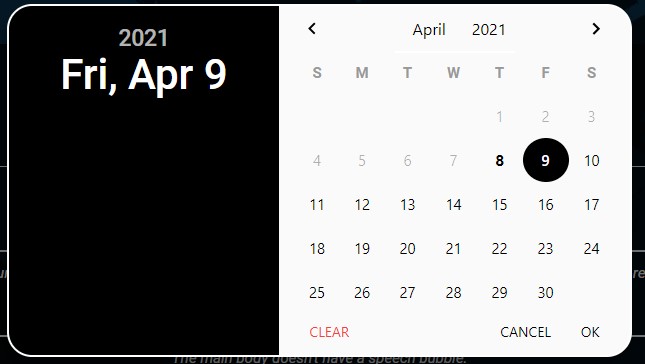
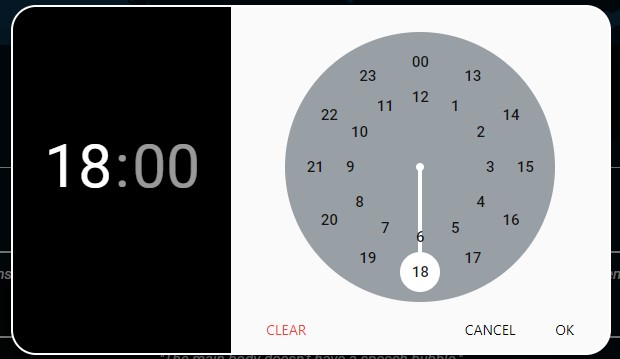
All form inputs utilise Materialize components, with custom JavaScript events tied to the Mood Range element for colouring the field’s sub-label, and with custom scripts tied to the date and time pickers (ensuring users interact with the pickers, rather than manually typing in an incorrectly formatted date/time).
Once the form data has been validated and formatted appropriately, a new instance of the Wyspa Class is created, using the formatted data from the form, along with the logged in user’s username as the author, an empty list for comments and Listens, and an initialised value of 0 for listen_count. A method is then called from within the Wyspa Class to write this new instance as a document to the messages collection of MongoDB.
From the My Voice page, a user can directly access any of their existing Wyspas; the page the user is redirected to is the Wyspa page, but with a targeted Wyspa ID. If a logged in user is presented with one of their own Wyspas on this page, they are given with the option to edit it.

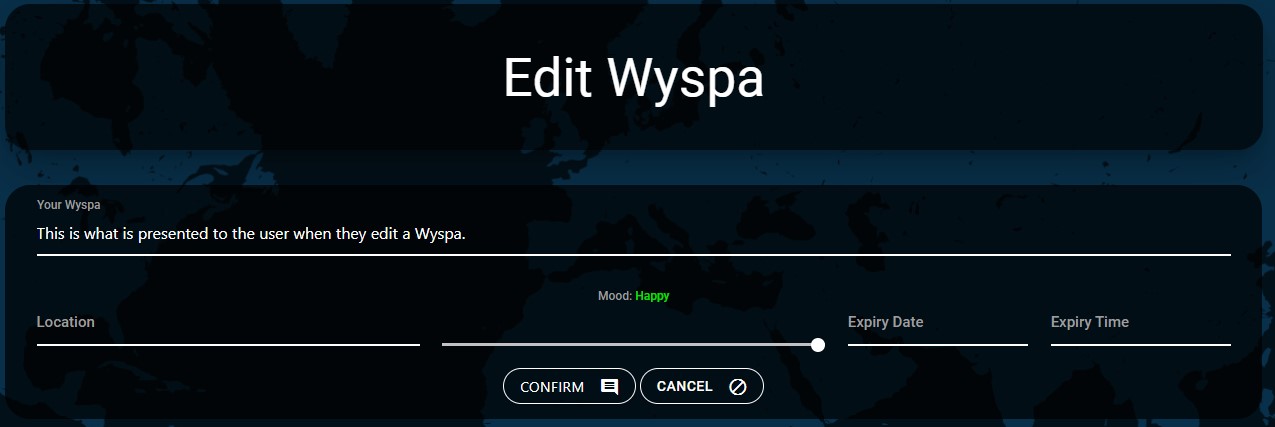
Clicking on the edit icon will take the user to the Edit Wyspa page, which contains a replica of the Wyspa Creation form within the My Voice page. When this page is accessed, the server queries the database for the full details of the Wyspa, and pre-populates some of the fields with the existing content, and allows the user to alter any aspect of the Wyspa they were originally allowed to create.
The exception to the data pre-population is the Location, due to the nature of how it is calculated and scrambled on first entry.
Once this form is submitted, and the data is validated and formatted accordingly, the Wyspa’s ID is used to edit the existing entry in the messages collection of the Database. The Server also ensures the logged in user is the owner of the Wyspa, to prevent unauthorized editing.
While anonymity is at the heart of WYSPA, one of the primary features is to allow users to identify Wyspas from around the world, using the Map feature, and interact with any Wyspa they choose. If the platform became popular enough, it would theoretically be possible to see a mood Map of the world (See Mood section below). Therefore, while a user should be able to retain anonymity, they should also have the ability to specify a location, without this feature storing identifiable information regarding a particular user. As such, while it is a requirement for a user to provide a location when creating a Wyspa, this can be as specific or vague as the user wishes, and the subsequent geographical information is scrambled. This both grants users control over how much information they want to reveal, ensures anonymity, and solves a potential problem regarding overlapping Wyspas.
When creating a Wyspa, the user is asked to specify a location. Using the Third Party package GeoPy, the verbal description of a location is converted to exact longitude and latitude. This allows a user to be specific (i.e. 1 Main Street) or vague (England), and geocoordinates are calculated accordingly. If a location cannot be identified from the package, the user is informed that the location could not be found, via a Toast. Additional information is also provided in the Help feature of the page to assist a user if this continues to occur.

Once the location has been verified, the longitude and latitude are scrambled. The scrambling of this data is implemented through a simple function whereby both the longitude and latitude are amended by a random floating-point number between 0.1 and -0.1; this is achieved through python’s random.uniform function. After various implementations of this scrambling, these values appeared to produce the best output, retaining the general location of the Wyspa, while still obscuring the specificity of the location. Below is an example of three Wyspas being created all using the same location: "Madrid, Spain".

When creating a Wyspa, a user has the ability to express themselves through not only the context and content of the message itself, but also through the mood of the Wyspa.
During Wyspa creation and editing, the user is presented with a slider containing three values: Sad, Neutral, and Happy. When the form is first initialised, when creating a Wyspa, the default position of the slider is on Neutral, and the user has the ability to change this according to the emotion which best represents their Wyspa.
This feature only currently affects the Map functionality, and it does so by changing the colour of the Wyspa’s marker on the Map. When the user chooses a value on the slider, the slider’s sub-label changes to the representative descriptive text; the colour of this text also changes to the colour the Map marker will be.


When initially implemented, this form had 10 values, and therefore had 10 colours to represent them. When testing this, it resulted in a more ‘watered down’ effect on the world Map, with the individual colours not being as impactful, and the intention of each respective colour losing its meaning. It was ultimately decided that Red, White, and Green would be the most effective means of communicating emotion, especially given their native connotations to such emotions.
One of the primary forms of interaction users have with Wyspas are Listens. A logged in user can Listen to any Wyspa once. This raises a counter, visible for all users to see from either the Wyspa page, or on the Wyspa owner’s My Voice page, and impacts the radius of the Wyspa’s marker on the Map feature. The more Listens a Wyspa has, the more likely it is to be noticed on the Map, subsequently encouraging other users to engage with it.
On the Wyspa page, underneath the message body of the Wyspa, an interactive icon is visible for users to engage with, along with a counter displaying the current number of Listens the Wyspa has. When the user interacts with the icon, if the current user is logged in, the server queries the current Wyspa from the messages collection of the database, and the Listens list is searched for the username of the current user logged in. If the username exists in the list, the user is informed they have already listened to the Wyspa, otherwise, the username is appended to the list, and the listen_count is increased by 1 (See Map section below for a discussion on why a separate attribute was created for this).
A second form of interaction a logged in user can have with a Wyspa is through adding or removing comments. When viewing a Wyspa, a logged in user can comment on it. The owner of the Wyspa, or the owner of the comment, also has the ability to delete the comment from the Wyspa, granting moderation capabilities to both parties.
Comments are stored as single-entry dictionaries, using the author as the key, and the comment as the value; each comment within a Wyspa is subsequently added to a list, creating a list of dictionaries. This data structure retains the order of comments, and allows comments to be deleted whilst retaining the order of all other comments within the list. By storing the author as the key, the author of each comment can be verified against the logged in user through Jinja templating logic.
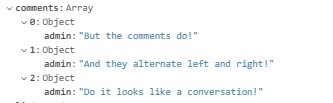
When a comment is added to a Wyspa, the server creates a dictionary from the author and comment. The server then obtains the relevant Wyspa from the database, and the dictionary is appended to the existing list (which is as an empty list when initialised). When a comment is deleted from the list, the index value of the dictionary containing the relevant comment is used to remove it from the list, and the new list is saved back into the database.
When a user attempts to delete a comment, a confirmation box appears, allowing the user to confirm their choice, or change their mind.
A unique feature of WYSPA is the ability to set expiry timers on Wyspas. This functionality requires a user to consider the length of time they want their Wyspa to be available before it expires. When a Wyspa expires, it is automatically removed from the collection within MongoDB. This ensures that all Wyspas are eventually removed from the database, along with any identifiable information pertaining to the content, which in turn produces a more dynamic ecosystem within the social media network, with content appearing and disappearing in a natural cycle.
This feature was implemented using MongoDB’s Time To Life TTL Indexing functionality. The index has been created on the expiry field of documents contained within the messages collection, using the following code directly within the MongoDB interface:
db.messages.createIndex( { "expiry": 1 }, {expireAfterSeconds: 0 } )
When creating a Wyspa, a user is required to input an expiry date and expiry time. As discussed previously, the user is required to interact with the interfaces for these inputs, as opposed to allowing free text, to ensure the data is formatted appropriately. This produces a better user experience than a user repeatedly attempting to type a date or a time in the correct format.
When the Wyspa is submitted to the server, the expiry date and expiry time are concatenated and converted to python’s datetime object. This datetime object is then assigned the users Time Zone, which is stored in the current session, and then compared against the server’s current time, in order to validate whether the expiry date is in the future; if the specified date is in the past, the user is re-directed back to the page they were on, with a Toast informing the user. This ensures all expiry dates are set in the future. A valid expiry DateTime object is stored within the expiry field of the Wyspa document; this is the field that MongoDB indexes against for the TLL.

This datetime object is stored in MongoDB as UTC. As such, when queried, it is retrieved as UTC. When a user visits the My Voice page, or when a user edits a Wyspa, the expiry date/time is converted back from UTC to the current user’s time zone using the Time Zone stored in the session.
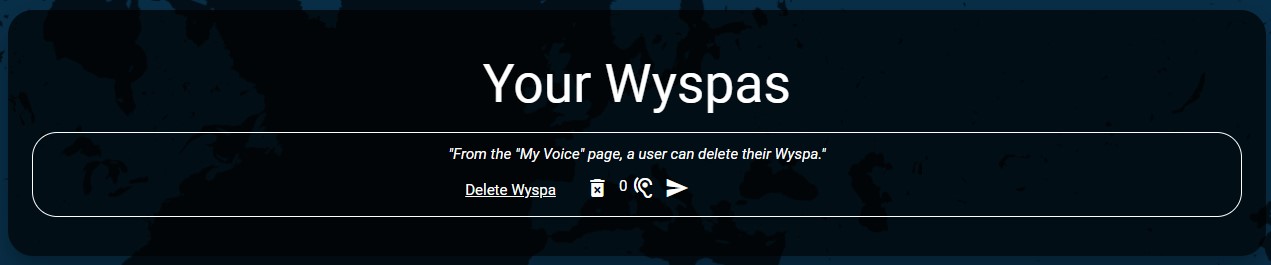
A user may decide they want to delete their Wyspa without having to wait for it to expire; as such, from the My Voice page, a user is presented with an interactive delete icon on each Wyspa. When a user interacts with this icon, they are presented with a confirmation message. If the user confirms deletion, the ID of the corresponding Wyspa is sent to the server, where it is used to send a remove request to MongoDB.
When this request is received by the server, the logged in user’s username is verified against the owner of the Wyspa, in order to prevent unauthorised access.
An alternative way for a user to engage and interact with a Wyspa is by selecting a Random Wyspa. This route on the website is labelled as Wyspa, and it selects a random Wyspa to be presented to the user, allowing them to read its message, read or add comments, edit the Wyspa (if applicable), or add a listen to the Wyspa.
list(mongo.db.messages.aggregate("sample": {"size": 1}}]))This feature grants users a similar feature to the "endless scroll" of modern social media platforms, but through unbiased selection, and unaffected by a user’s network of following. A random Wyspa is presented to the user when the page is visited, or through interacting with the Random Wyspa icon in the action bar of the currently displayed Wyspa.
The Map feature allows users to visualise all Wyspas currently within the database on a Map of the world. Each Wyspa can be interacted with individually, taking the user directly to its respective Wyspa page, where its message and comments can be viewed. This feature utilises the Google Maps API, with the markers for each Wyspa utilising Google Maps’ Circles.
When a user visits the Map feature, all Wyspas in the messages collection of the database are obtained; the relevant information is then pre-processed before being sent to the Map initialisation in JavaScript.
Each Wyspa is displayed based on the following parameters:
- Location: The scrambled geolocation, based on the location set by the user.
- Colour: The mood set by the user.
- Size : Calculated based on the amount of Listens the Wyspa has.
As discussed in Wyspa: Location, WYSPA uses GeoPy to convert a verbose location to a precise latitude and longitude, and then adds or subtracts a random floating point value between 0.1 and -0.1 to both values in order to scramble the precise location. These scrambled latitude and longitude values are used to pinpoint each Wyspa on the Map.
As discussed in Wyspa: Mood, the mood of the Wyspa, set by the user during Wyspa : Creation or Wyspa : Edit, depicts the colour of the marker on the Map. By using semi-transparent circular markers to represent each Wyspa on the Map, markers can overlay each other, creating a natural colour blending effect. When initially testing this feature with a range of 10 colours, the outcome produced a much more abrasive and mismatched blending of colour. The use of 3 core colours (Red, White, and Green), allows a user to immediately and easily identify the mood of each Wyspa.
As discussed in Wyspa: Listens, the size of the marker is depicted by the amount of Listens a Wyspa has. When the pre-processed data is sent to JavaScript to place the markers on the Map, the radius of each marker is calculated using the following formula:
radius: Math.min(
  1000000,
  Math.max(10000, 10000 + map_data[message]["Listens"] * 5000)
);
This function multiplies the amount of Listens a Wyspa has by 5,000, and sets a minimum (15,000) and maximum (10,000,000) value, before setting the outcome of this calculation to the radius of the circle. This ensures that Wyspas with no Listens are still visible on the Map, Wyspas scale appropriately and effectively for each Listen, and caps the maximum radius of each Wyspa.
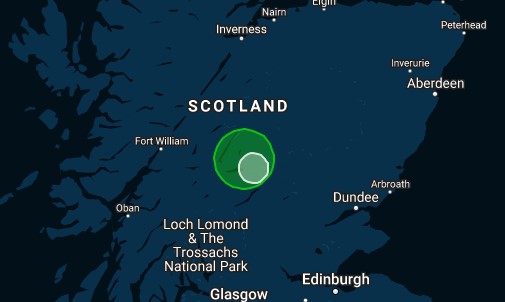
When the Wyspas are obtained from the database, they are sorted by listen_count. This is an independent field to the Listens field, however, is a direct representation of the length of the Listens array, incrementing each time a Listen is added to a Wyspa. By sorting the Wyspas in order of listen_count, Wyspas are placed on the Map in order of their size, placing the largest markers first. As two Wyspas may overlap, due to either two Wyspas being in close proximity or due to one Wyspa being significantly larger than the other, a user must be able to interact with both Wyspas. The result of this is that no matter how large a Wyspa is, all visible Wyspas can be interacted with. In the below example, clicking on the white field will take the user to the "Neutral" Wyspa, while clicking on the green field will take the user to the "Happy" Wyspa.
When implementing this functionality, multiple solutions were explored as to the most efficient and effective way of sorting the entries in the database. While a $size aggregation query on the MongoDB would have produced similar effects, this would take significantly longer to obtain the data when handling a larger set of data, and as such, the trade-off was made between memory and computational speed. The implemented solution to this is simple, requires a small amount of additional storage space per Wyspa, and ultimately functions as intended.
list(mongo.db.messages.aggregate("sort": {"listen_count": -1}}]))Using Materialize CSS, WYSPA has been designed to be fully responsive on all viewports, ensuring all functionality is maintained from 320px width and up. The targeted media queries are based on Materialize’s predefined widths (600px, 992px, and 1200px). The main visual and interactive features which have been modified to enhance user experience depending on viewport are as follows:
- The Navigation Bar collapses into a SideNav at 992px, preventing navigational links from overflowing in the header, and providing a cleaner user interface for users on smaller viewports.
- The Index page’s call to action condenses from 3 columns into 3 alternating rows at <600px, to allow for the content to be legible and more effectively communicated on smaller viewports.
- The Wyspa creation form condenses from 2 rows to 4 rows at <600px to allow for sufficient breathing room, and efficient interaction, on smaller viewports.
- The Login and Register Modals changes width between viewports: 50% at >992px, 75% between 601px and 992px, and 100% at <600px. This produces appropriately sized and positioned forms at all viewports.
All other responsive features have been implemented through Materialize’s native Grid, Container, and Row systems.
One of the major ethical considerations when making WYSPA was the implementation of moderation and censorship. To what extend should the platform be moderated? Should free speech be allowed? Should profanity be filtered? Several python packages were explored to automate this process, such as profanity-filter, profanity-check, and WebPurify, along with exploring implementing this functionality manually. However, these solutions were either too explicit (removing words when not being used in a profane or offensive manner), or overly complex using scikit-learn and NLP, ultimately increasing the physical memory size of the project by over 1000%. Given the scope of the project, the decision was made to give Wyspa authors self-moderating capabilities (allowing owners of Wyspas to remove any comment, along with the relevant comment owner). With more time and resources, further consideration would be given to implement an appropriate form of moderation that continues to preserve the platform’s free speech, but limits the potentially harmful or abusive content that such a platform empowers.
In its current form, and with a small userbase, the current methodology for drawing markers on the Maps feature is efficient and responsive. However, if the userbase were to increase to the extent that over 10,000 markers would need to be drawn on the Map every time a user visited it, an alternative method would likely need to be implemented. One solution to this would be to cluster the markers on the Map, however I’ve currently been unable to find a solution to combine MarkerClustererPlus and Circles, as MarkerClustererPlus appears to solely relate to Markers. As such, a workaround would be to implement a canvas tile overlay, which would be more lightweight on the browser, and would respond much quicker than the current implementation. This would remove the need for clustering, and would also perform quicker than clustering.
In order to expand on the Map functionality, consideration was given to implementing a Quick View to the markers on the Map feature. The concept would be to present users with a snippet of the Wyspa message when interacting with the markers on the Map, showing both the Listens and amount of comments, and grant the user the ability to listen or go directly to the Wyspa from this view. This would allow a more streamlined usage of the Map feature, and would prevent the user from constantly being re-directed away from the Map feature every time they wanted to interact with a Wyspa. Implementing this feature would also exacerbate the concerns raised above with regard to slow-down, and optimisation would need to be implemented first prior to attempting to integrate this functionality.
- The project was written and tested in the Gitpod IDE.
- The project was debugged using Google Chrome Dev Tools.
- The project uses GitHub for hosting source code and utilising git version control.
- The project’s template was generated from Code Institute’s Gitpod Template.
- The project’s background was designed using GIMP.
- The Google Maps custom Map was designed with SnazzyMaps.
- This project utilised metatags.io for generating Social Media previews.
- The project’s wireframes were designed in Balsamiq.
- The project’s Database Schema was designed with dbdiagram.io, and edited with GIMP.
- The project utilised favicon.io to convert the Favicon to the appropriate format.
HTML5 and CSS3 are used throughout this project.
- This project uses an alpha build of the community improved Materialize CSS framework due to the original (also called Materialize CSS) no longer being supported.
- The project uses Google Material Icons for icons.
- The project uses Google Fonts for typography.
- The project’s cross-browser compatibility was enhanced using Autoprefixer.io.
This project uses Python version 3.8.9 for back-end infrastructure and data pre-processing.
- Packages
- Flask – WSGI Web Application Microframework.
- Flask-Login – User Session Management Flask Extension.
- Flask-Pretty – HTML Prettifying Flask Extension.
- Flask-Pymongo – A PyMongo bridging Flask Extension.
- Geopy – A geocoding web services client.
- Pymongo - A distribution for interacting with MongoDB through Python.
- gunicorn - A Python WSGI HTTP Server.
- For a full list of these packages’ dependencies, please see the requirements.txt.
- This project uses Jinja templating language for HTML generation via Python.
This project uses JavaScript ES6.
- Packages
- Materialize CSS – In-built JavaScript package for interactive and responsive web-design.
- Alertify– A framework for improved dialogs and notifications.
- Google Maps API – A JavaScript API for implementing Google Maps.
- Polyfill.io – A browser polyfill package required by Google Maps.
- The project’s HTML was validated using W3C HTML Markup Validator.
- The project’s CSS was validated using W3C Jigsaw CSS Validator.
- The project’s JS was validated using JSHint.
- The project’s Python was validated using Pylint.
- The project’s accessibility was assessed via WebAim’s W.A.V.E and Contrast Checker and Google Chrome’s Lighthouse.
- The project used Toptal’s Colorfilter to assess how colour-blind-friendly the site was.
- The project was Unit Tested using Python’s unittest package, and third party package Flask-Testing.
- Note : this package is not included in the requirements.txt
- The images used in the project’s README and TESTING documentation were hosted and served through Cloudinary.
- This website is hosted through Heroku.
The project uses MongoDB, a document-based NoSQL Database, for data storage.
Testing documentation, processes, and outcomes can be found under TESTING.md.
This project has three branches:
Master(Live Environment)Dev(Dev Environment)Nightly-CSS(Nightly CSS integration environment)
All development takes place in the Dev branch. As the project uses an alpha build of a community enhanced Materialize CSS, any nightly releases are integrated into the project via the Nightly-CSS branch and tested, before being merged with the Dev branch prior to merging with the Master branch for deployment.
This project was deployed to Heroku via the following steps:
- Navigate to Heroku.
- Log in or Sign Up for an account.
- If Creating an account, select Python as the Primary development language.
- Activate the account via the confirmation email.
- Accept the Terms of Service.
- Click on Create new app.
- Enter a suitable App Name and Region.
- Click Create App.
- Under the Deploy tab, under the heading Deployment Method, click the GitHub icon, and proceed to click the button which states Connect to GitHub.
- Enter your credentials for GitHub.
- Search for the repository required (in this instance, WYSPA), and click Connect.
This project was set up to automatically re-deploy with any changes made to the Master Branch. The following steps were taken to enable this.
- Navigate to the Automatic deploys section within the Deploy tab.
- Select the branch you would like to link to automatic deployment.
- As stated above, the
masterbranch was chosen for automatic deployment.
- As stated above, the
- Click Enable Automatic Deploys.
The following environment variables must be set within your Heroku Server for the site to deploy and function correctly. Navigate to the Settings tab, and under the heading Config Vars, select Reveal Config Vars, and add the following variables:
- IP : 0.0.0.0
- PORT : 5000
- MONGO_URI
- This variable can be obtained from MongoDB through the following steps:
- Log in to MongoDB.
- Under Data Storage click on Clusters.
- For the Cluster that you would like to connect to, click the Connect button.
- Click on Connect your Application.
- Select Python, and Version 3.6 or Later.
- Copy the connection string, replacing
<password>with your MongoDB password, andmyFirstDatabasewith the name of the MongoDB Collection (Database) you would like to connect to.
- MONGO_DBNAME
- The name of the Database you are connecting to (in the above example, the default would be
myFirstDatabase.
- The name of the Database you are connecting to (in the above example, the default would be
- SECRET_KEY
- A random sequence of characters, required for maintaining session security in Flask. One method of obtaining a Secret Key is through RandomKeygen.
- GMAPS_API
- An API Key for Google Maps.
- Make an account with Google, and navigate to Google Developers Console.
- Navigate to APIs & Services.
- Select Credentials.
- Click Create Credentials.
- Click Create API Key.
- Copy the provided API Key into the
VALUEvariable of the Heroku Config Vars.
- GMAPS_ID
- An ID for a custom Map Style.
- If no custom style is required, do not set a value to the key (although you must still insert the key).
- If using env.py, set the variable to an empty string:
"".
- If a custom Map is required, navigate to the Google Maps Map Manager, whilst logged into your Google Account.
- Click Create New Map ID.
- Enter a Name.
- Set Type as JavaScript.
- Set Options as Raster.
- Click Next.
- Copy and paste the provided Map ID into the Variable field within Heroku.
- Return to Google Maps and click Map Styles from the navigation pane.
- Click Create New Map Style.
- Either use the tool provided to create a Map, or;
- Use SnazzyMaps to choose a pre-made style, and copy the provided JSON code into the Import JSON option in Google Maps Style Editor.
- Once the Map has been designed, return to Map Manager.
- Select your new Map ID.
- Select your new Map Style from the dropdown box.
- Press Save.
- An ID for a custom Map Style.
- Important : The
CSS-Nightlybranch is purely for integrating new nightly builds of Materialize CSS, and as such it is not recommended this branch is used for cloning or running in your browser/locally. Please use theMasterbranch for the most stable release, and theDevbranch for work in progress. - Important : The
Masterbranch is in production mode, which means debugging is disabled in the app.py. TheDevbranch is in development mode, which means debugging is enabled. Depending on which branch you run, please be aware of this and change this setting accordingly. It’s important that Flask application are not run in development mode when deployed in a production environment.
- When running this project locally, the Environment Variables must be set in order for it to function as intended.
- Once you have completed any of the upcoming steps to run/deploy the project in your browser or locally, please create a new python file in your root directory called envy.py.
- Within this file, declare the environment variables described above, in the following format, replacing the
<variable>with the required variables:
import os

os.environ.setdefault("IP", "<variable>")
os.environ.setdefault("PORT", "<variable>")
os.environ.setdefault("SECRET_KEY", "<variable>")
os.environ.setdefault("MONGO_URI", "<variable>")
os.environ.setdefault("MONGO_DBNAME", "<variable>")
os.environ.setdefault("GMAPS_API", "<variable>")
os.environ.setdefault("GMAPS_ID", "<variable> ")
The project will automatically locate this file, and read the required environment variables as and when necessary. This file has not been included within the repo due to the security implications.
- Install Google Chrome or Firefox .
- Install the applicable GitPod Browser Extensions for your chosen browser.
- Create a GitHub account.
- Log in to Gitpod using your GitHub account.
- Visit WYSPA's GitHub Repository.
- To run the
Masterbranch, ensure theMasterbranch is selected next to the branches and tags subheadings. To run thedevbranch, please selectdevbranch. - Please note that any features that exist purely in the dev branch are in testing and may not be fully functional.
- Open the repository in Gitpod:
- Click the green "Gitpod" icon at the top of the Repository, or
- Open the master branch or dev branch directly in Gitpod via these links.
- A new workspace will open with the current state of the requested branch. Any changes made to the requested branch after this point will not be automatically updated in your Gitpod Workspace.
- Create the aforementioned env.py file in your root directory and declare the environment variables.
- Type
pip install requirements.txtinto the GitPod terminal to install all the required Python packages. - To host the project from Gitpod, type
python app.pyin the terminal.
- Visit WYSPA’s GitHub Repository.
- Click the "Code" dropdown box above the repository’s file explorer.
- Under the "Clone" heading, click the "HTTPS" sub-heading.
- Click the clipboard icon, or manually copy the text presented:
https://github.com/BAK2K3/WYSPA.git - Open your preferred IDE (VSCode, Atom, PyCharm, etc).
- Ensure your IDE has support for Git, or has the relevant Git extension.
- Open the terminal, and create a directory where you would like the Repository to be stored.
- Type git clone and paste the previously copied text (
https://github.com/BAK2K3/WYSPA.git) and press enter.- If you would like to clone only the dev branch, please type git clone -b dev before the previously copied link to the repository.
- The Repository will then be cloned to your selected directory.
- Visit WYSPA's GitHub Repository.
- Ensure you have selected the appropriate branch, as previously discussed.
- Click the "Code" dropdown box above the repository’s file explorer.
- Click the "Download ZIP" option; this will download a copy of the selected branch’s repository as a zip file.
- Locate the ZIP file downloaded to your computer, and extract the ZIP to a designated folder which you would like the repository to be stored.
- Open your preferred IDE (VSCode, Atom, PyCharm, etc).
- Navigate to the chosen directory where the Repository was Cloned/Extracted.
- Optional: Create a new Python Virtual Environment
- Type
pip install requirements.txtto install all the required packages. - Type
python app.pyin the terminal, whilst in the project’s root directory. - You will now be hosting the repository from your IDE.
- All instructional text throughout the site was self-written.
- The content which drives the site is designed to be user driven. The more users interact with the site, the more dynamic and interactive it becomes.
- The background Map image was designed in SnazzMaps, then subsequently edited in GIMP.
- Both the Social Media image and the Header image in the Readme were designed in GIMP.
- I designed the Favicon icon in GIMP myself, and converted it to appropriate format using favicon.io.
- CSS: Code extract obtained from All This Smitty and modified to allow sticky footers to compensate for mobile URL bar.
- CSS: Code extract obtained from Coding Is Love and edited to create a speech bubble effect with CSS
- CSS: Code extract obtained from CSS Tricks and modified to allow for dynamic background images.
- CSS: Code extract obtained from StackOverflow and modified to adjust the height of Materialize NavBar and respective elements.
- CSS: Code extract obtained from StackOverflow and modified to update the style of Materialize sliders.
- CSS: Code extract obtained from StackOverflow for preventing touchscreen users from targeting two events on single element.
- CSS: Code extract obtained from StackOverflow to set Google Maps as a full screen background.
- CSS: General guidance on how to use Materialize CSS was obtained from their documentation.
- CSS: Guidance obtained on how to re-position Google Maps logo and interactive elements, given they are applied inline to the Map element, obtained from StackOverflow.
- CSS: Guidance obtained on overriding Materialize CSS’s Inactive/Active form input colours without using !Important obtained from StackOverflow.
- CSS: Source code of Materialize CSS’s Range Slider was copied for targeting keyboard focused styling.
- CSS: Style rule generation for CSS Gradients obtained from CSSGradient.io.
- HTML/CSS: Code extract obtained from StackOverflow to prevent icons/text being highlightable.
- HTML/CSS: Guidance on how to fix Materialize CSS’s SideNav overlay covering the whole screen obtained from StackOverflow.
- HTML/Python: Code extract obtained from StackOverflow for Password Regex and amended to suit purpose.
- HTML: Concept for index page was inspired by Materialize CSS’s Example Promotion Table.
- JavaScript/HTML: Code extract obtained from Bram.us and modified to multiple submissions on the same HTML form element.
- JavaScript/HTML: Code extract obtained from StackOverflow and modified to prevent a form submitting prior to user interacting with Alertify.
- JavaScript/HTML: Code extract obtained from StackOverflow and modified to add events listeners to all elements with a given class.
- JavaScript/HTML: Code extract obtained from StackOverflow and modified to prevent users typing in a required field, without disabling the field.
- JavaScript/HTML: Guidance on how to update title and label of Alertify Modal obtained from StackOverflow.
- JavaScript: Code extract obtained from StackOverflow for obtaining a user’s time zone.
- JavaScript: Code extract obtained from Google Maps documentation and modified to add circle markers to Google Maps.
- JavaScript: Code extract obtained from StackOverflow and modified for setting min and max limits on a variable.
- JavaScript: Code extract obtained from StackOverflow to implement Map bounds for Google Maps.
- JavaScript: Guidance on creating dynamic Map Markers and OnClick events obtained from StackOverflow posts: [1] [2]
- JavaScript: Guidance on implementing hasOwnProperty in "for in" statement in JavaScript, following Jshint error, was obtained from StackOverflow.
- MongoDB: General guidance on MongoDB commands taken from their documentation.
- Python/HTML/JavaScript: Guidance on how to pass data from Python to JavaScript obtained from StackOverflow.
- Python: Code extract obtained from StackOverflow and modified to allow access to restricted attributes of classes.
- Python: Code extract obtained from StackOverflow and modified to integrate Flask-MongoDb and Flask’s Application Factory.
- Python: Code extract obtained from StackOverflow for whitespace Regex pattern.
- Python: General guidance on docstring best practices was obtained from Programiz, Napoleon documentation, and THAT-A-SCIENCE.
- Python: General guidance on how to use Flask (specifically Application Factories) was obtained from their documentation.
- Python: General guidance on how to use Flask-login was obtained from their documentation.
- Python: General guidance on how to use Flask-pretty was obtained from their documentation.
- Python: General guidance on using flask-pymongo was obtained from their documentation.
- Python: Guidance on how to interpret and disable pylint warnings was obtained from StackOverflow.
- Python: Guidance on how to use tz and datetime for time zone conversion obtained from StackOverflow.
- Python: Guidance on how to utilise GeoPy was obtained from their documentation.
- Python: Guidance on Python Unit test was obtained from the unittesting documentation and the Flask-Testing documentation.
- The concept for this project was inspired by the circumstances of close friends and family during the pandemic; the ultimate goal was to produce a website they would want to embrace and engage with regularly.
- Thank you to my wife, for her relentless patience and support.
- Thank you to my mentor, Dick Vlaanderen, for his encouragement and guidance.
This website is for educational purposes only.