
RoboAide is a project to improve a DIY robotic arm used for mobility assistance. This repository contains code for a GUI application, Arduino code for the control of the arm's motors as well as CAD parts for a 3D printed shell for the arm segments and joints. The application is made in Python using PySide2 and communicates the desired motor positions via USB serial communication with the Arduio/OpenCR board.
Due to the team's limitation in regards to access to the robotic arm, a smaller prototype version of the arm was built and it was with it that the software was written and tested on. However, the 3D printed shell was designed for the actual arm. In a future version, the software will be adapted for the real arm as well.
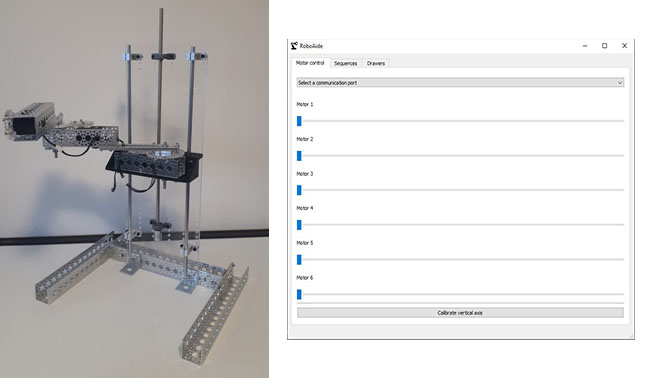
The application is written in Python and is designed to run on Windows but should also run on other platforms, although this was not tested extensively. The application contains three tabs: "Motor control", which is for moving the arm's motors individually in joint mode, "Sequences", which is for creating move sequences and executing them, and "Drawers", which is for opening and closing drawers. It is to be noted that the code controlling the arm is split into two parts.The first is in the main and runs the openCR code for all of the arm's movements. The second is in the Vertical_Axis branch and runs the arduino code which moves the vertical motor.
NOTE: follow the instructions section before launching the application.

To start the connection, select the appropriate communication port in the drop-down menu. Once connected, moving the sliders will move the motors.
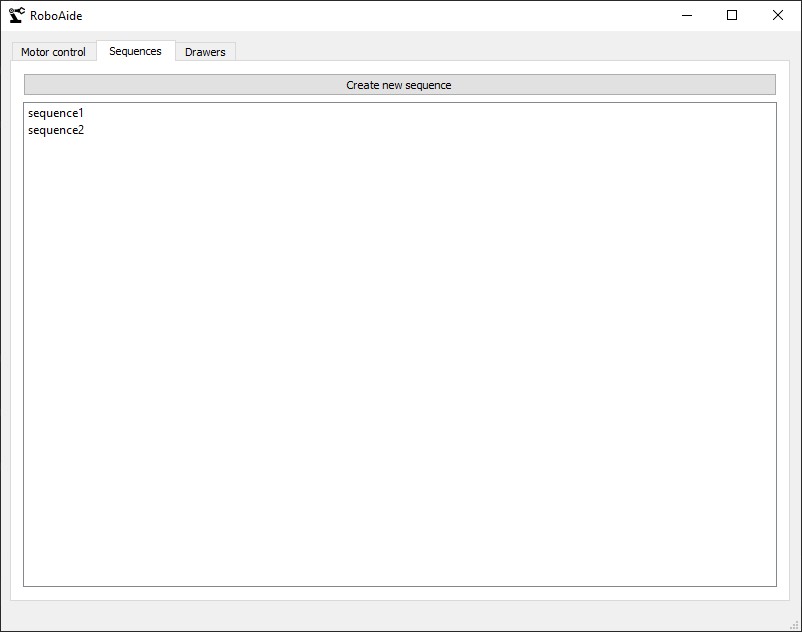
Here, you can see the list of user-created sequences. To execute a sequence, double click the sequence.
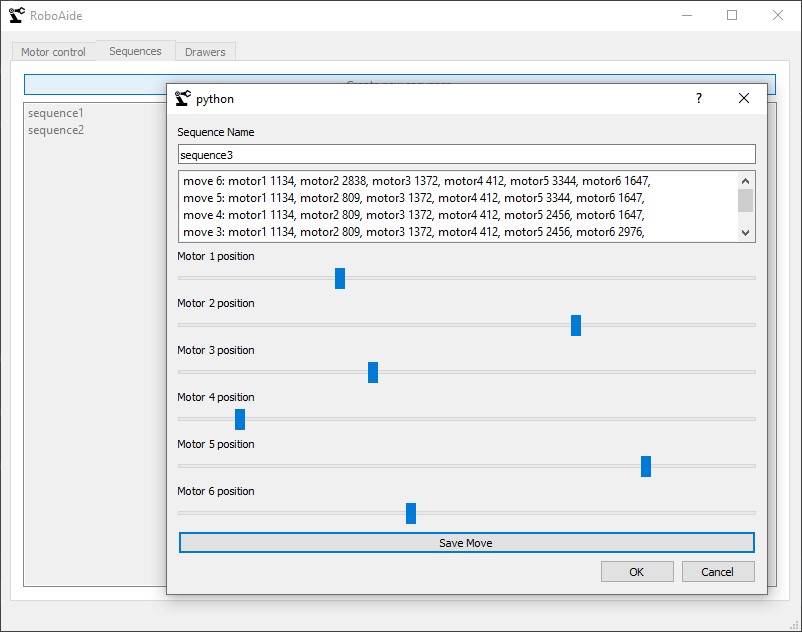
To create a new sequence, click the "Create new sequence" button, which will open this window. You can move the sliders to the desired position, then click "Save move" and create the next move. Double clicking a saved move will move the arm to that position. When done, click "ok".
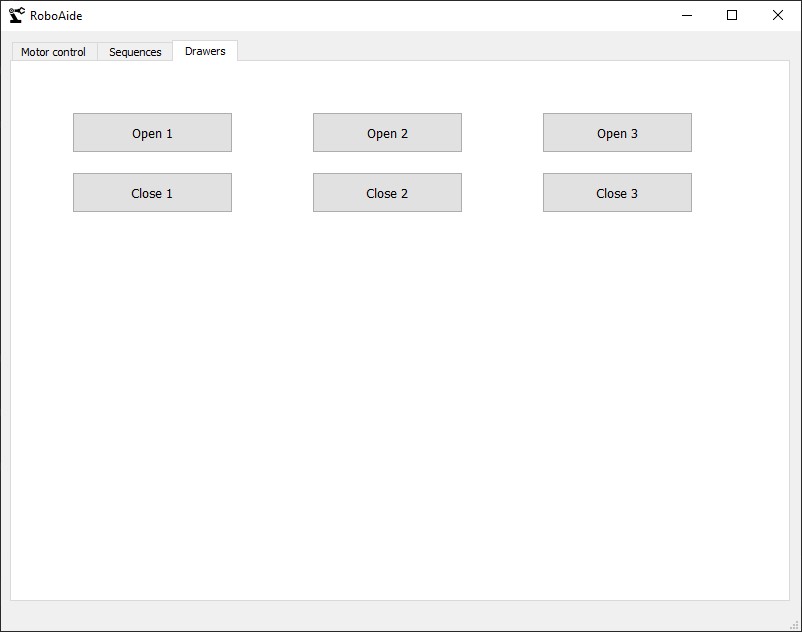
This tab makes it possible to open and close the drawers. Note that this feature is not yet implemented in the controller, so the buttons currently do nothing. The feature will be implemented in a future version.
- 1x PC running Windows (may also run on other platforms, but hasn't been tested)
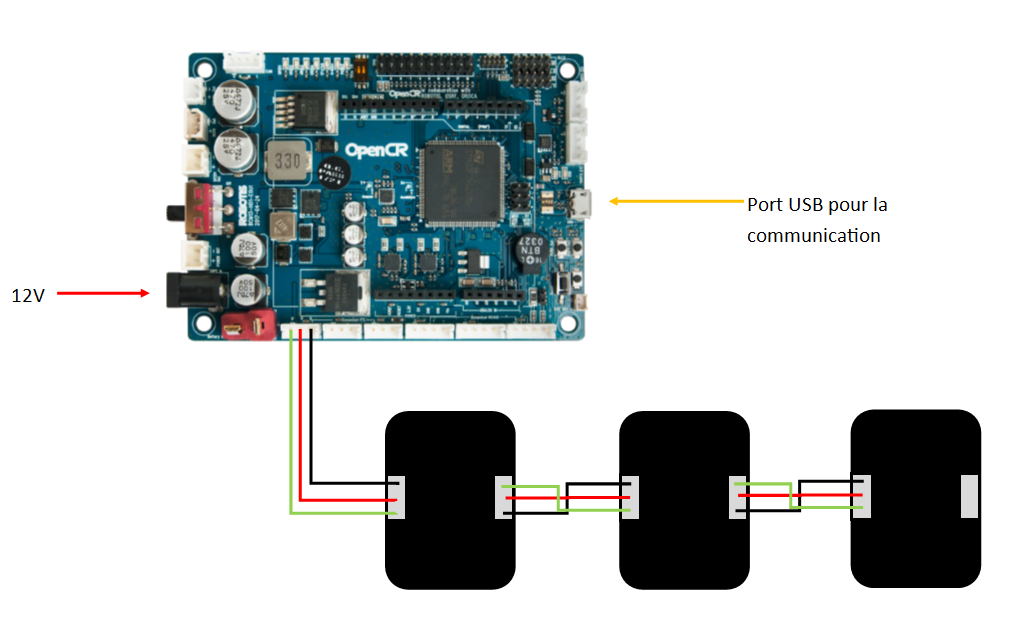
- 1x OpenCR board
- 3x Dynamixel motors
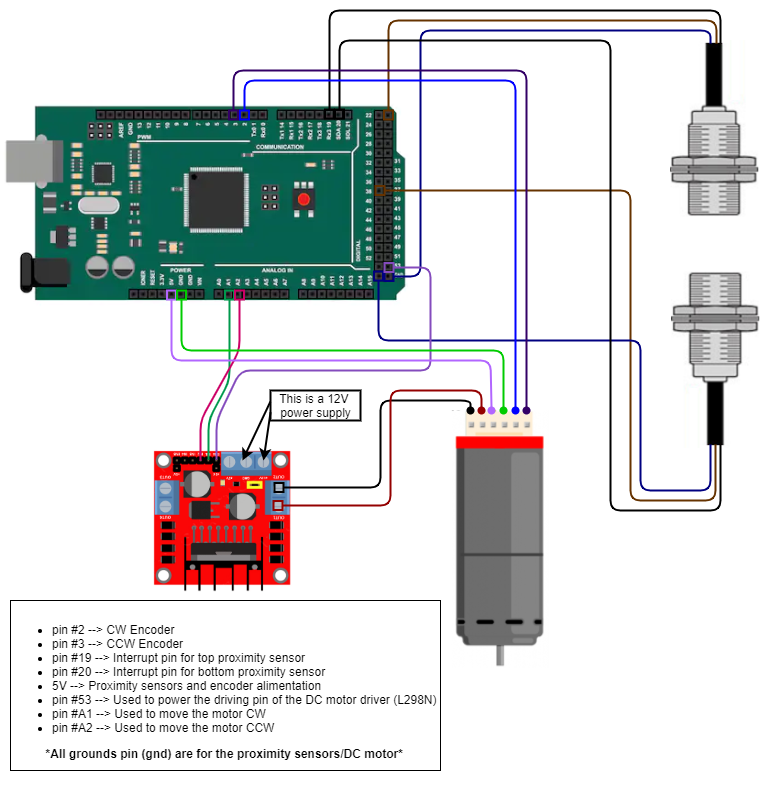
- 2x Twidec NJK-5002J inductive proximity sensor
- 1x L298N DC motor drive
- 1x Cytron 12v DC motor
- Robot arm prototype (see hardware documentation for more information)
- Python 3.7 or later (https://www.python.org/downloads/)
- pip (https://www.liquidweb.com/kb/install-pip-windows/)
- PySide2
- PySerial
The necessary Python libraries can be installed with pip install -r requirements.txt
- Arduino IDE (https://www.arduino.cc/en/main/software)
- OpenCR driver (should install automatically when the board is plugged into the PC)
- OpenCR board support for Arduino IDE (http://emanual.robotis.com/docs/en/parts/controller/opencr10/#install-on-windows)
- Install all dependencies
- Plug in the OpenCR board to the PC via USB
- Launch Arduino IDE and choose the right board and communication port.
- Upload the Arduino code
- Run RoboAide.py with python to launch the GUI application. To do this, open a command prompt, change the directory to this project's directory and run this command
python UI/RoboAide.py
- Plug all electronic according to the wiring diagram (see below)
- Once plugged in, run and push the main.ino code which is under the Arduino_code folder to your arduino.
- Open Pycharm and run the RoboAide.py file which can be found under the ui folder.
- An application should pop up. Choose your communication port on the application and wait for 10 seconds to let the arduino initialise its comm port.
- The vertical axis is ready to be calibrated. Press "calibrate vertical axis" button. Once the robot arm has been calibrated, you're free to use the slider #4 to move the vertical axis.
All software documentation can be viewed here
*The bill of materials for the robot arm prototype can be viewed here
- OpenCR documentation can be viewed here
- Electrical diagram of the prototype
Everything concerning the arm shell can be found here
- DC driver L298N documentation can be viewed here
- Twidec NJK-5002J Inductive limit switch documentation can be viewed here
- Cytron 12v DC motor documentation can be viewed here
- For wiring images using arduino mega2560 :
The application is tested using the unittest python module. To run the tests, open a command prompt, change the directory to the project’s directory and run this command: python -m unittest discover